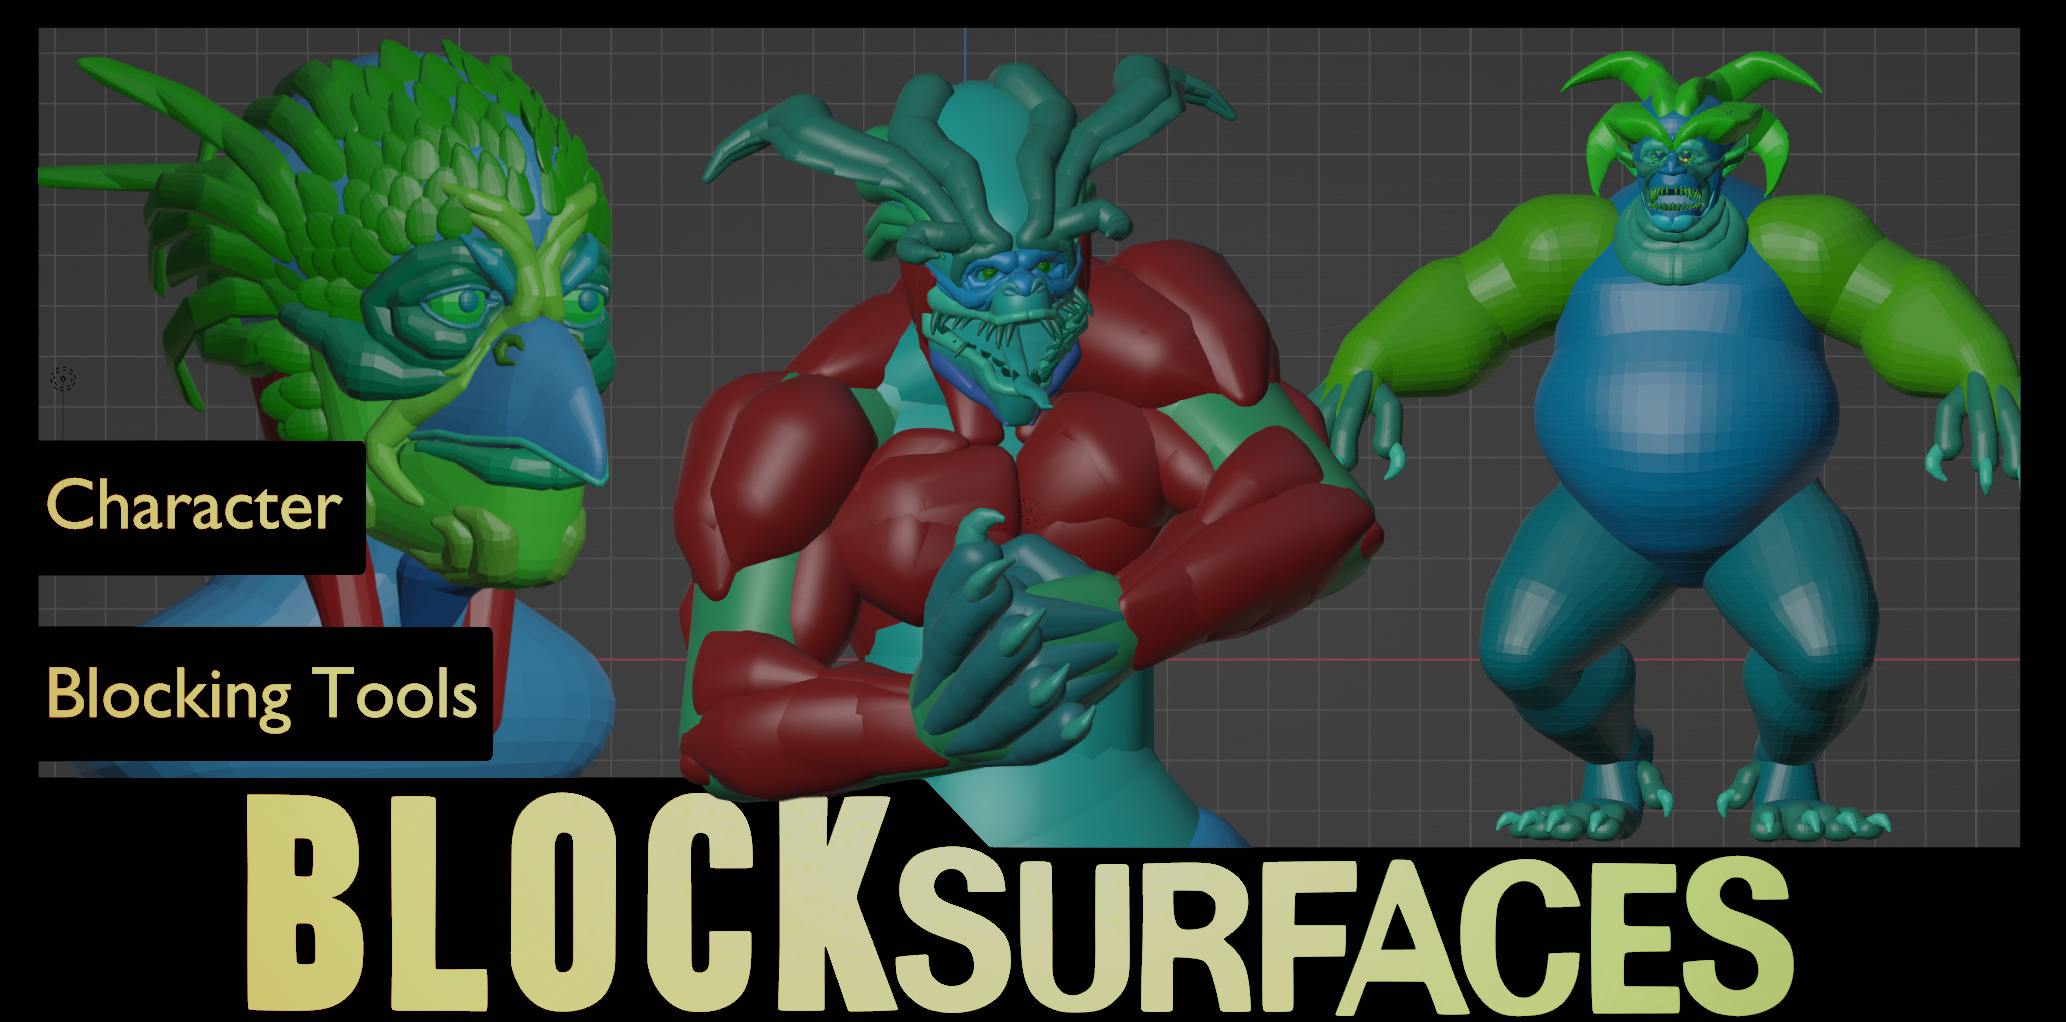
Blocksurfaces
Blocksurfaces new version for Blender 4 is now available for download
Are you looking for creative freedom to model amazing 3D characters? BlockSurfaces is the perfect tool for both beginners and advanced users in character art.
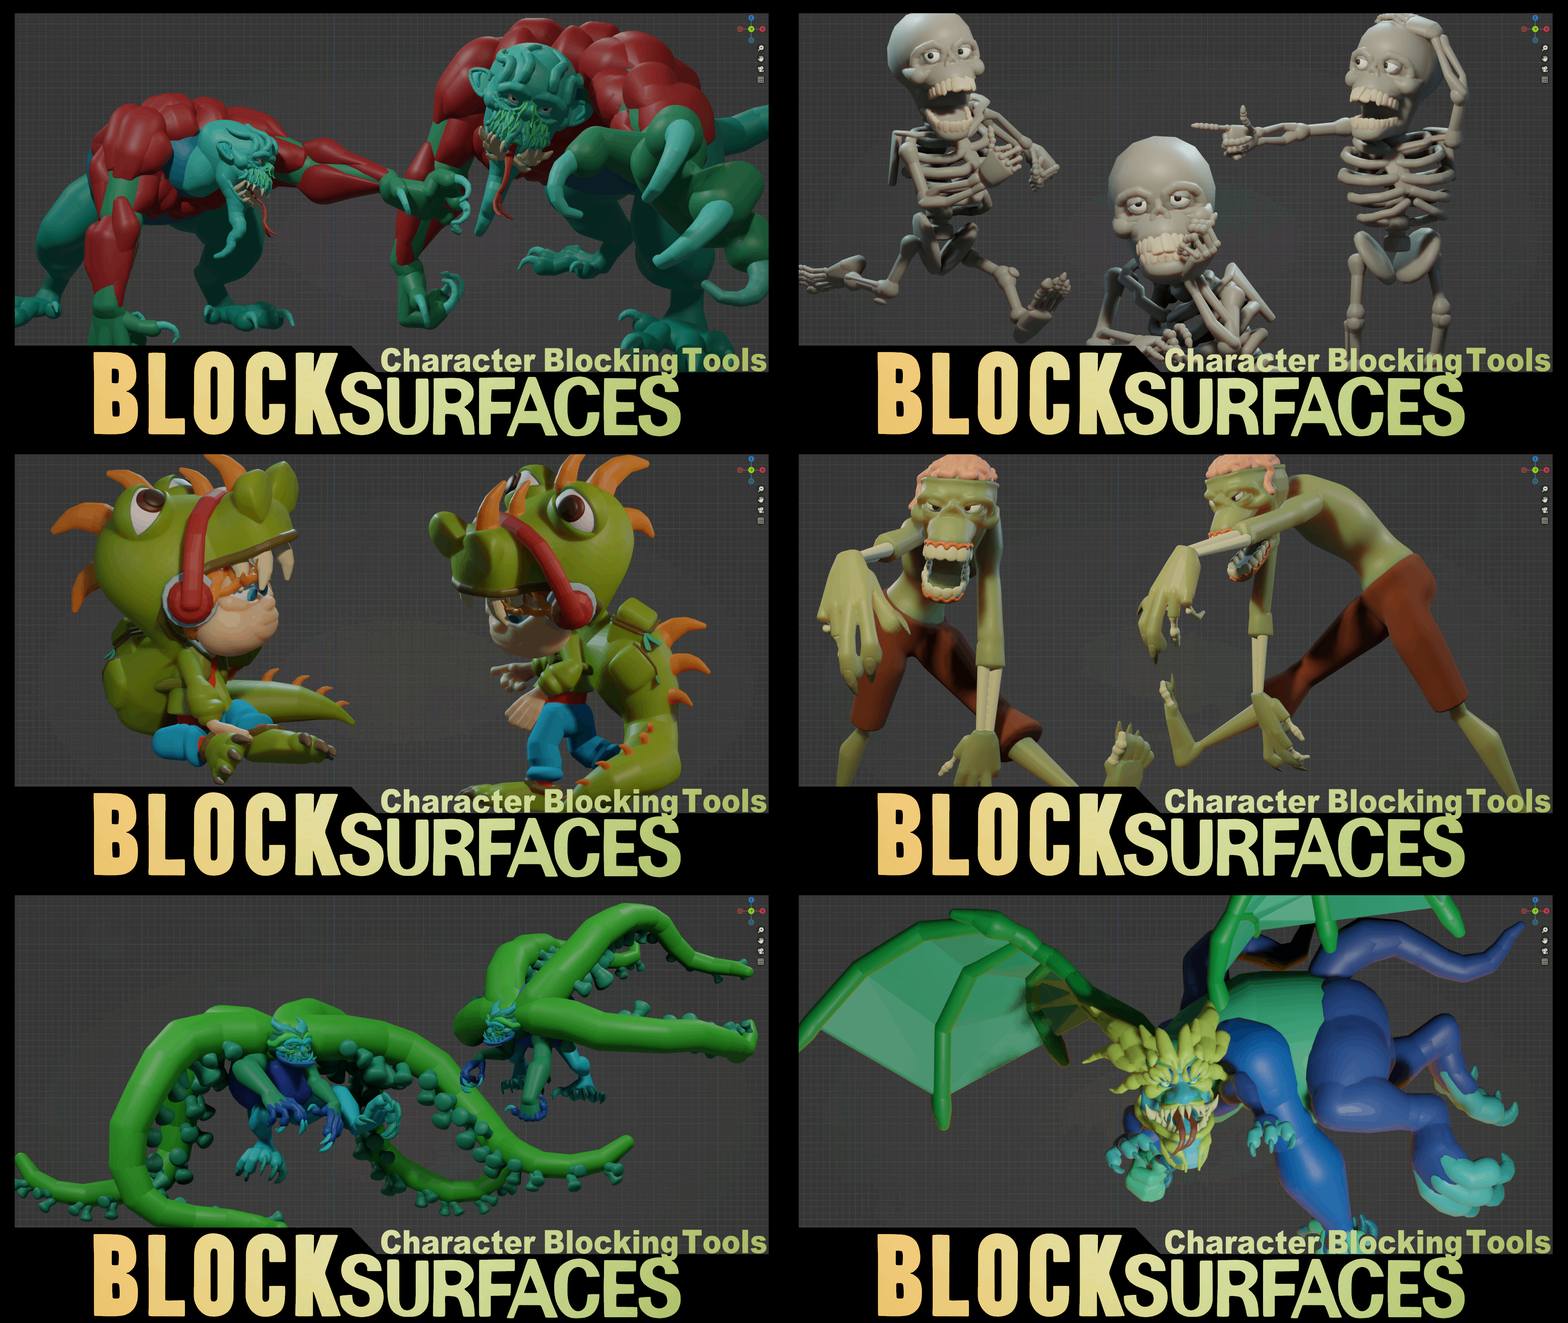
Forget about the limitations of outdated tools or simply stacking objects to do the blocking. Enjoy a much more creative workflow with great freedom to bring your ideas to life. Additionally, BlockSurfaces allows you to do the blocking of all types of characters, from the simplest for starting in character art to the most complex, with possibilities such as duplicating limbs and testing different compositions for your characters or creating muscles that simulate their behavior, you can pose the characters without rigging knowledge, and finally generate the mesh to sculpt and give it the finishing touch.
You will achieve solid and professional results by focusing on the base shapes before adding details in the sculpting. This way you will build a solid structure going from general to specific.
BlockSurfaces accelerates your workflow and makes tedious tasks easy, making character modeling fun and fast.
With BlockSurfaces, you can quickly get started by learning to use 3 or 4 functionalities that you can already use to create characters. And as you progress and add more skills, you will be able to get the most out of it by making characters as complex as you want.
With BlockSurfaces your imagination will have no limits.
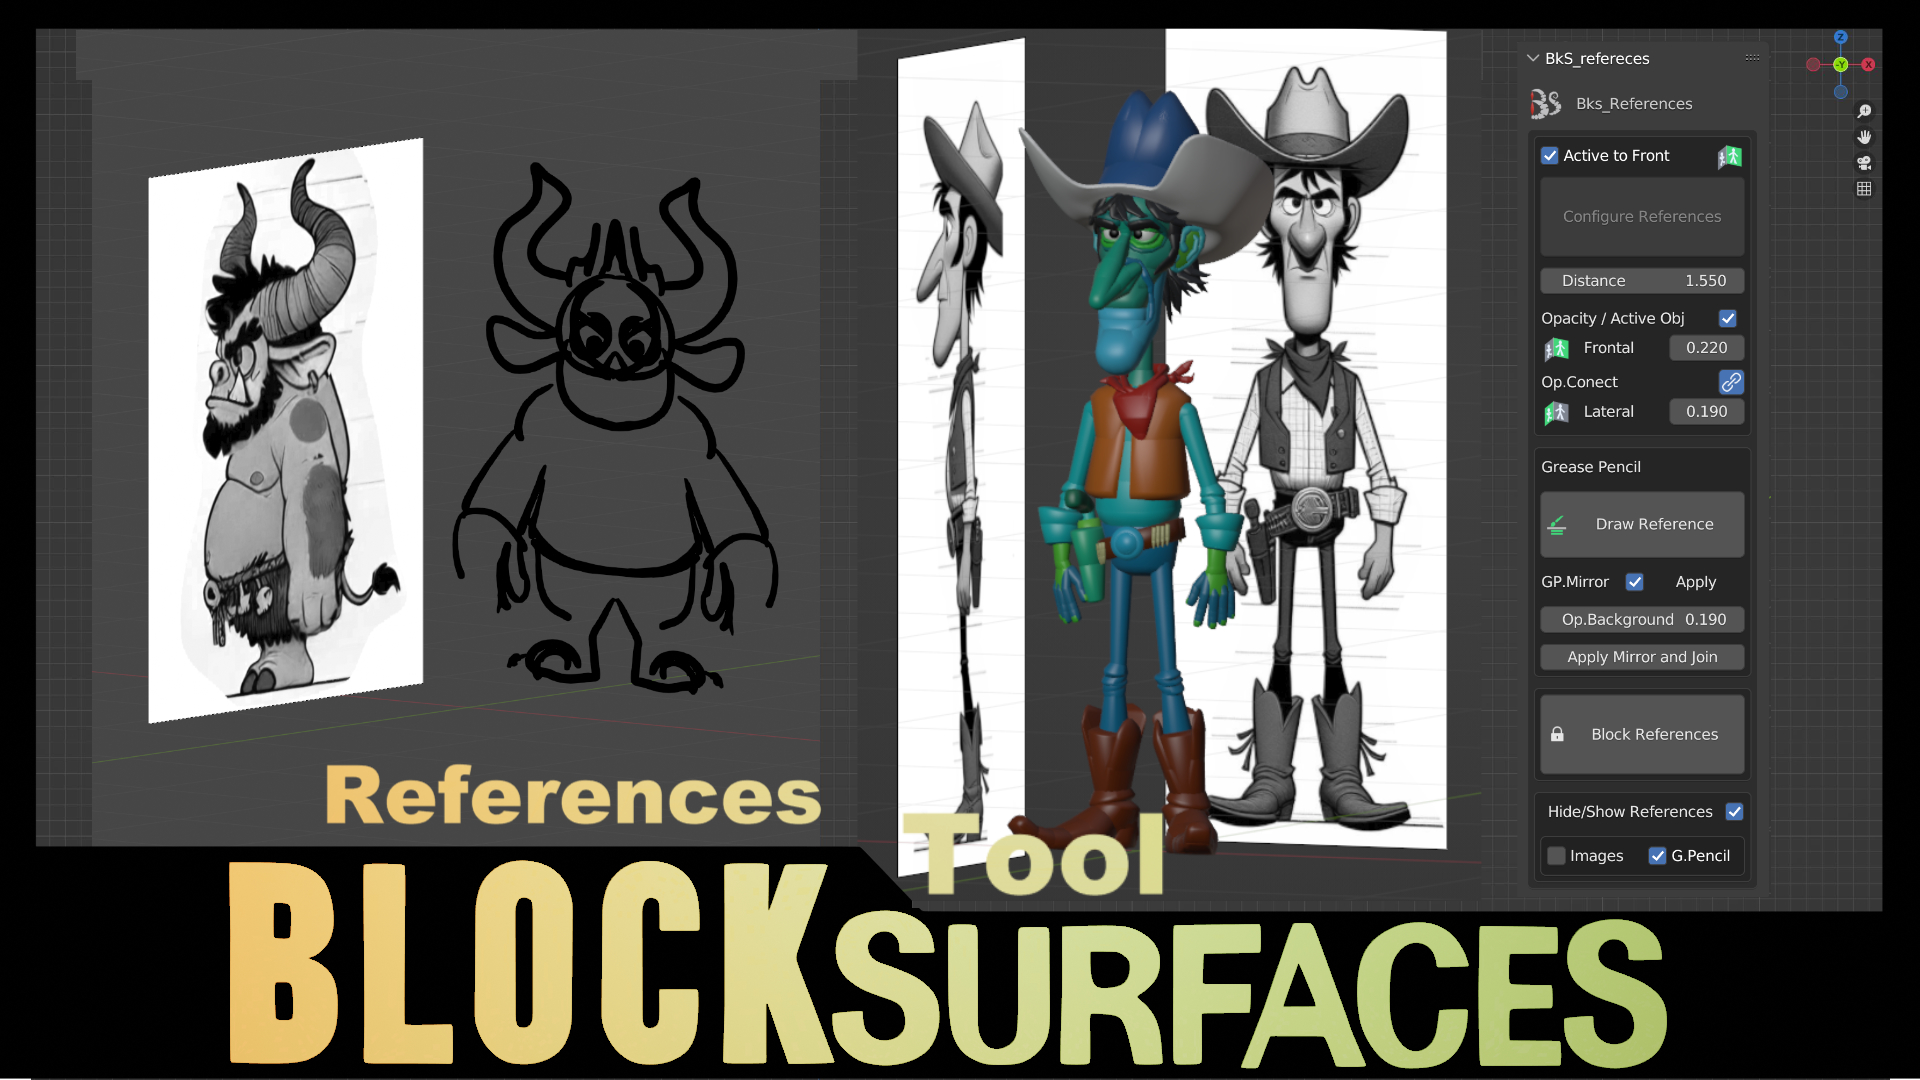
But don't just take my word for it. Check out the YouTube channel for more than 100 videos with hours of timelapses, tutorials, and a full manual video explaining each option in each panel of the addon.
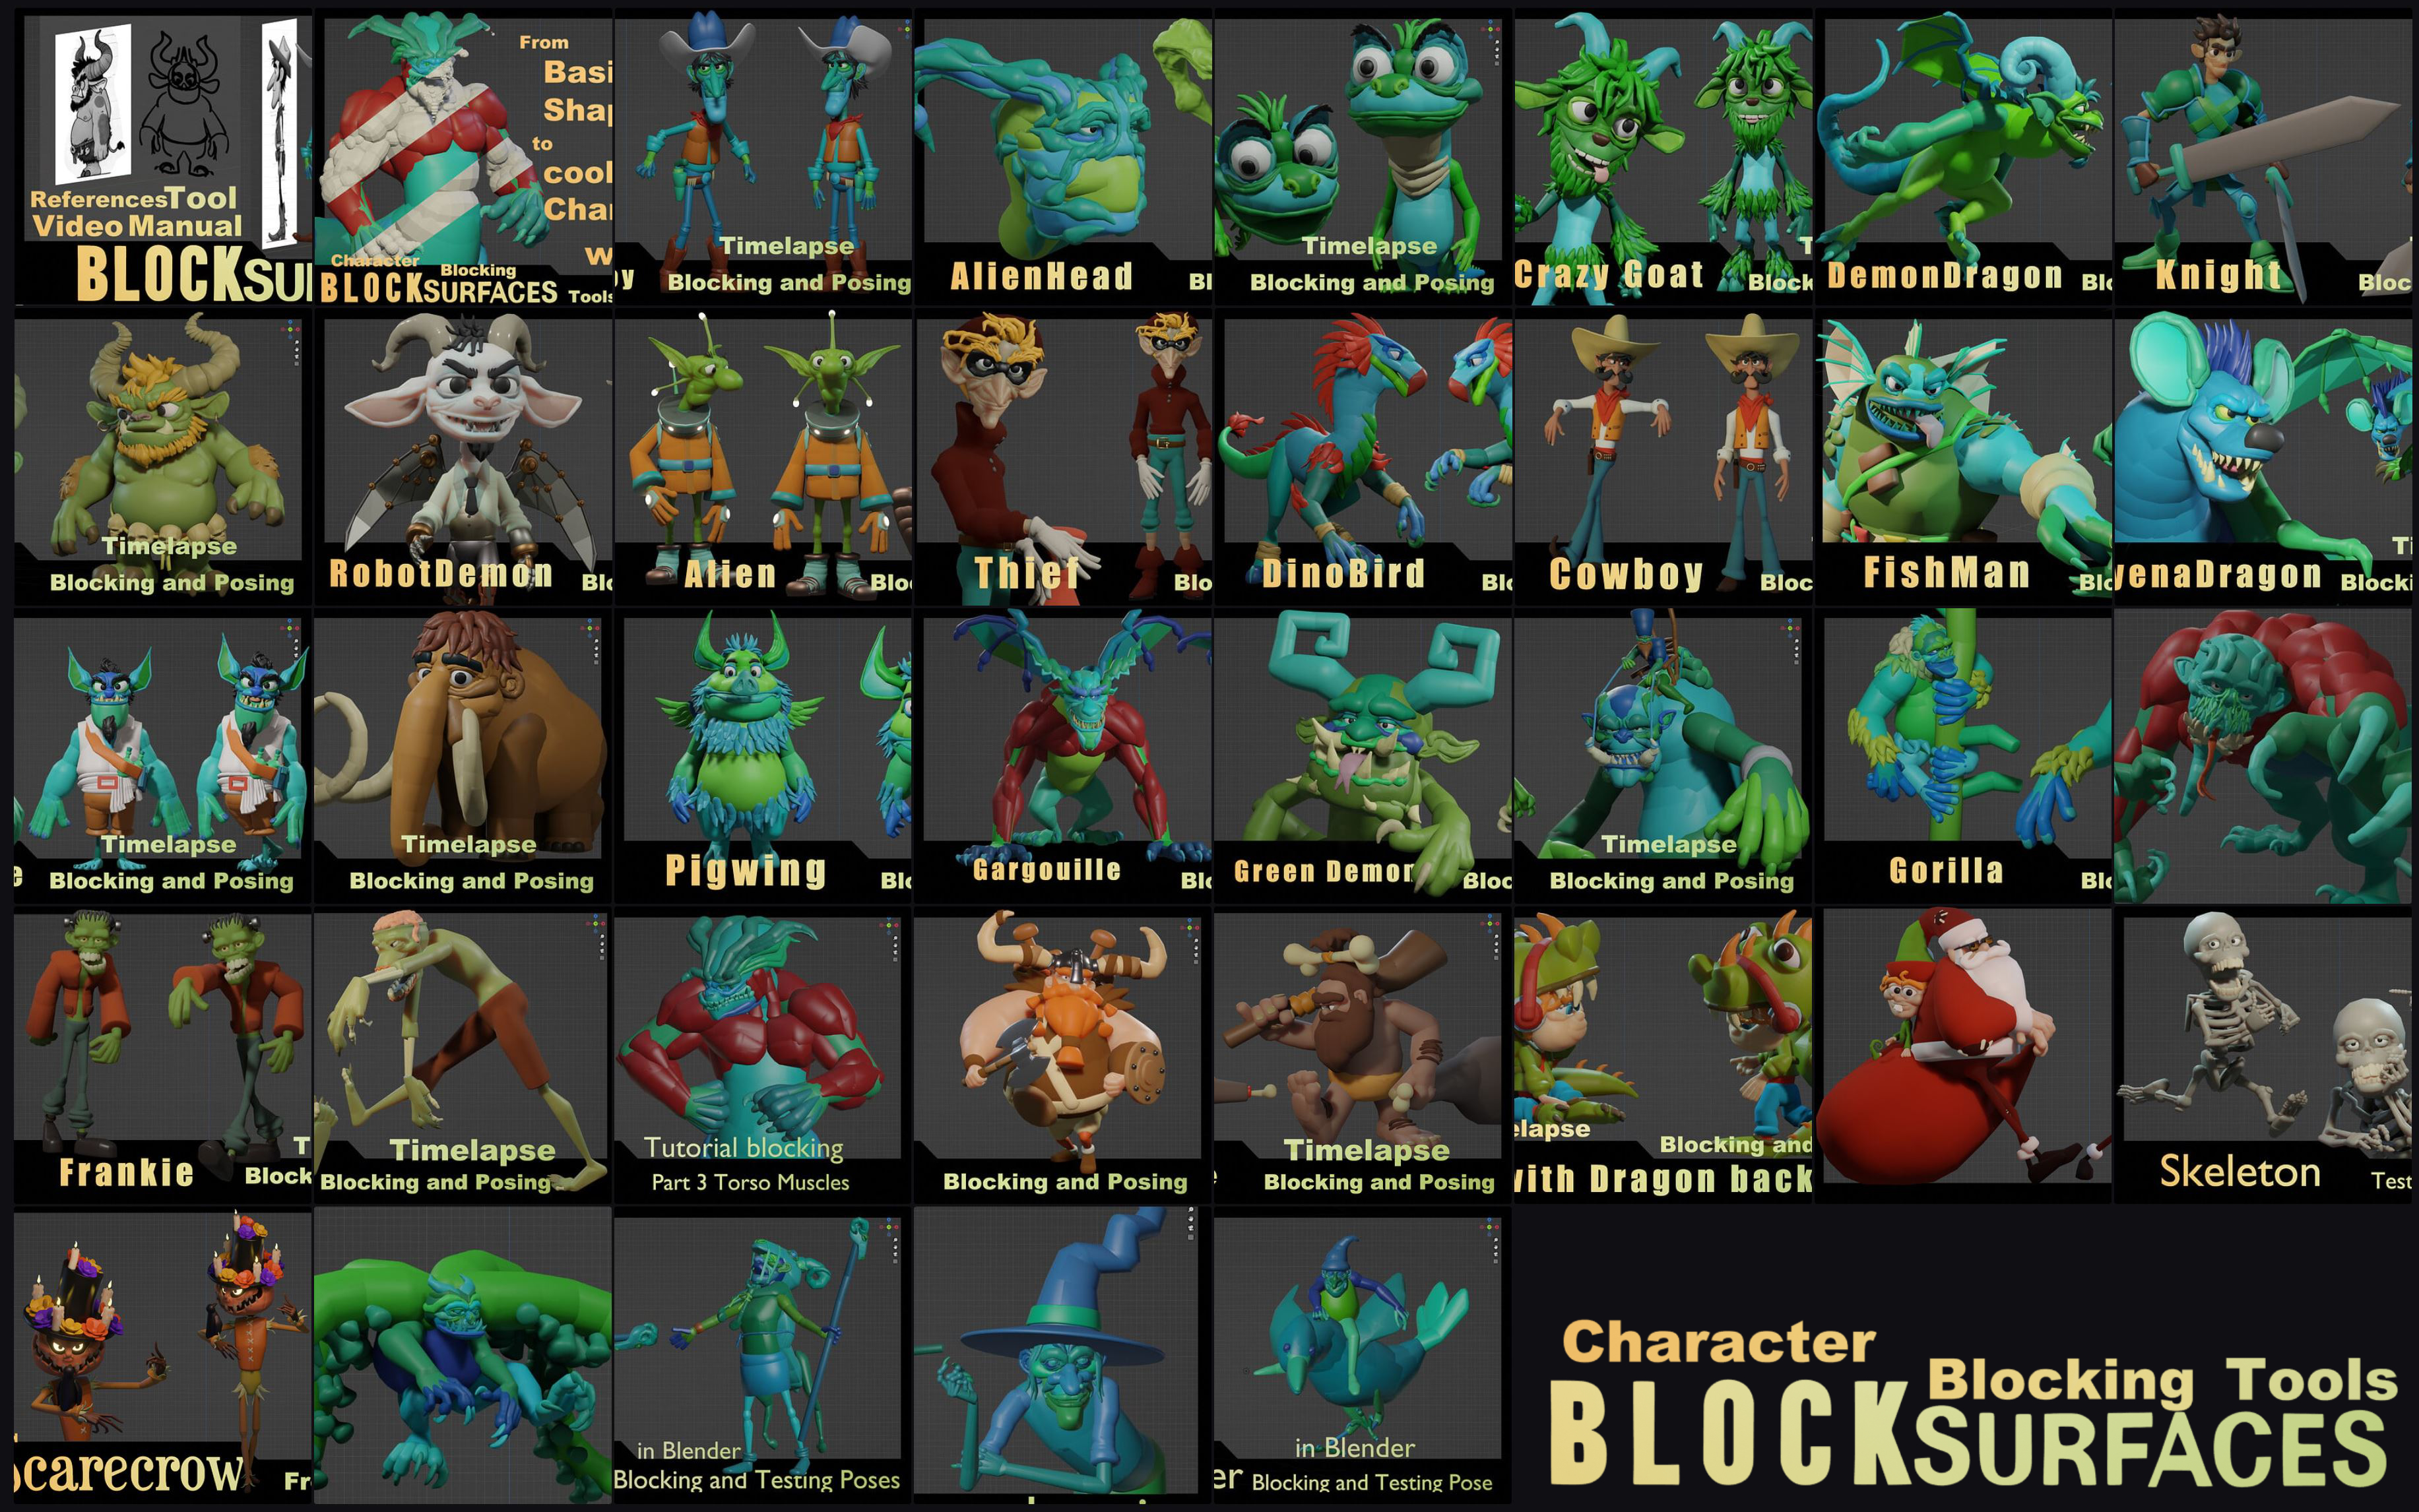
Check out these demonstration videos:
Santa and Elf timelapse
BlockSurfaces Version 1.0.025 Full Character Creation Tutorial - Overview and Step-by-Step Process in Under an Hour
Testing new version 1.0.015 Blocksurfaces : Asterix Fan Art Timelapse
Fan-Art Asterix Full Tutorial without acceleration and with voiceover. Blocksurfaces version 1.0.015
Quick demonstration video of lumberjack character workflow Ver 1.0.000
Lumberjack tutorial Ver 1.0.000
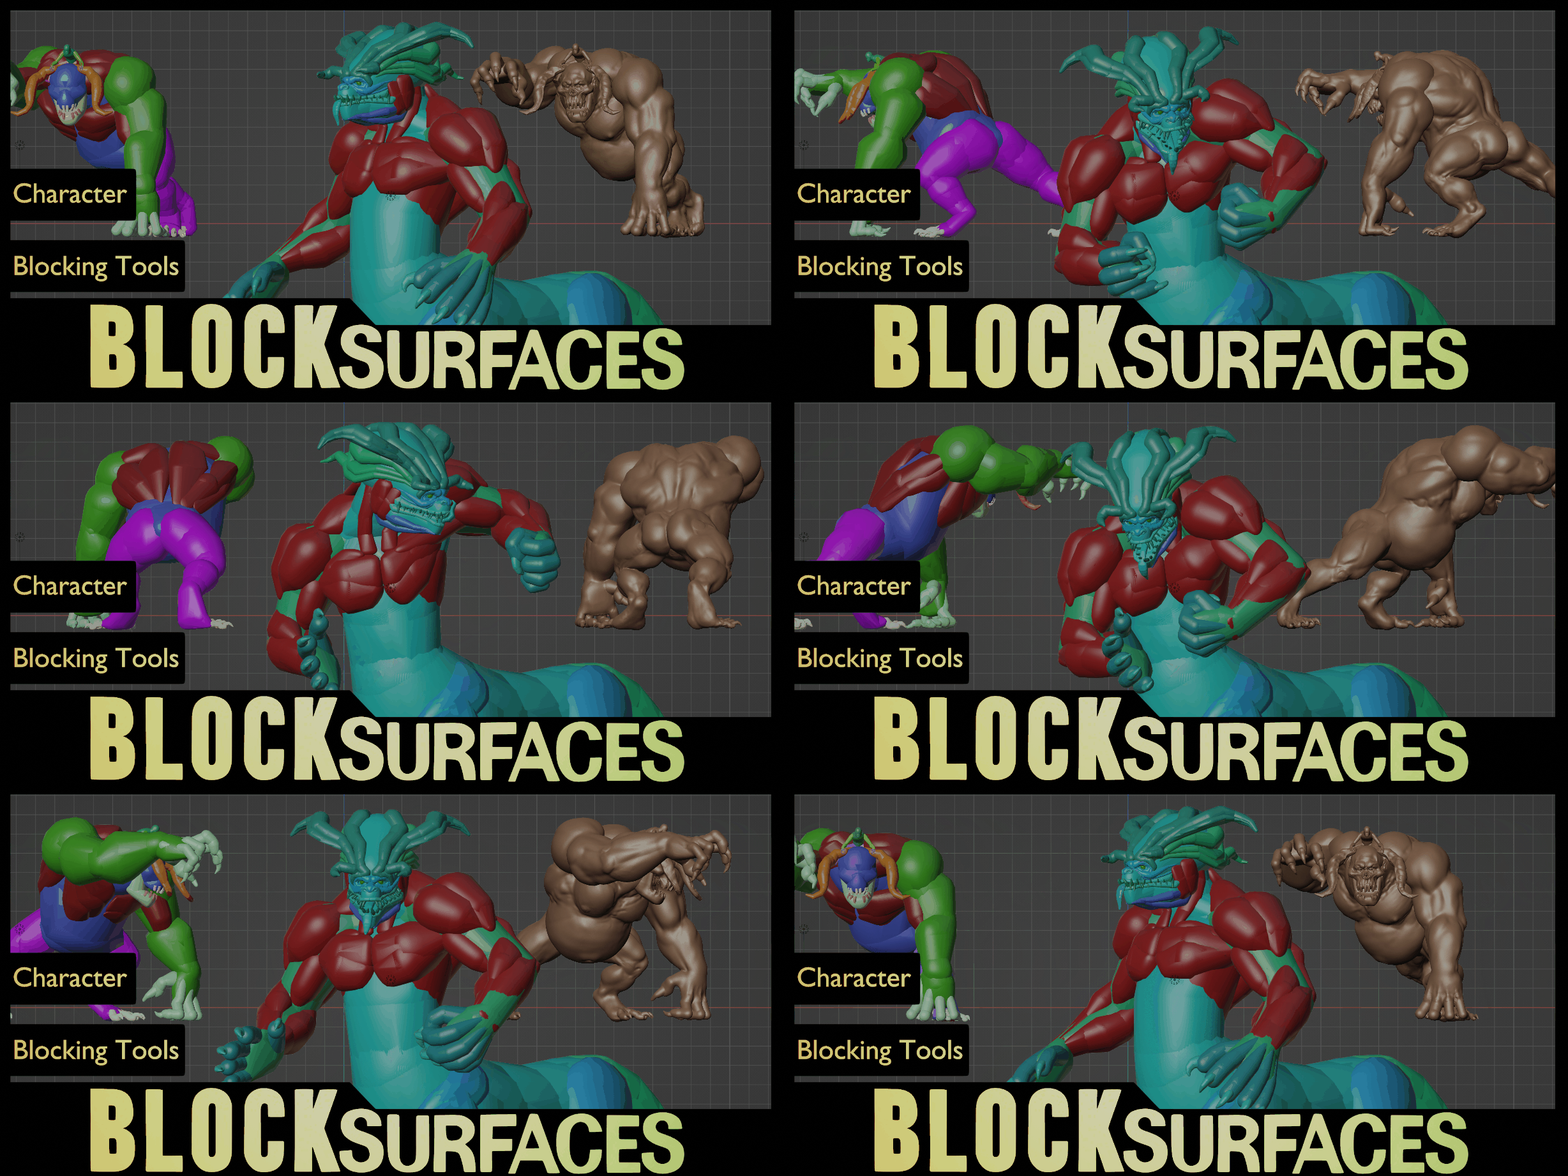
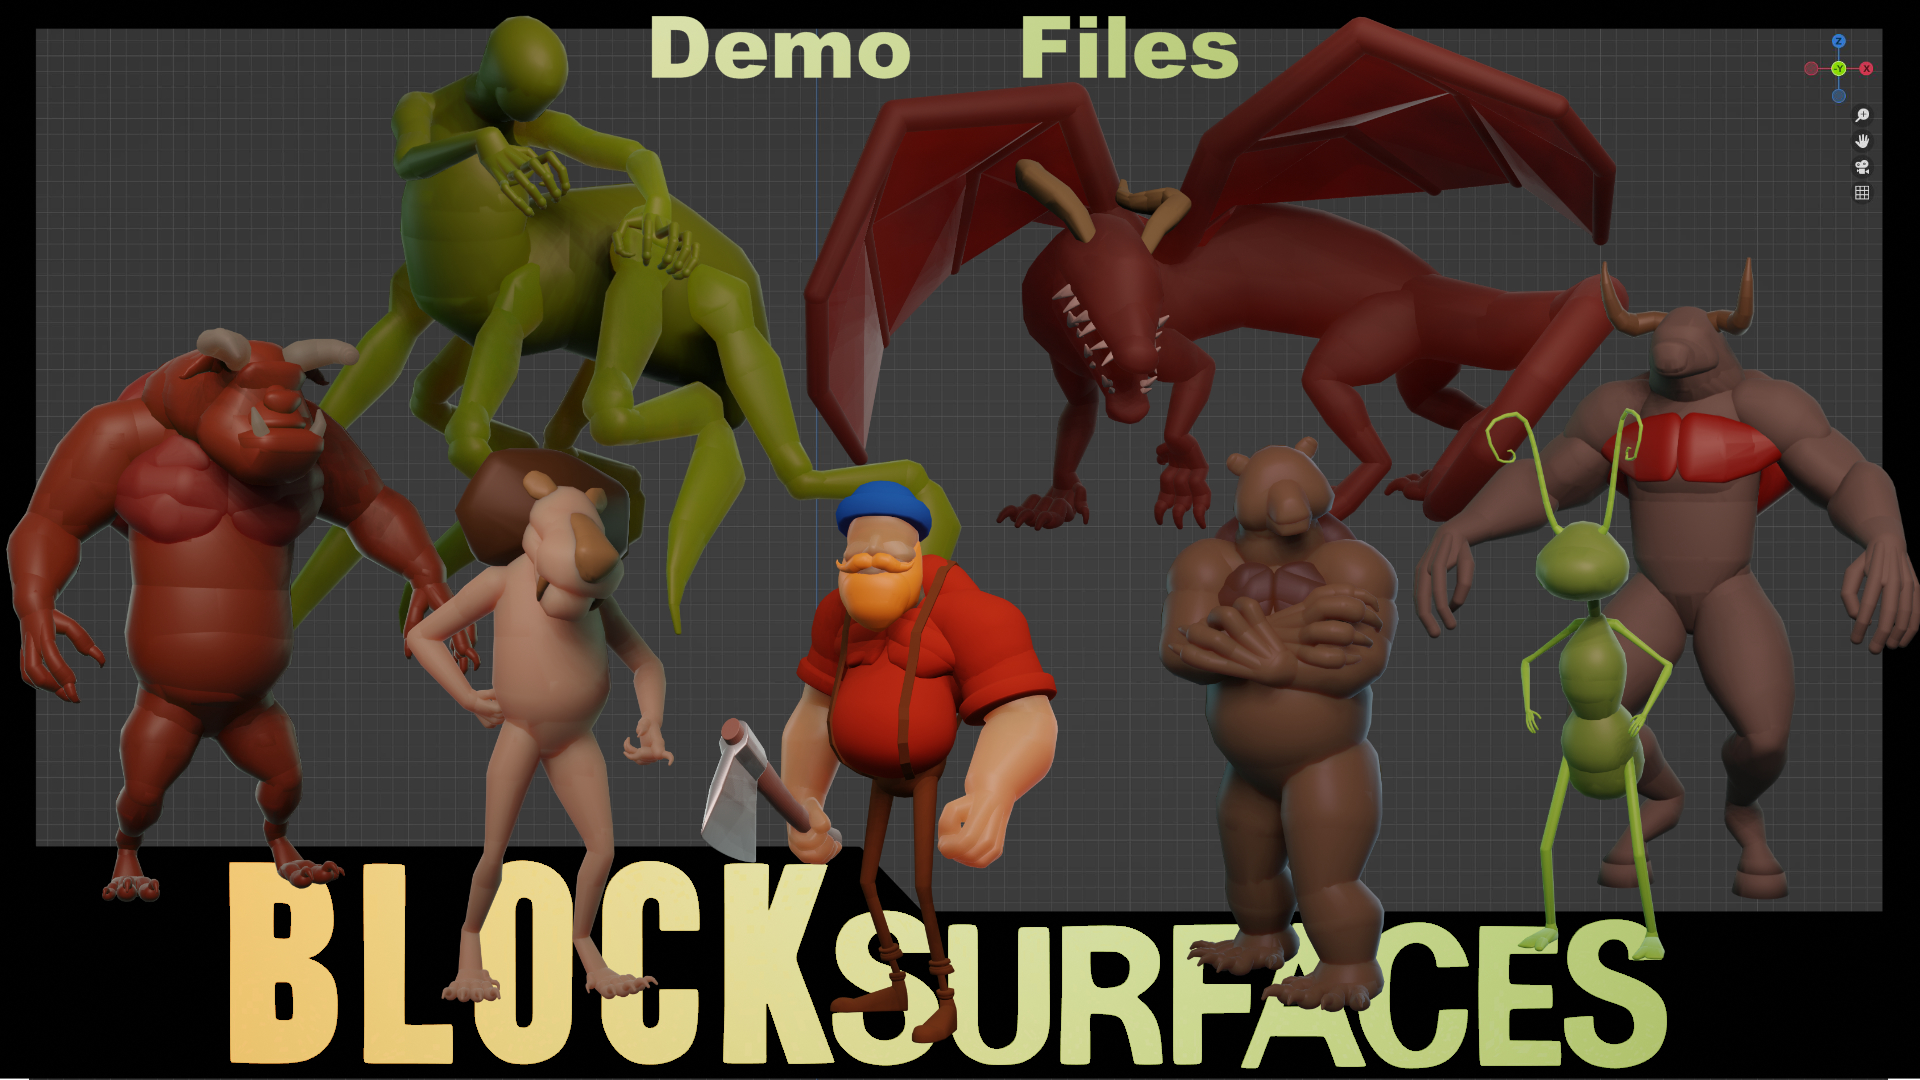
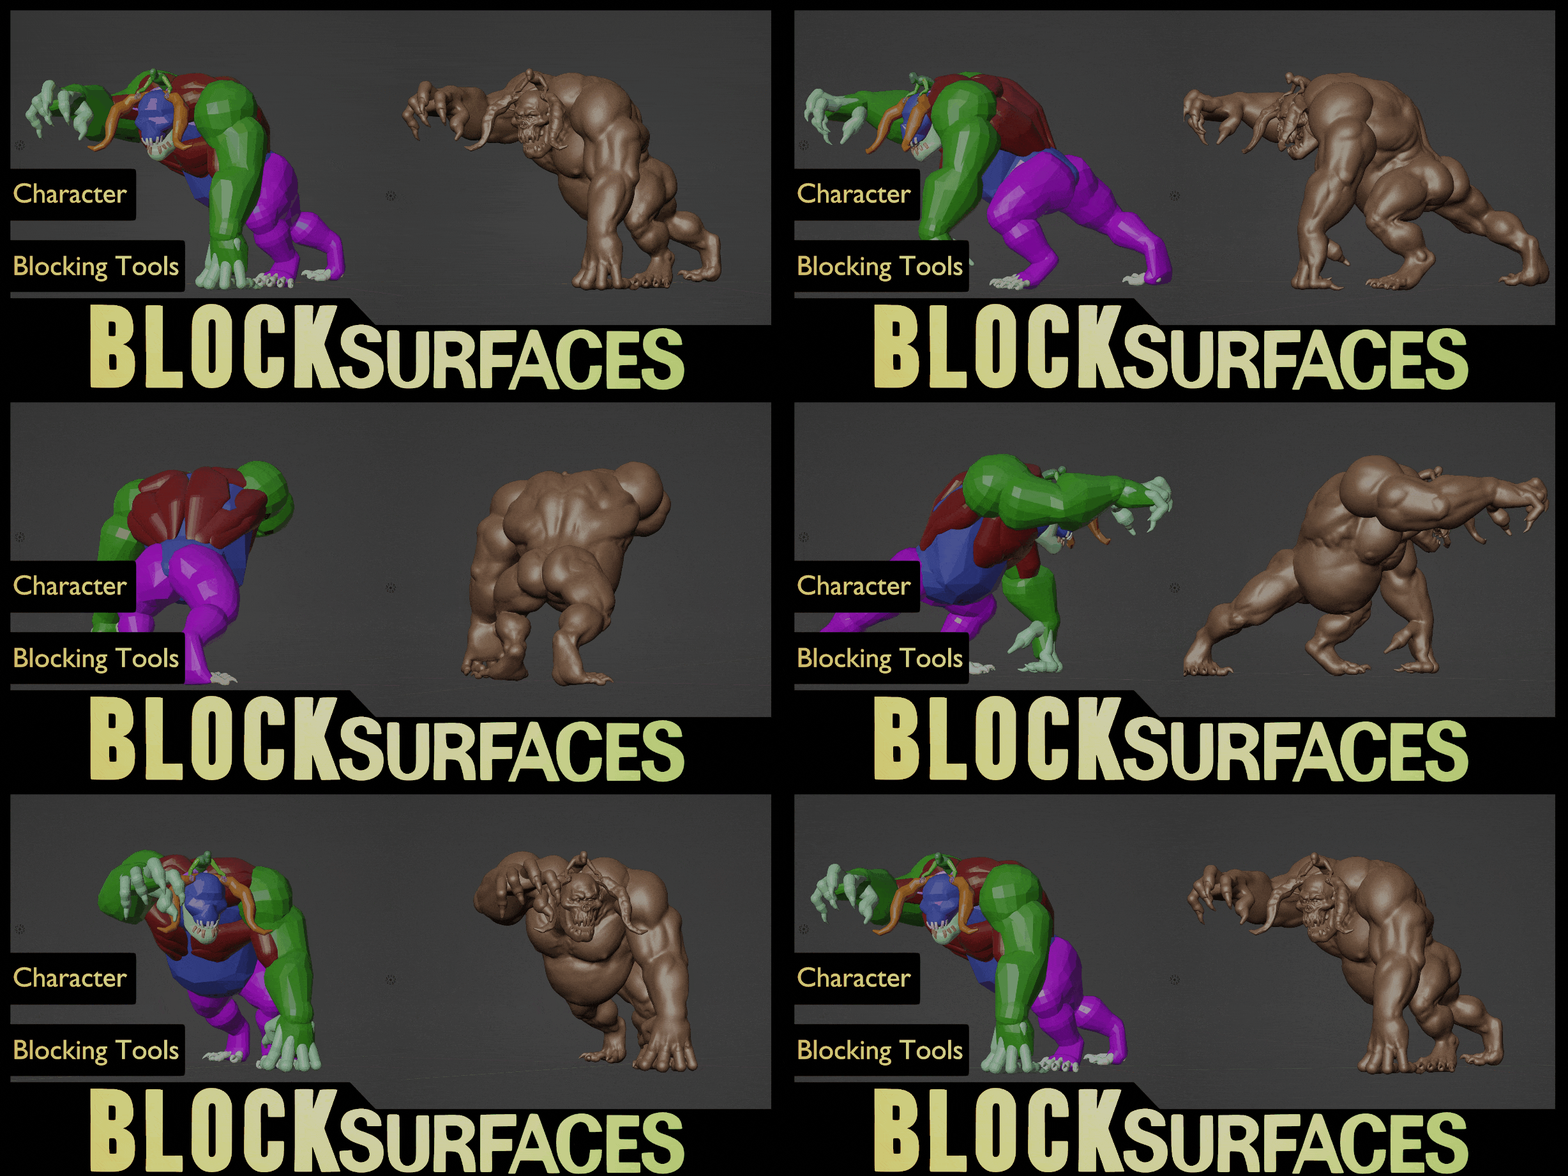
- Do the blocking in Blender and continue your model in your prefered sculpting program
The blocking process with BlockSurfaces is a quick and efficient way to create the general shape of a character model. It is used to capture the character's proportions and pose and generate a remeshed mesh. This final mesh can be imported into your favorite sculpting program so you can continue working on the model by sculpting. You can also use the generated mesh as a base for retopology.
These are some of the features that make BlockSurfaces the ideal tool for any 3D artist:
- Create the main volumes with branch and basic shapes.
This helps to focus first on establishing the main volumes of the character by creating basic volumes using cubes, spheres or any other object, before adding details. It is important to work from the general to the specific, building a solid structure on which to progressively add complexity.
Creating solid base shapes in blocking and then sculpting and adding details. This way of modeling from larger to smaller is essential for an orderly workflow and obtaining solid results.
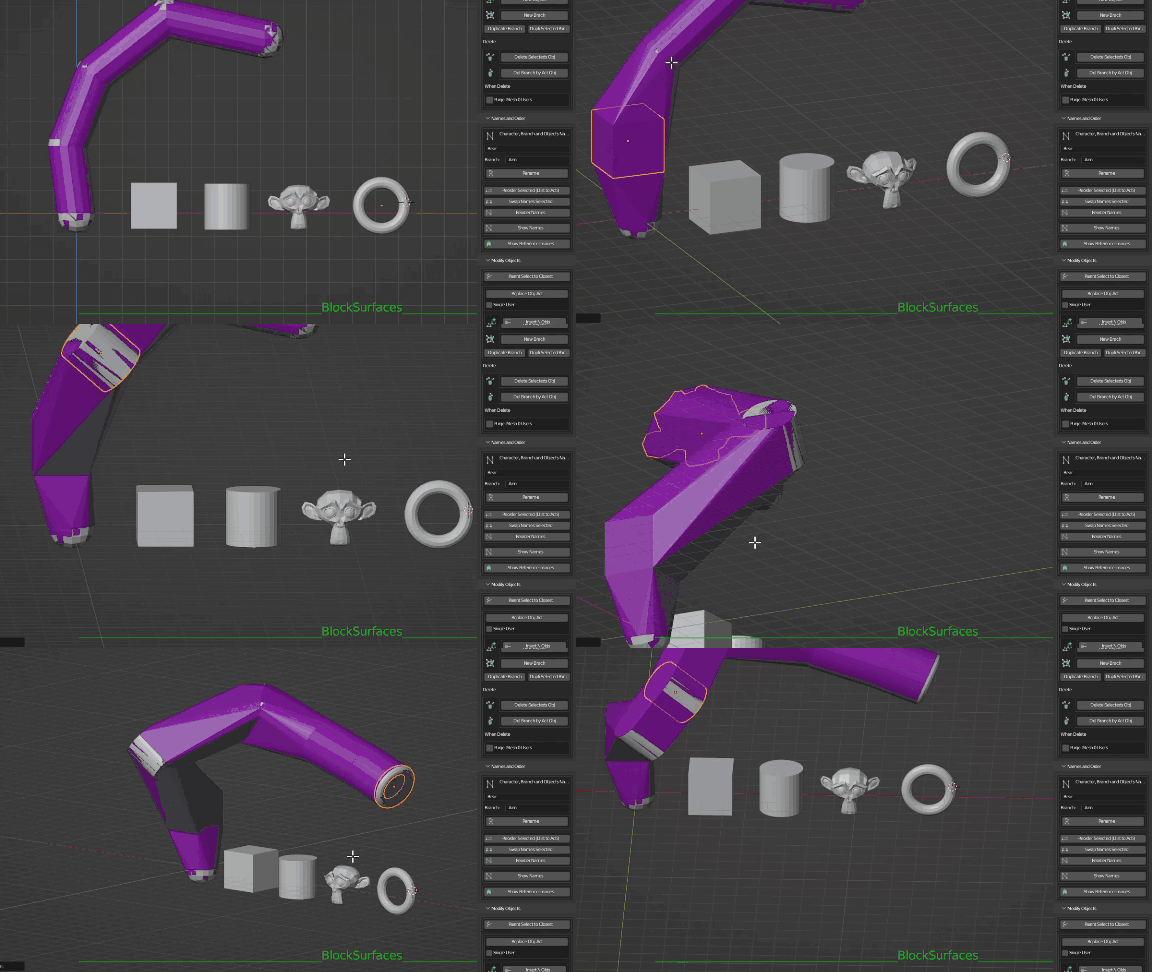
- Edit, move, rotate, scale, and even sculpt the objects of the branch.
This allows great freedom when modifying the objects that make up the branch volumes, essential to define the main forms of the character.
You can focus on the primary volumes, and the branch will generate connecting the shapes within it from one object to the next. This streamlines and speeds up the blocking process.
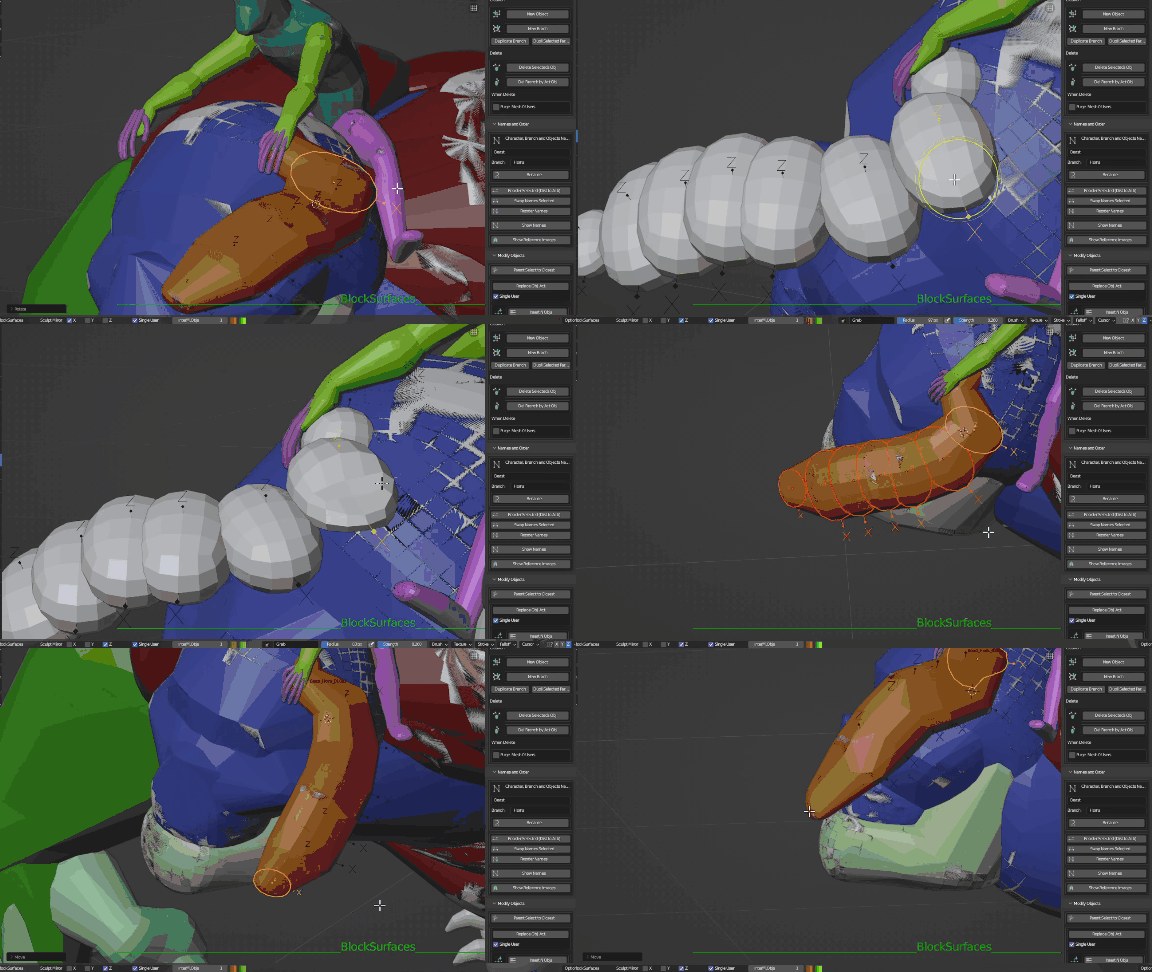
- Duplicate branches or parts of them.
The branch duplicating function allows you to quickly copy sections of a 3D model's structure. For example, if you've already modeled one leg, you can duplicate it to swiftly create an additional leg or multiple legs, rapidly designing an original creature.
You can then make minor modifications to the copies to adapt them as needed. This speeds up the modeling process by reusing previous work instead of recreating it from scratch. It also greatly aids fast exploration of different possibilities for your character.de recrearlo desde cero.
In the newest versions, you can even duplicate entire branch hierarchies like an arm with its hand and fingers.
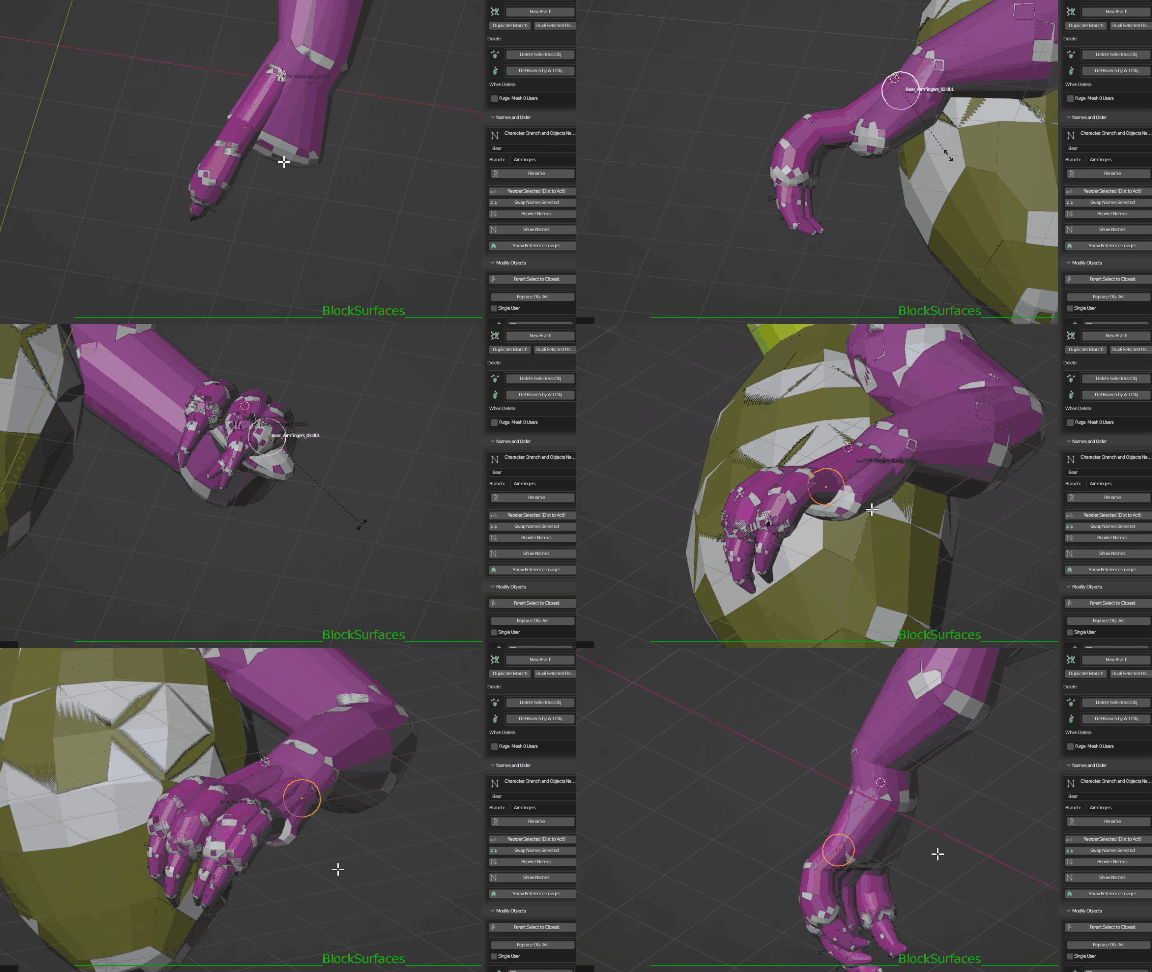
- Replace objects in the branch with others.
The object replacing function allows you to quickly define the basic shapes of a branch. You can replace one or multiple objects and thus swiftly define the shape of the branch.
You can also use objects as single user or linked so that modifying one will modify all of them at once. This makes it easy to quickly define the overall shape of an entire branch.
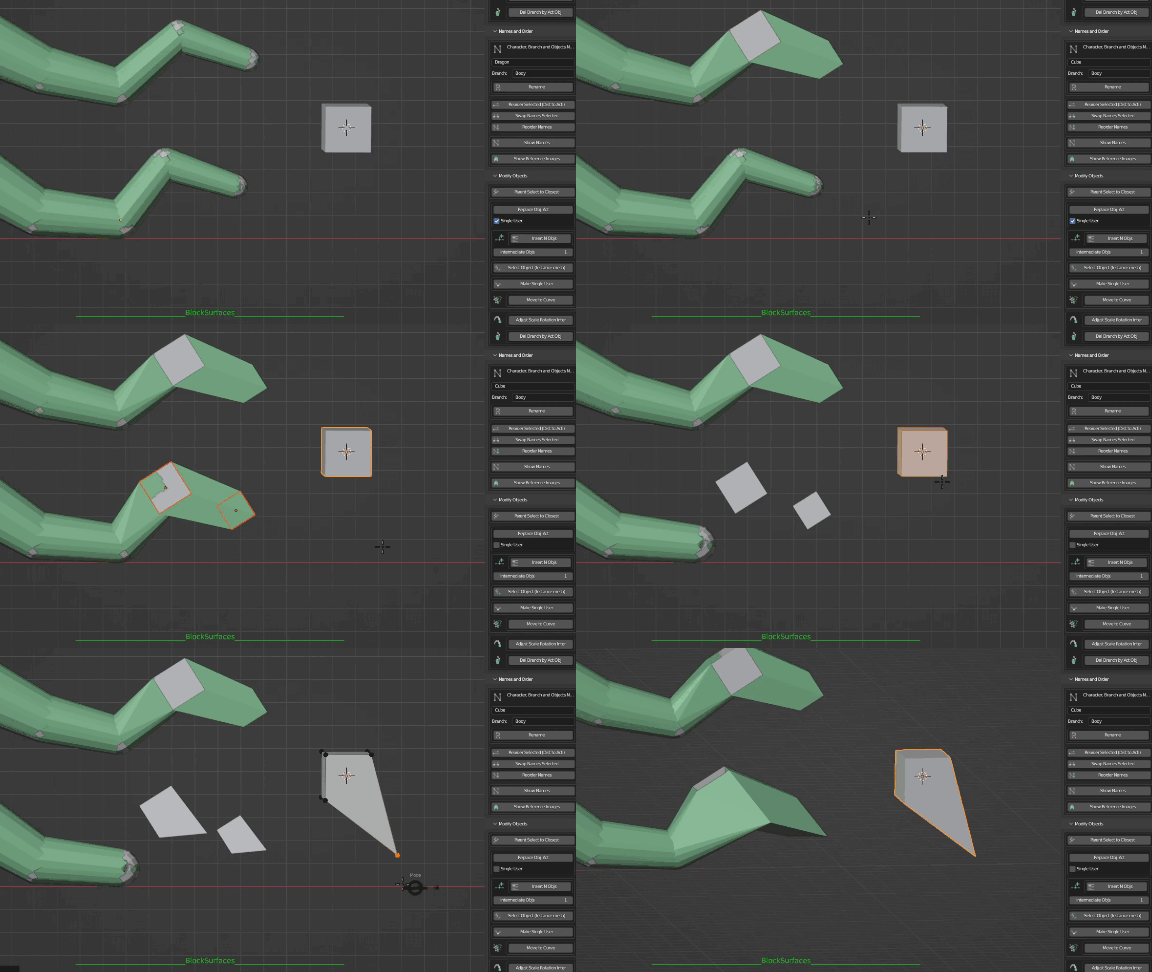
- Insert N objects between 2 selected ones.
This option allows you to add a specific number of new objects between existing objects in a branch. Very useful for adding more definition and detail to the shape of the branch.
In summary, this functionality enables quickly increasing the density of objects in specific areas of a branch for greater control over the shape.
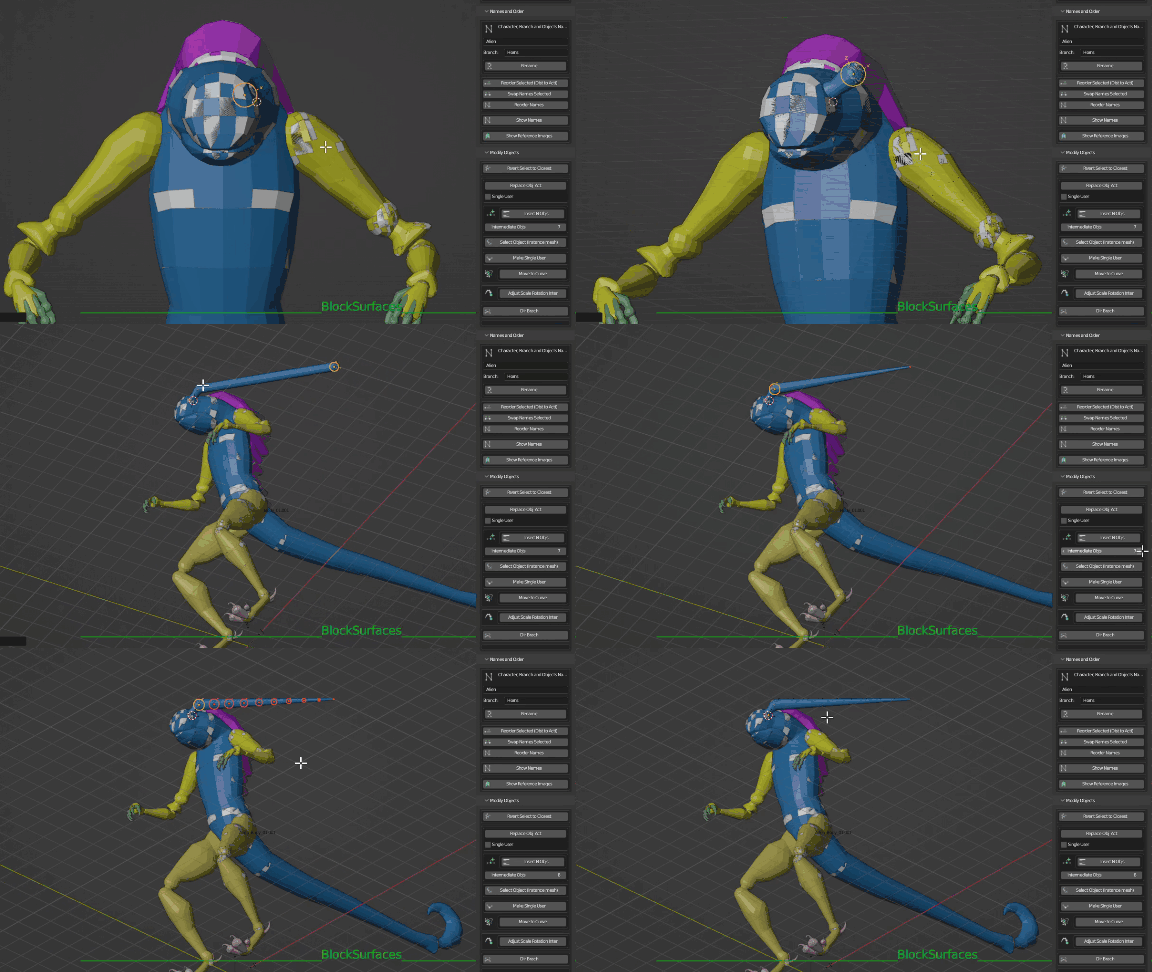
- Edit the objects of the branches independently or modify several linked ones.
We can link objects, so that editing one will automatically affect the other linked ones and the shape of the branch.
This way we can modify specific parts of the branch or its entire shape at the same time.
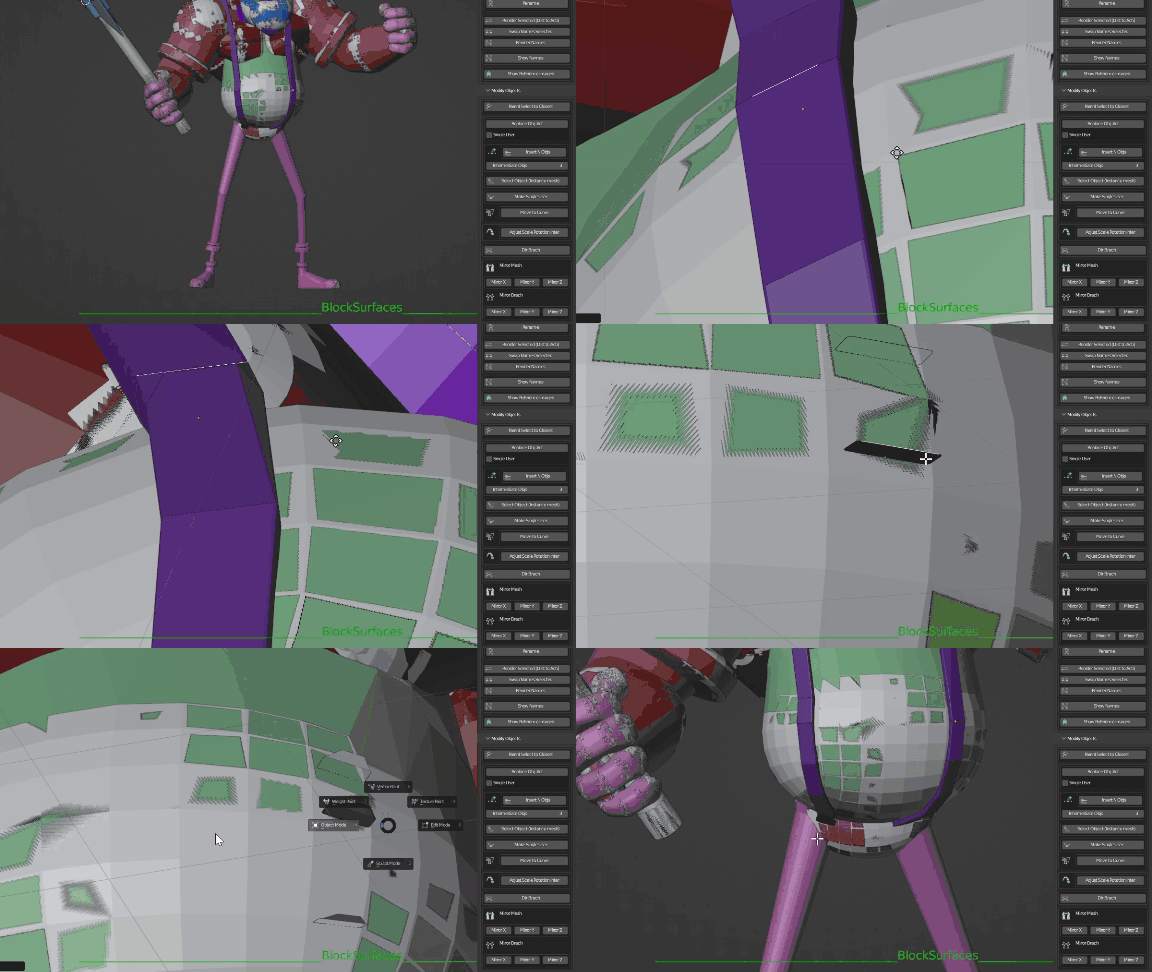
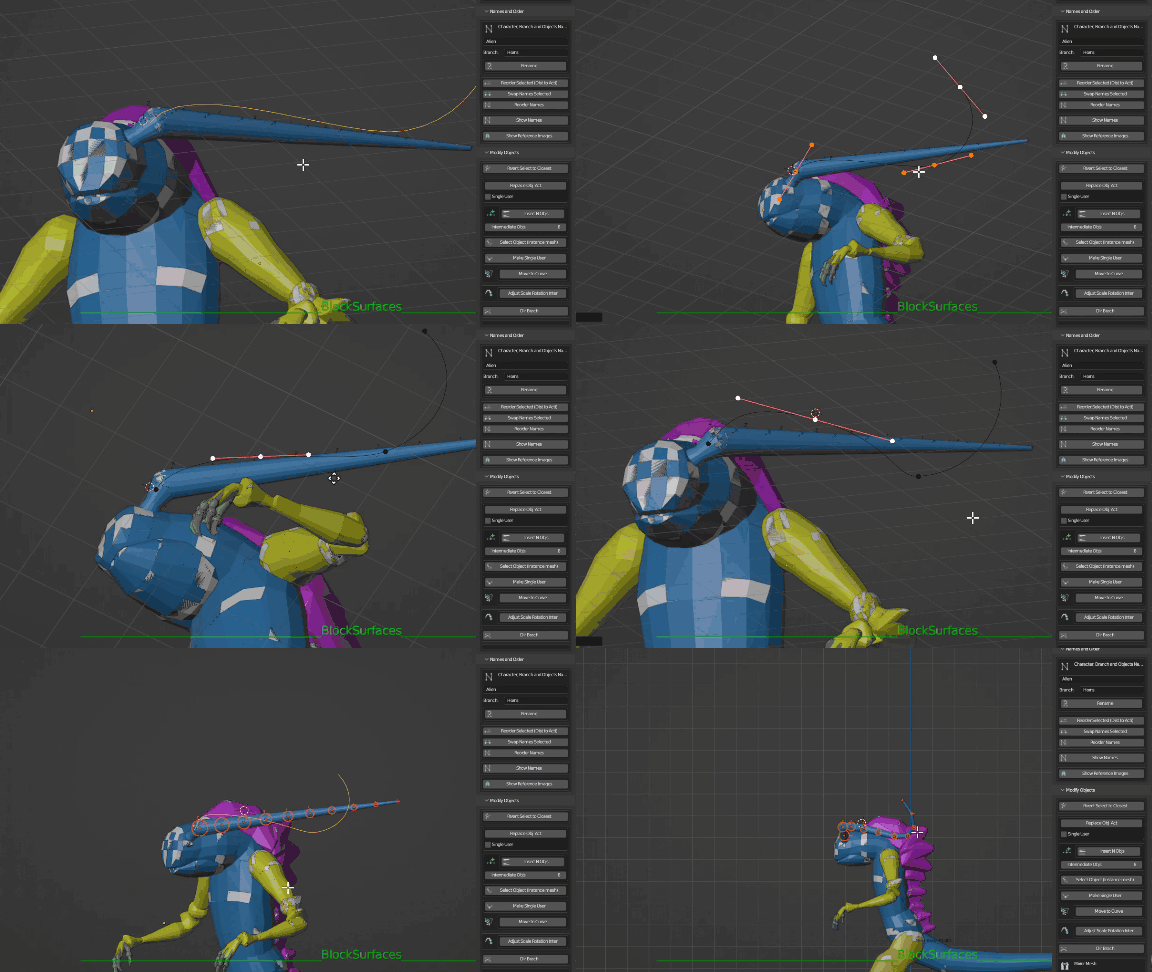
- Reposition the selected objects of the branch on a curve.
This option allows you to draw a curve and position the selected objects on it, thus allowing you to quickly change the shape of the branch by adapting it to the drawn curve.Very useful for easily and quickly creating horns, tentacles, tails or other non-linear shapes.
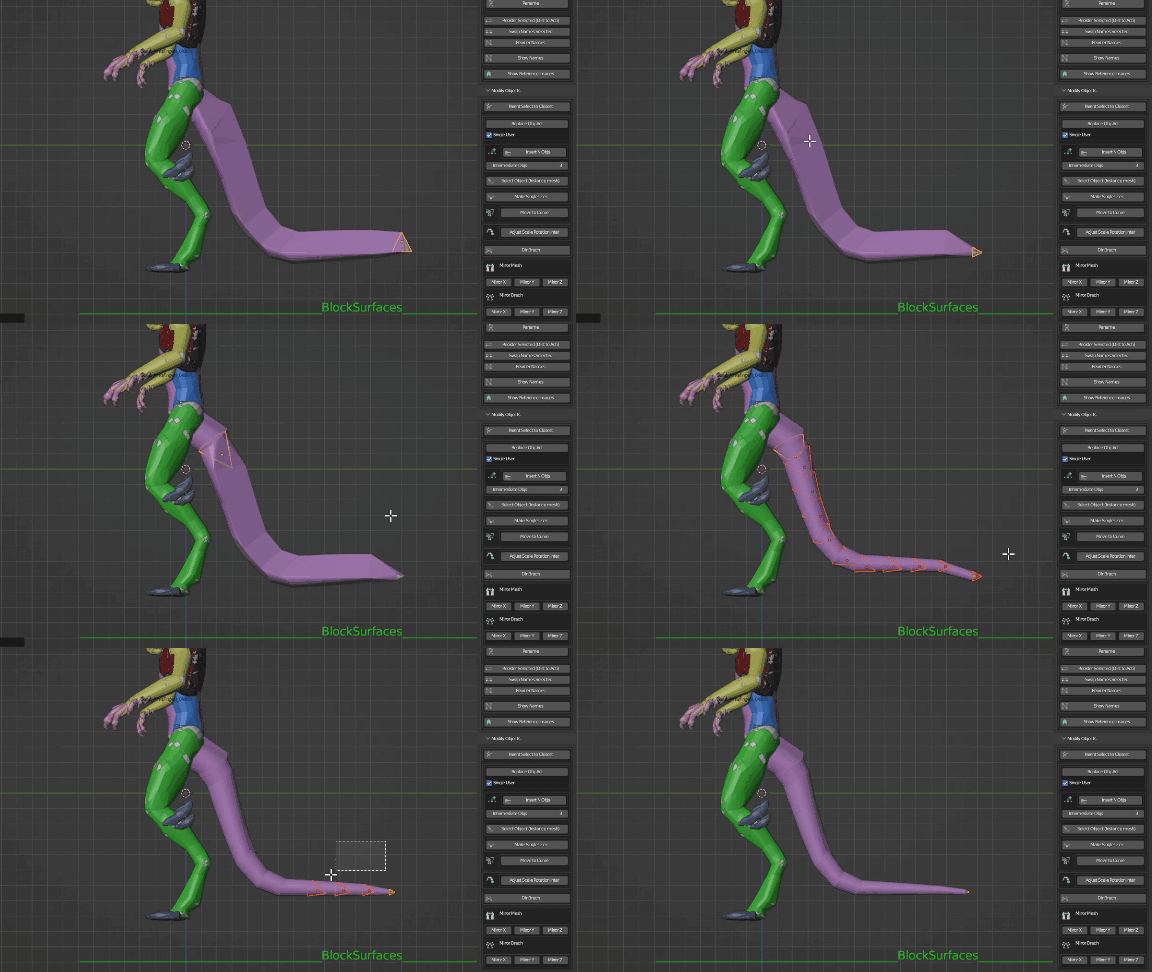
- Adjust the rotation and scale of the intermediate objects to the selected ones.
This option allows you to adjust the rotation and scale of the intermediate objects between the selected objects, making them rotate and scale uniformly. This achieves a more natural-looking shape for the branch without needing to adjust each object individually. Thanks to this, the shape of the branch can be quickly defined by only basing it on the selected objects.
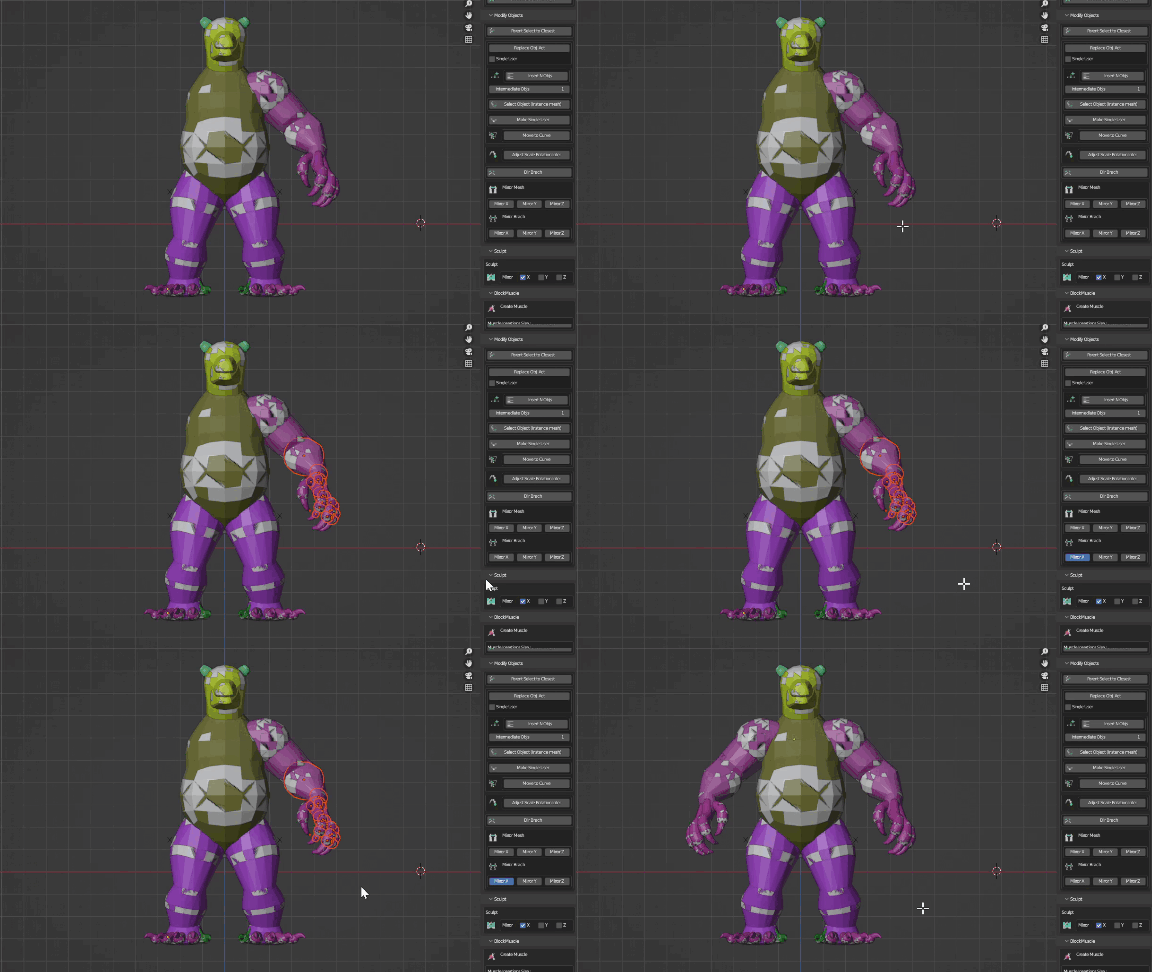
- To create a mirror branch
This option allows you to perform mirroring of the selected branches and you can do mirroring in two ways:
Mesh mirror: It will add a mirror modifier to the final generated mesh, so we will have a symmetric mirror and where the changes made on one side will be replicated on the other.
Branch mirror: It allows working asymmetrically by creating new branches on the other axis that you can modify freely, achieving asymmetry in your character or pose.
In summary, branch mirroring allows differentiated manipulation of the duplicated branches for asymmetric modeling, while mesh mirroring maintains symmetry by replicating changes between both sides.
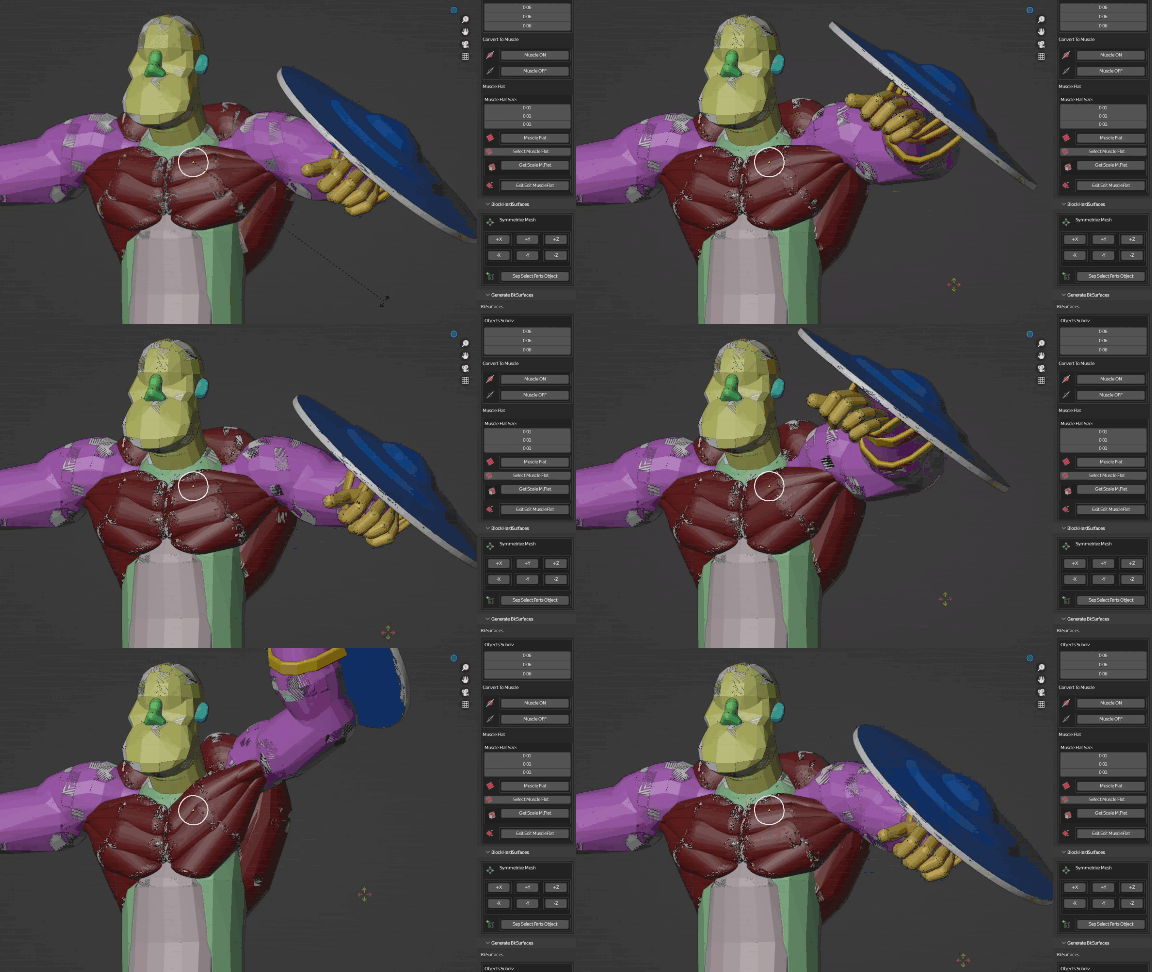
- Convert the branches into a type of branch called BlockMuscle to simulate muscle behavior.
You will be able to convert any branch into a muscle type, so that it has a behavior similar to a muscle with stretching and contraction. You will also be able to do the reverse operation, converting a muscle into a standard branch.
Relate the muscle insertions to the corresponding branches, where the insertions would be in a body, and when moving the joints the muscle will adapt.
Keep in mind that BlockMuscles is a basic muscle simulation, very useful to aid in the blocking of a posed character and with small adjustments, it can greatly help in understanding how movements could affect the muscles of your character.
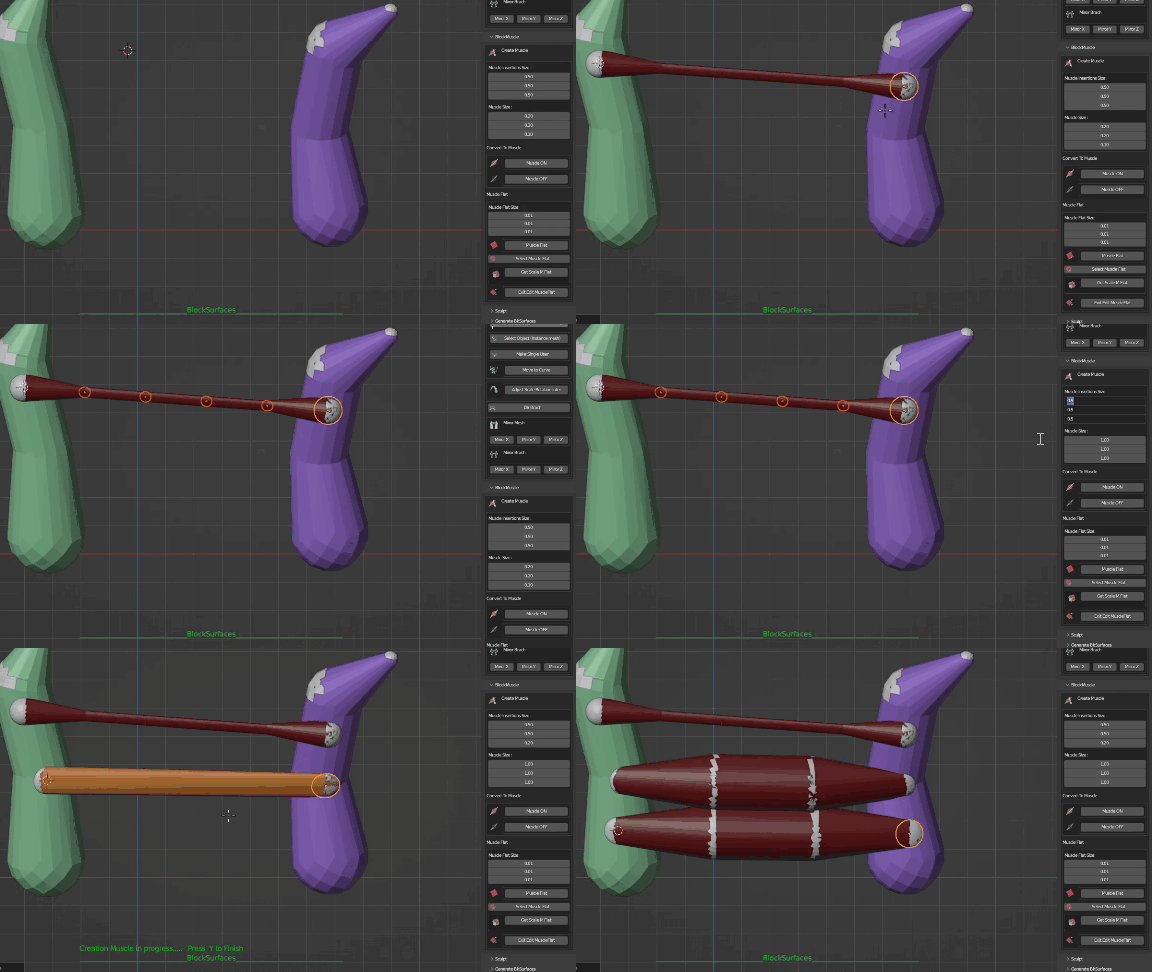
- Build muscles with a simple click for every insertion.
You have the option to create muscles with a simple click on each insertion point.
When clicking, it will create the first insertion of the muscle, and the second click will create the second insertion. With the number of intermediate objects that you have defined in the options, it will create the muscle. Then you just have to relate the branches that the insertions should follow.
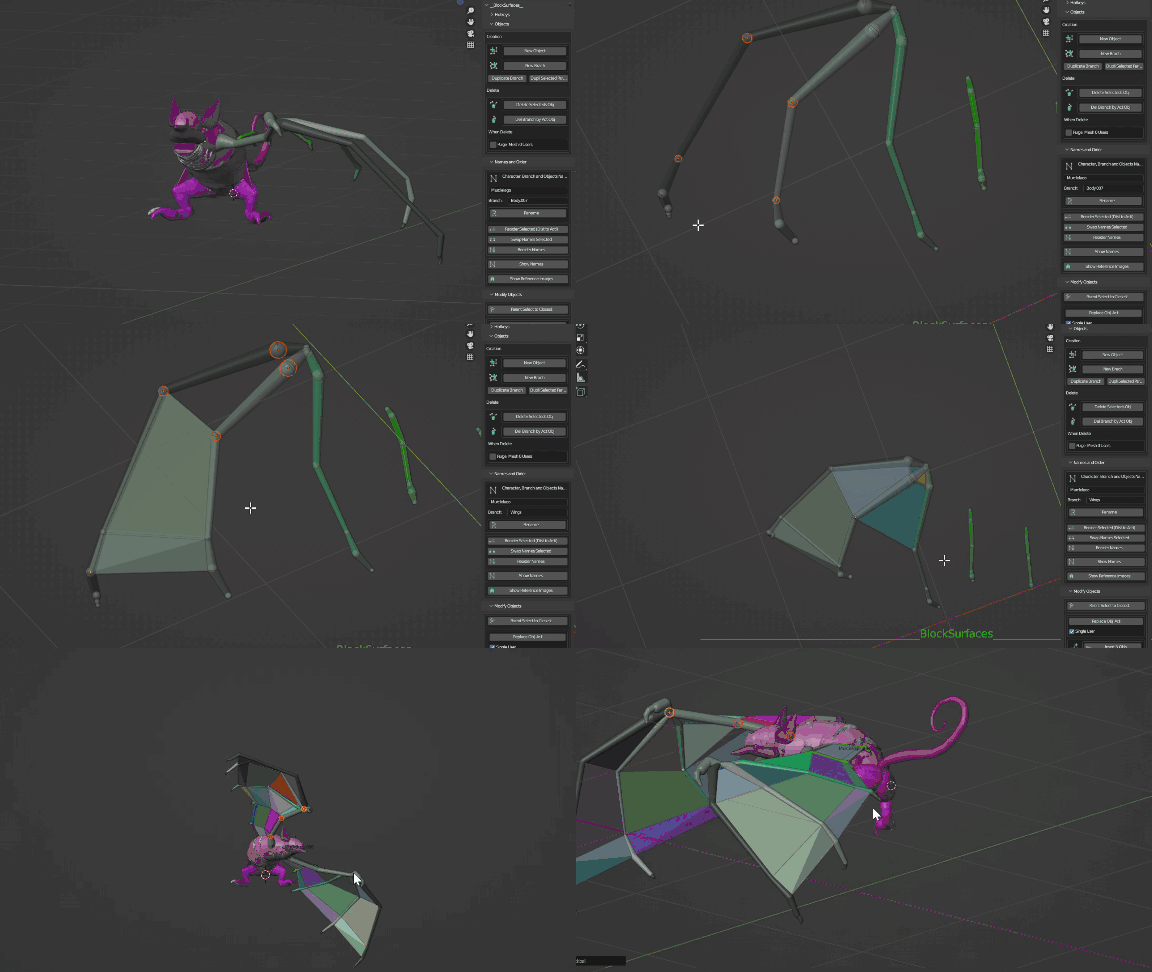
- With FlatMuscles, create flat surfaces to simulate membranes.
You will be able to simulate membranes with FlatMuscle option. It will create a surface encompassing all selected objects. This surface will be linked to the selected objects, so that you can move the objects you selected and the surface will continue to encompass those objects wherever they are.
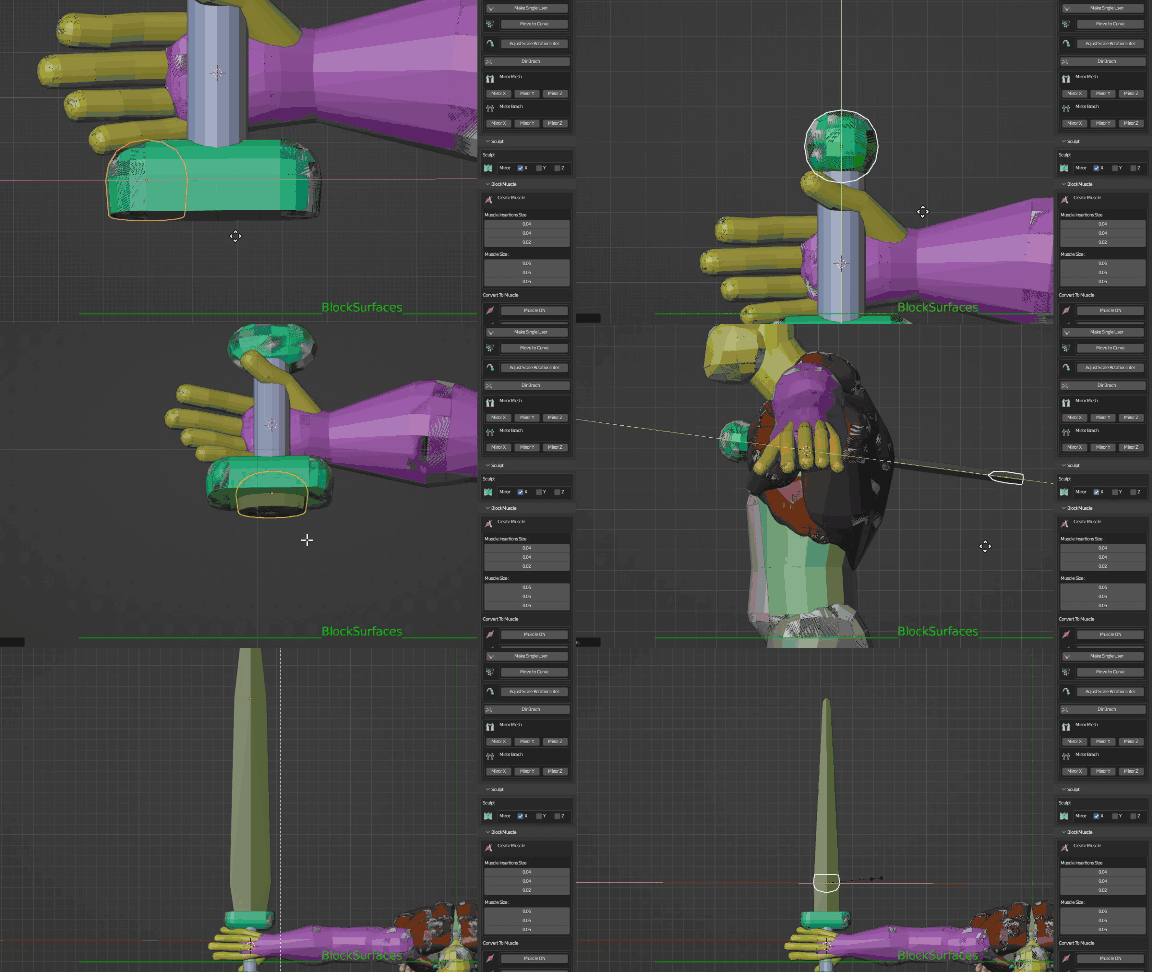
- BlockHardSurfaces currently has only two small tools and is more of a project, a set of ideas that I want to implement.
For now, hard surface blocking can be done with BlockSurfaces. I am working on new ideas to offer more possibilities and improve the hard surface blocking experience in the future
- Save time by creating hierarchies for branches with BlockSurfaces tools and you'll be able to articulate and pose your characters with ease.
With Blocksurfaces there are several tools to acelerate the process of creating hierarchies between the branches that make up the character. It will be quick and easy to create a hierarchy that allows you to articulate and pose the character without having to resort to rigging. This way, you can easily obtain poses quickly or readjust parts of the character before the sculpting process, with the possibility that the muscle branches simulate behavior.
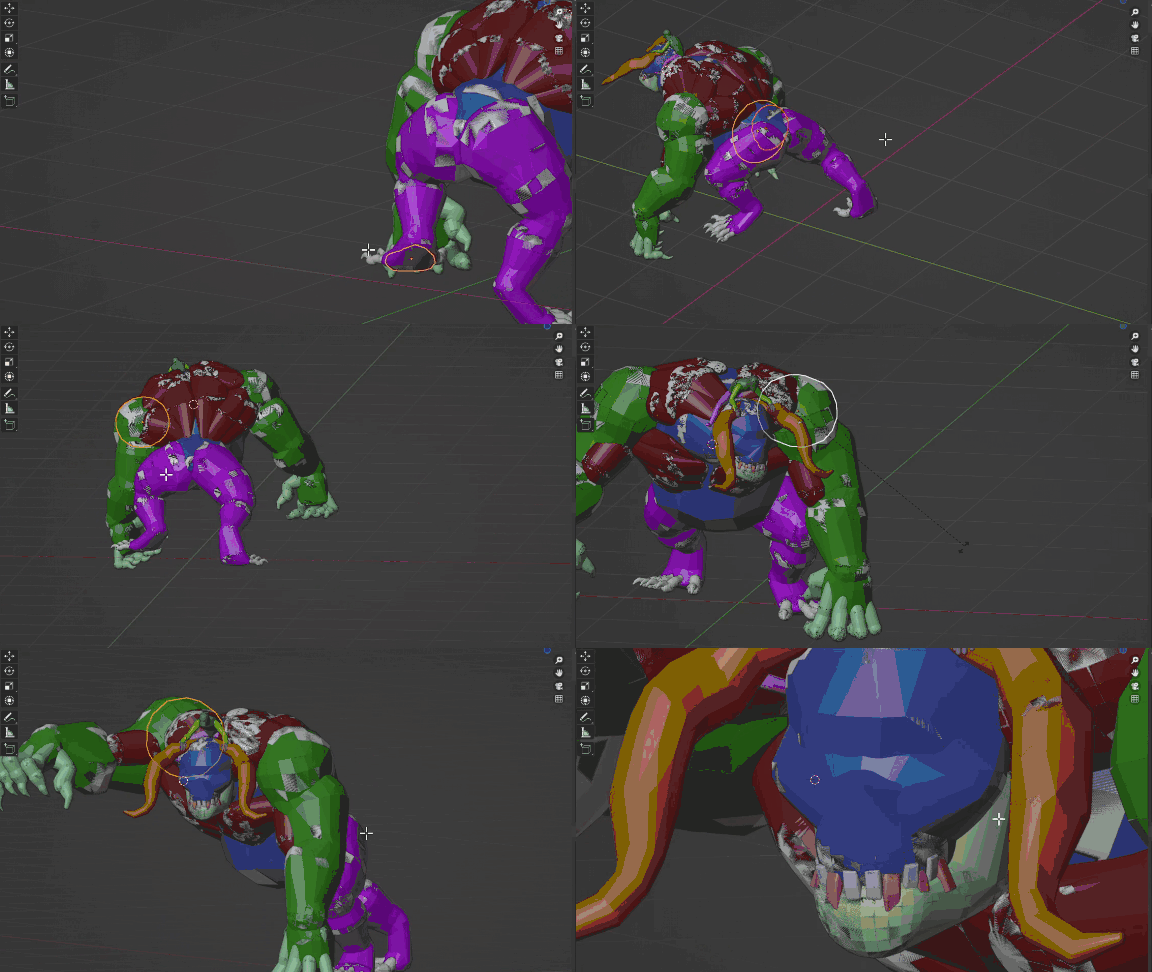
- Generate the complete final model or by parts ready for sculpting.
You will be able to generate the final mesh by doing a remesh of the whole model or parts of it, configuring it as best suits you to then continue the process. Also, you will be able to generate as many meshes as you want, or with as many poses as you want.
You will be able to continue the retopology, sculpting etc. work in Blender or export the mesh to your preferred program.
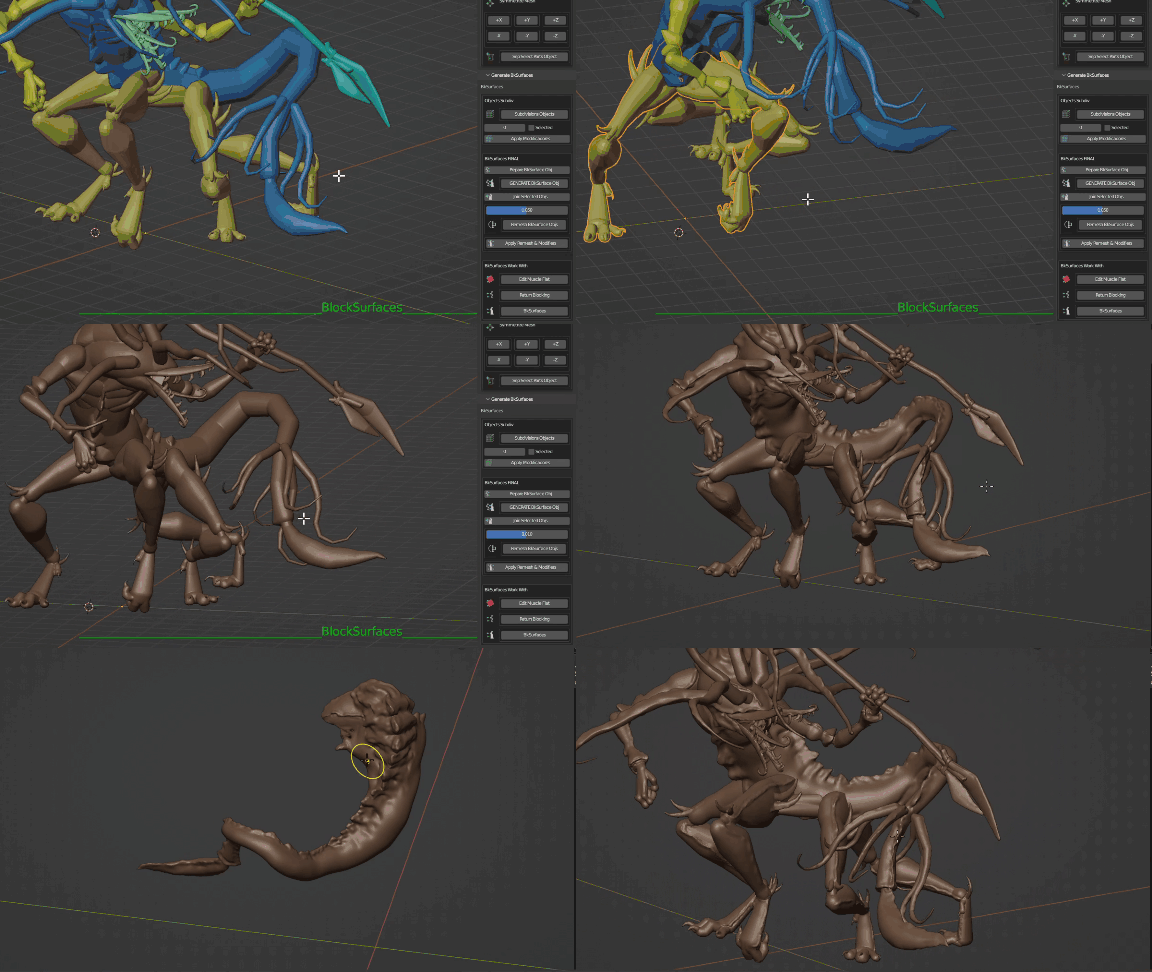
- You can switch between blocking and final mesh work modes in BlockSurfaces.
This will allow you to generate the final model with one pose, go back to the blocking, make modifications, and output another model with a different pose or perhaps other readjusted parts, so you can make all the adjustments you want, all the poses you want, and alternate between working in the different blocking modes or go to sculpting the final model.
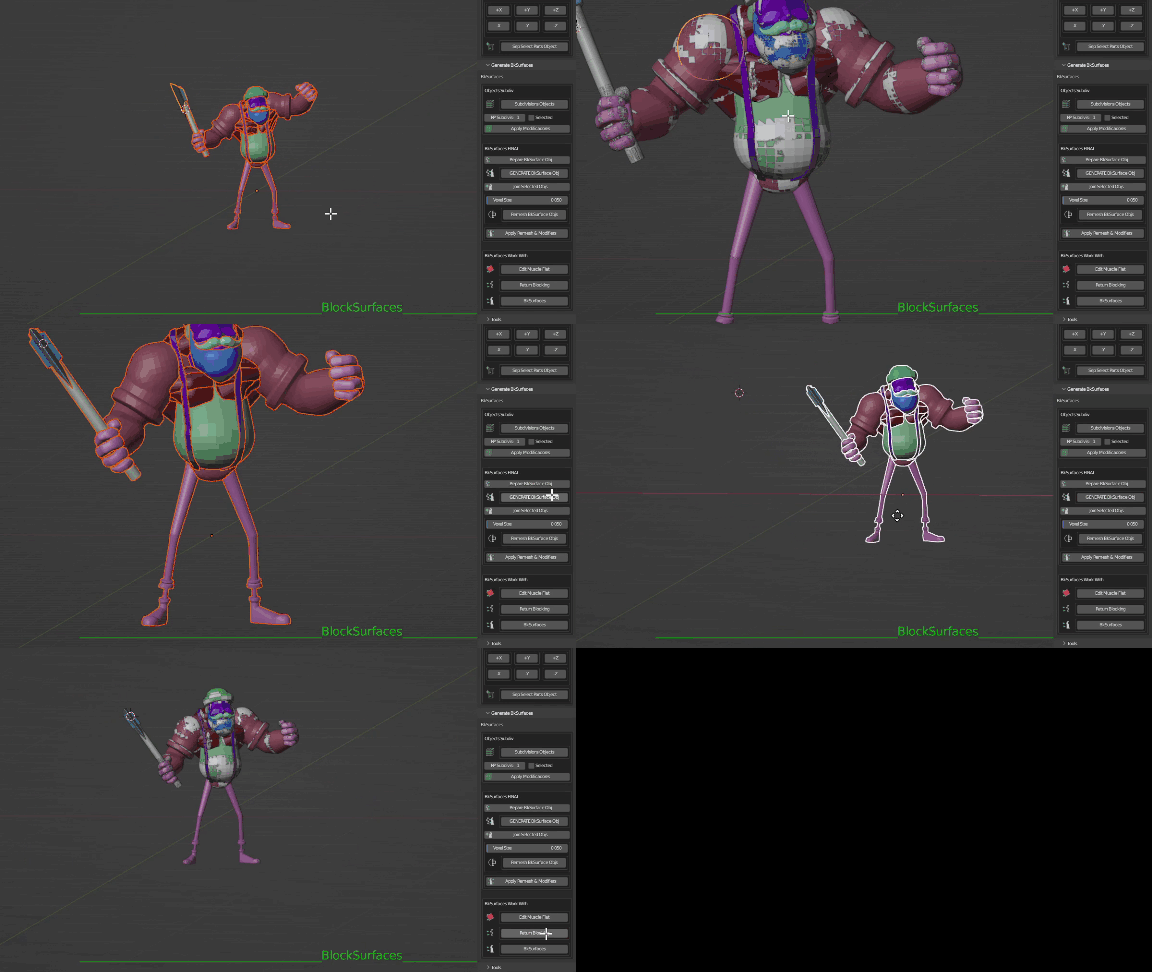
With all these features, BlockSurfaces is the perfect tool to take your work to the next level. Try BlockSurfaces now and transform your character blocking workflow forever!
Updates up to version 1.0.20: Video with the most important updates
- Duplicate branches in the desired position
Duplicate branches in the desired position With a simple click on the keyboard shortcut, you can duplicate the selected object, creating a new branch or if you have a branch selected, it will duplicate it in the position with its sub-branches And if you don’t select anything, it will create a new branch with a sphere object for quick blocking of details on the surface.
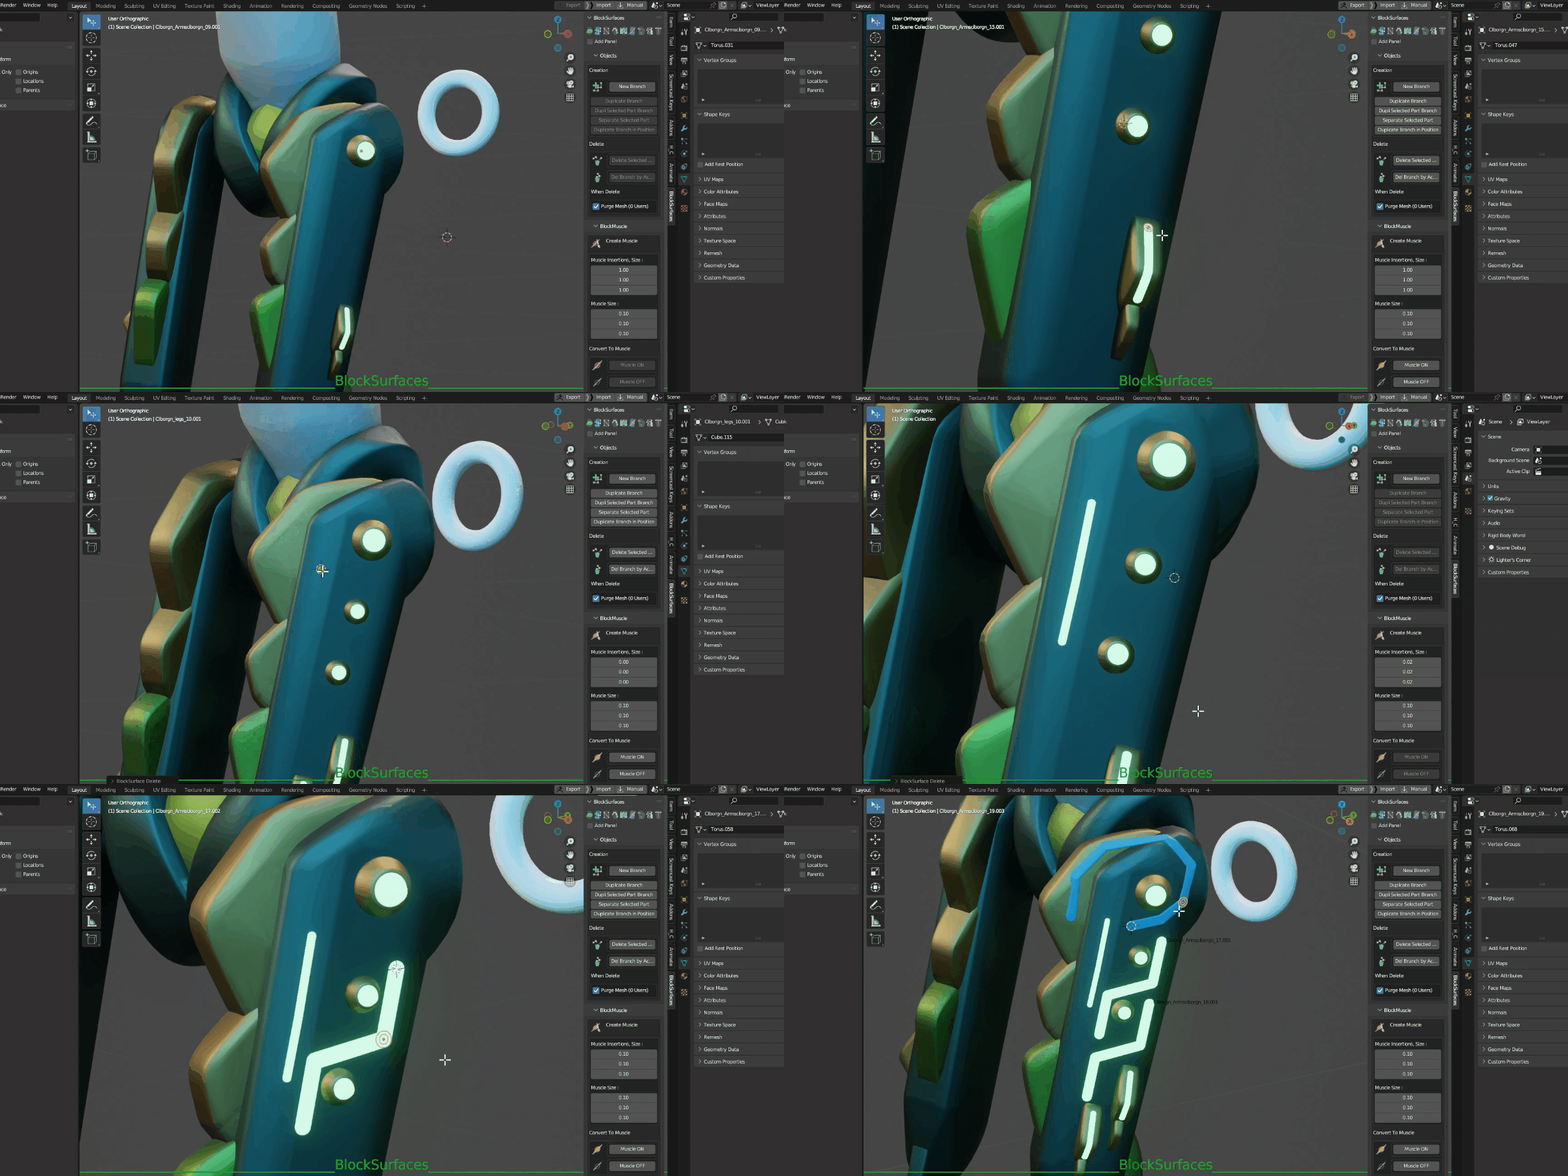
- Duplicate branches with hierarchies
This option will allow you to duplicar branches with hierarchies, for example mirroring a full arm with its fingers, nails or other nested elements, in a way that maintains intact the hierarchical relationships between the different components when mirroring. In this way, the work can be accelerated by having the other mirrored extremity automatically configured on the corresponding axis, without the need to re-establish the hierarchies between its parts manually.
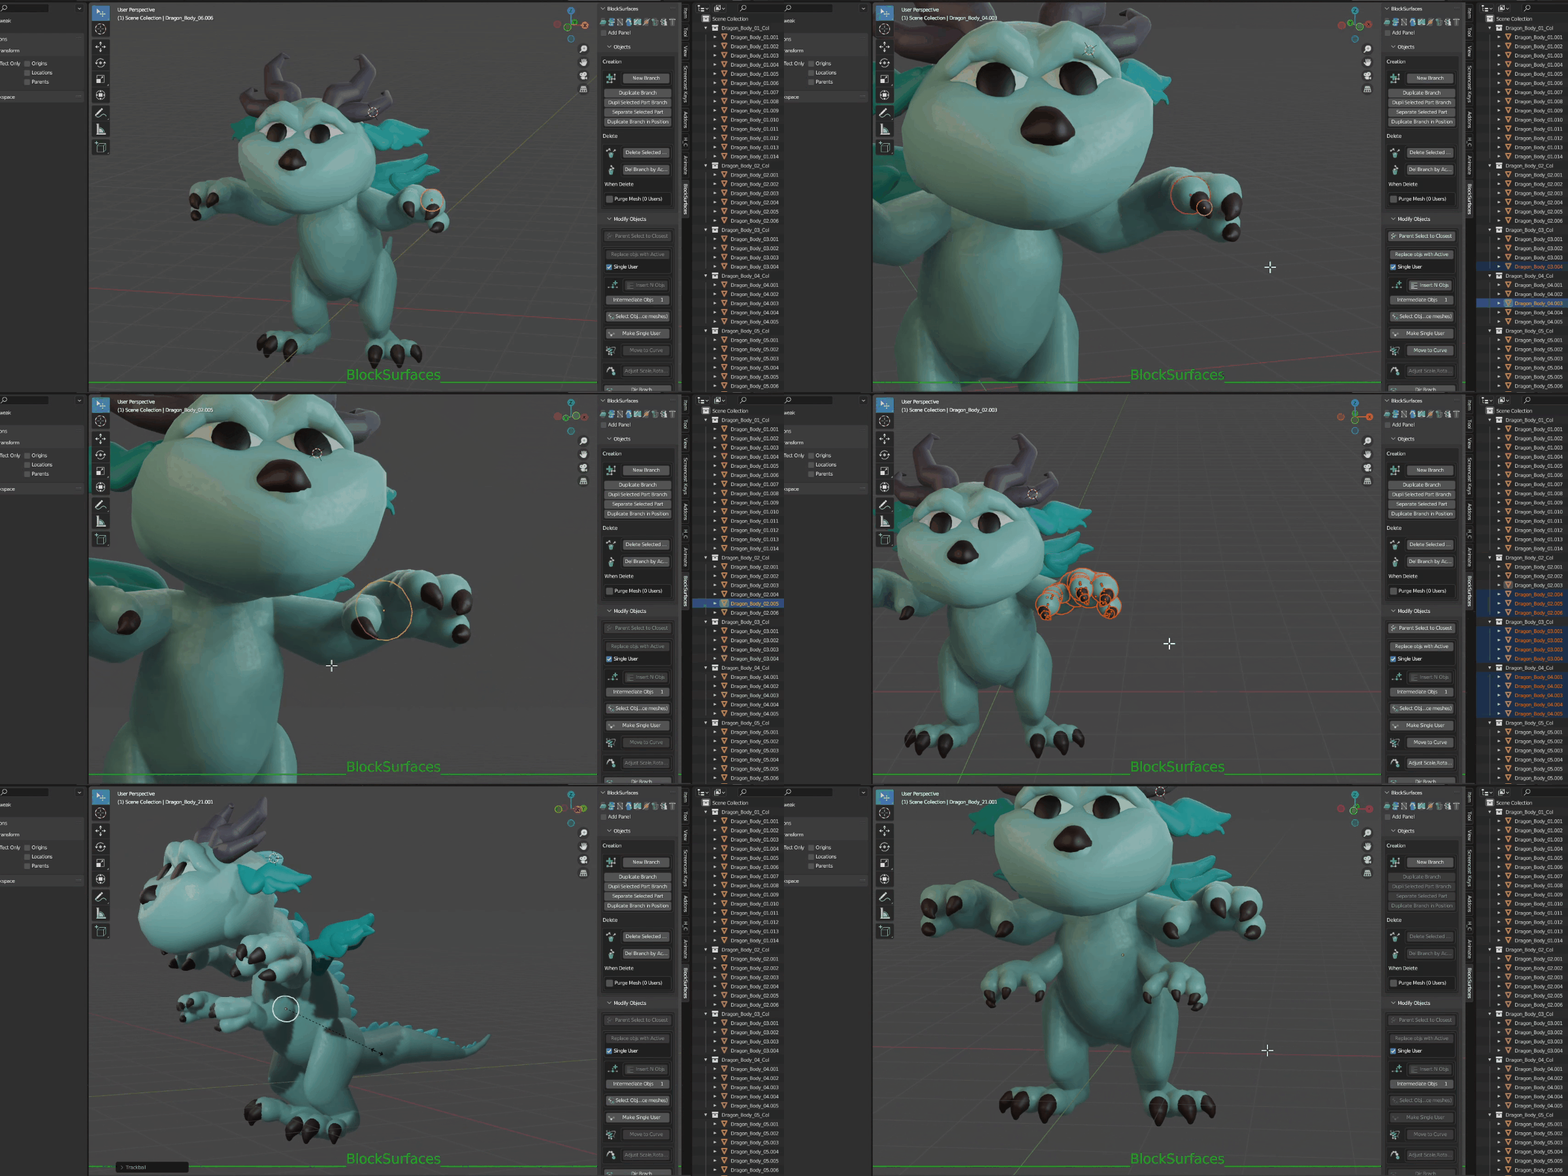
- Mirror branches while maintaining hierarchies
You will also be able to do symmetry of the branches maintaining intact the hierarchical relationships. Just like with the duplicate option, you will have the option to mirror any extremity along with its fingers or other nested elements, and maintain the hierarchies between them.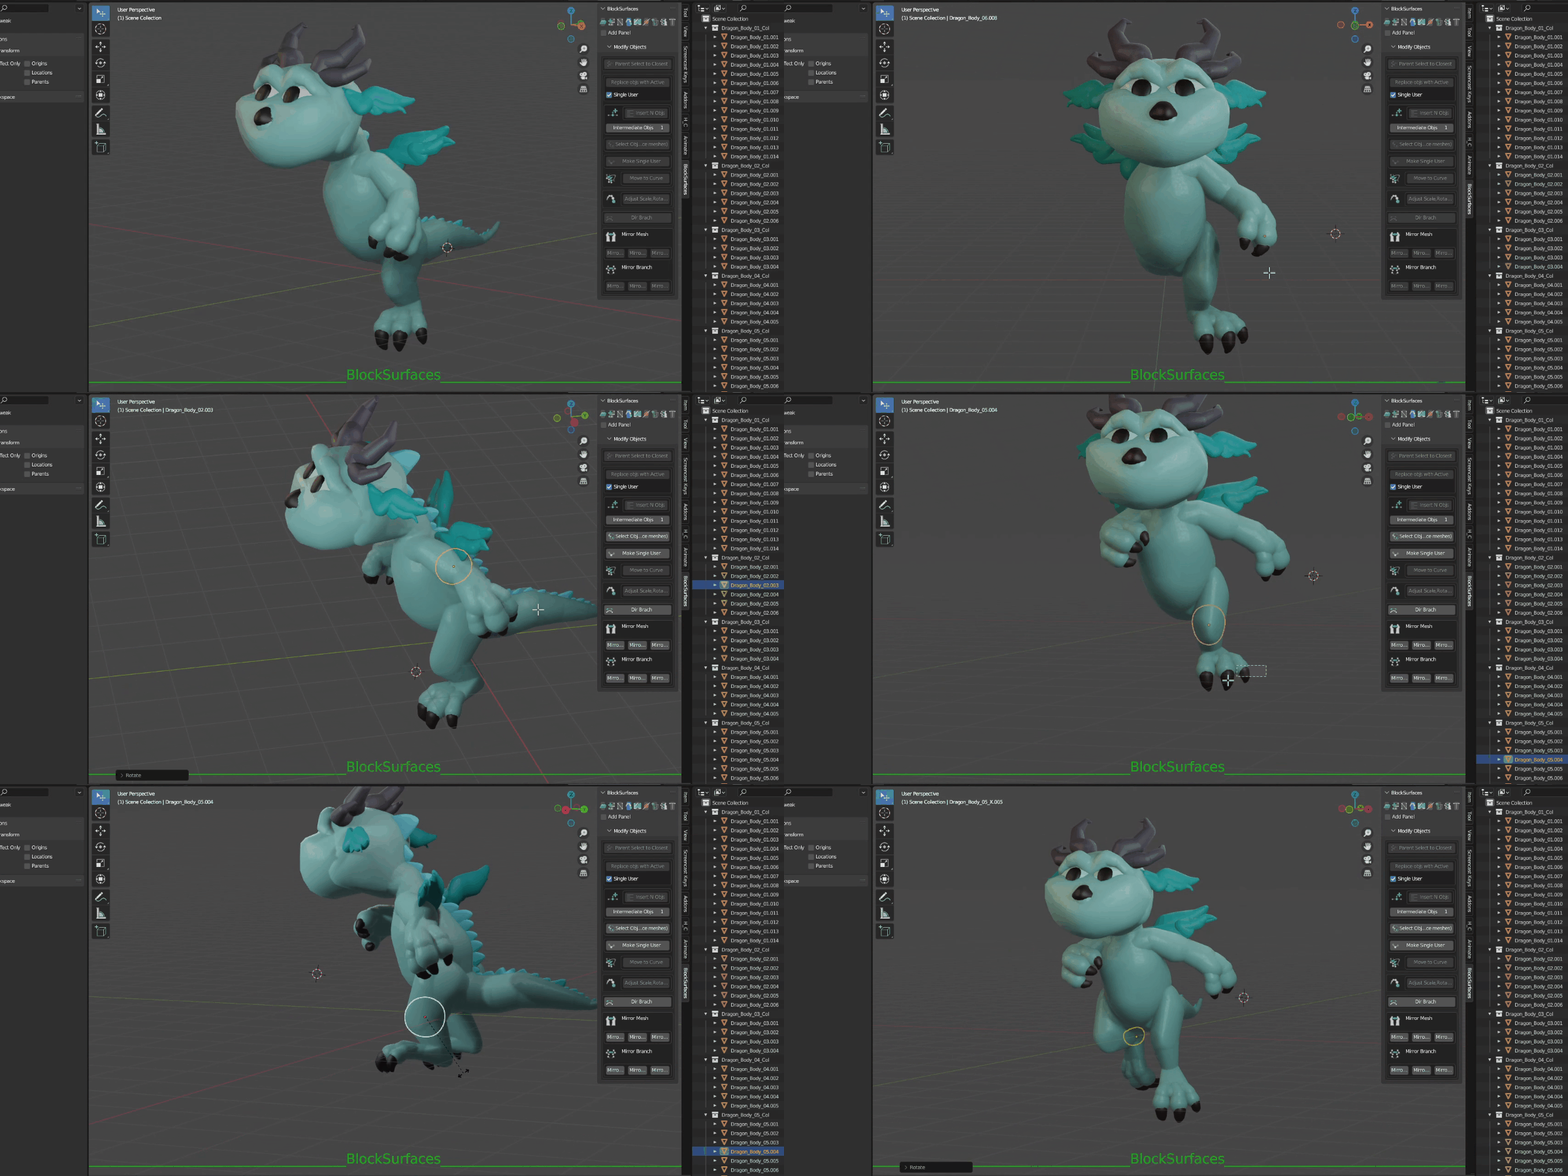
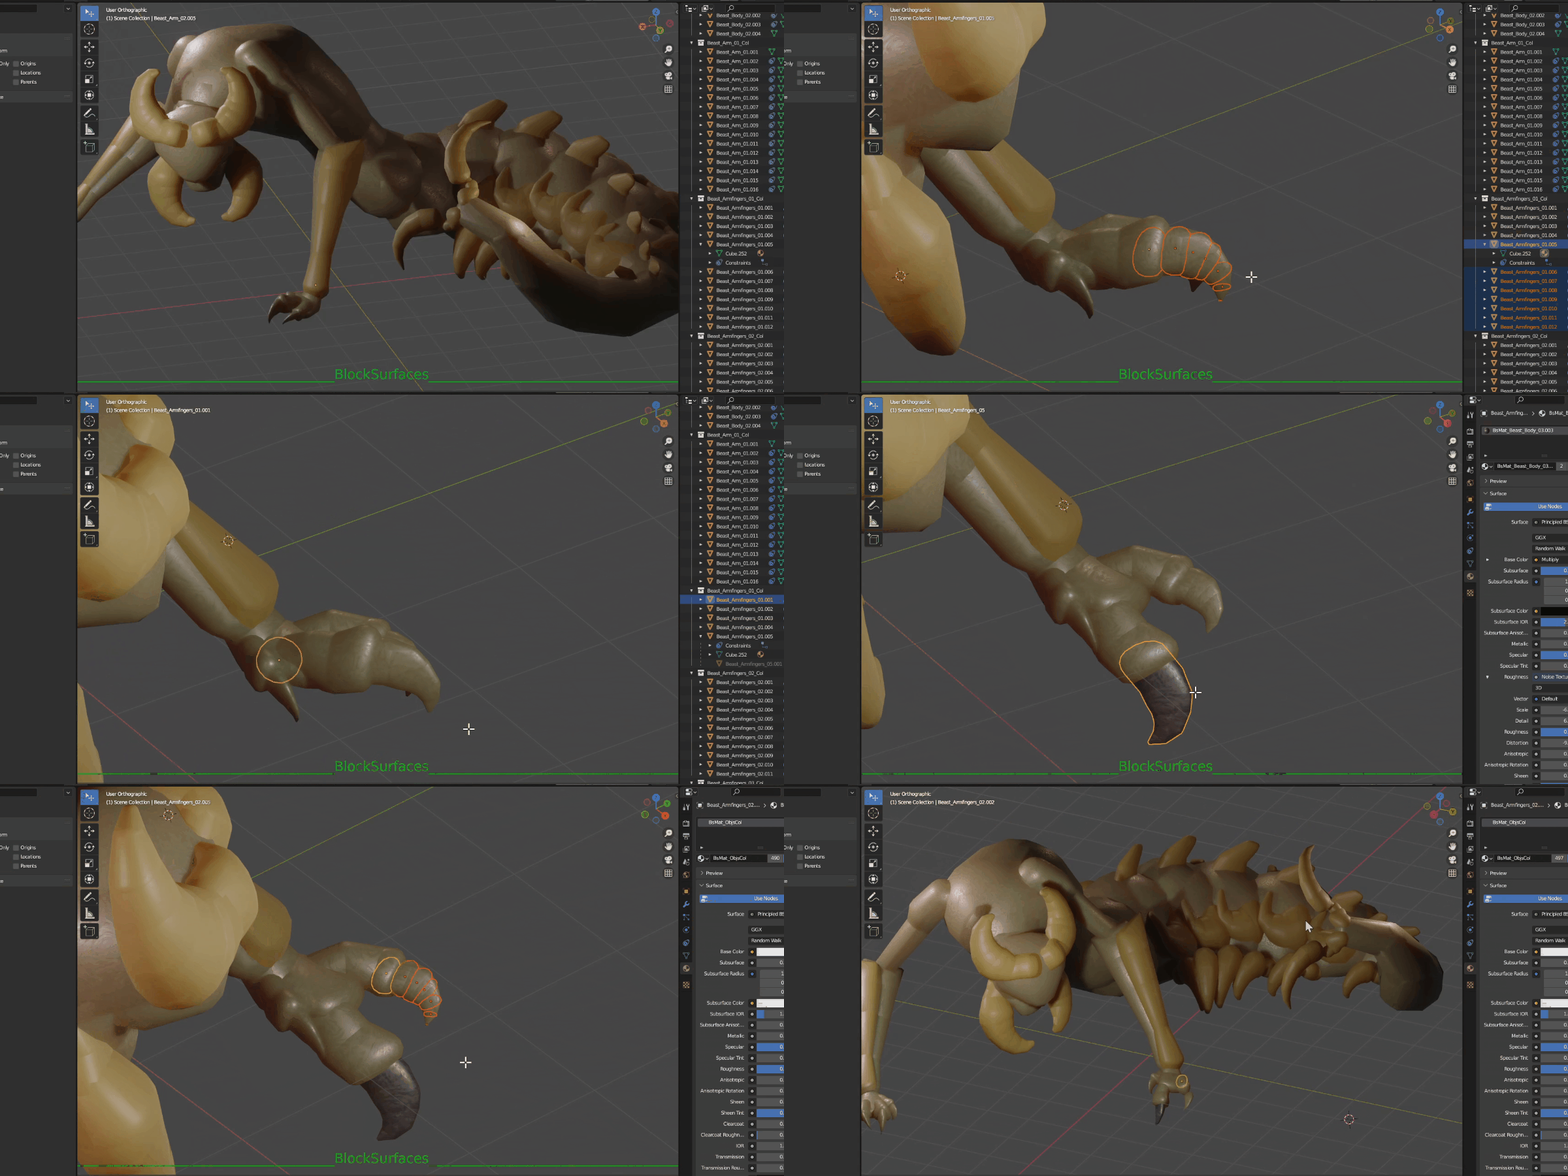
- Separate the selected objects from the branch
- Now you can select the objects with which to create a new branch, separating them from the branch they belong to and creating a new one. You can make this new branch a child of the previous branch or not, for quick configuration of the new branch.
- Pie menu for creating relationships
- Pie menu for creating relationships Now you have a pie menu that may be more comfortable for you to create relationships in different directions within the branch or with others.
- Updates up to version 1.0.015: Video with the most important updates
- Customizable keyboard shortcuts
- Now you can configure the keyboard shortcuts of the addon operators to your liking.
- Configurable and floating panels
- You can change the visible panels, combine them, and use them in a floating way.
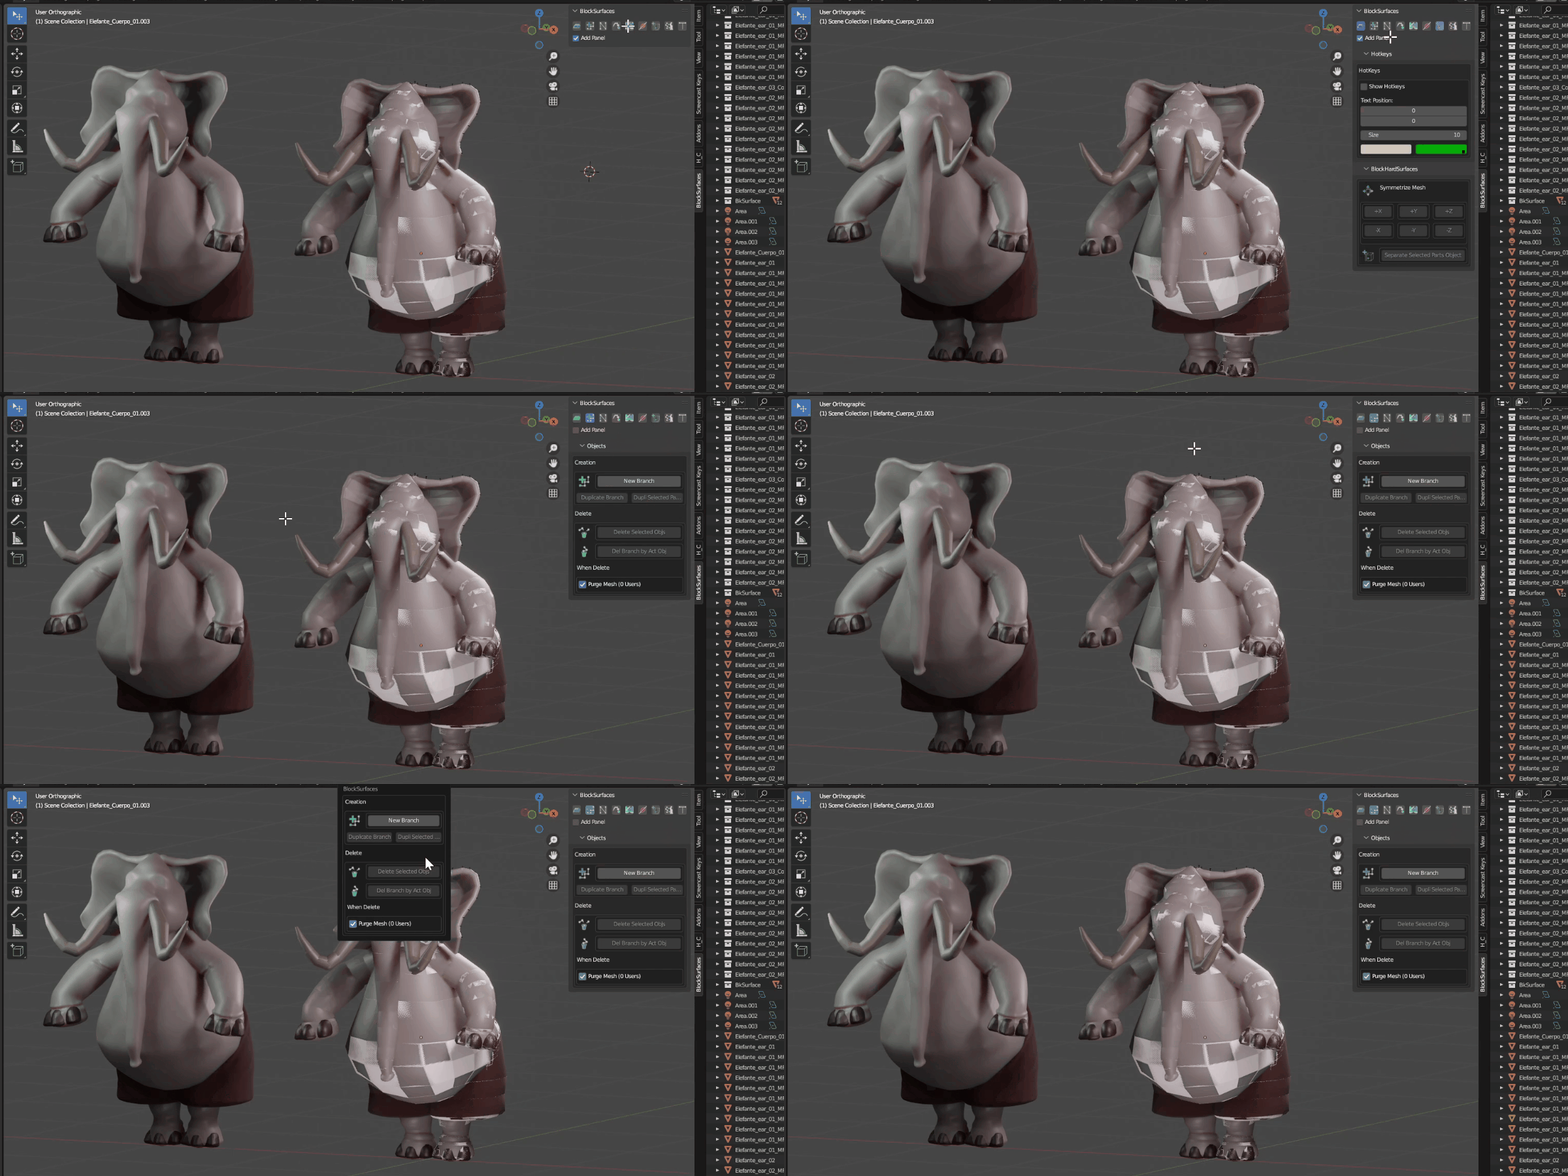
- Branches with materials
-Now you can see the generated branches with materials, copy materials between them, work in material mode or render with lights or however you want. You can work without seeing the interior objects, smooth the generated mesh and have easy access to X-Ray mode. A much more pleasant visualization work mode.
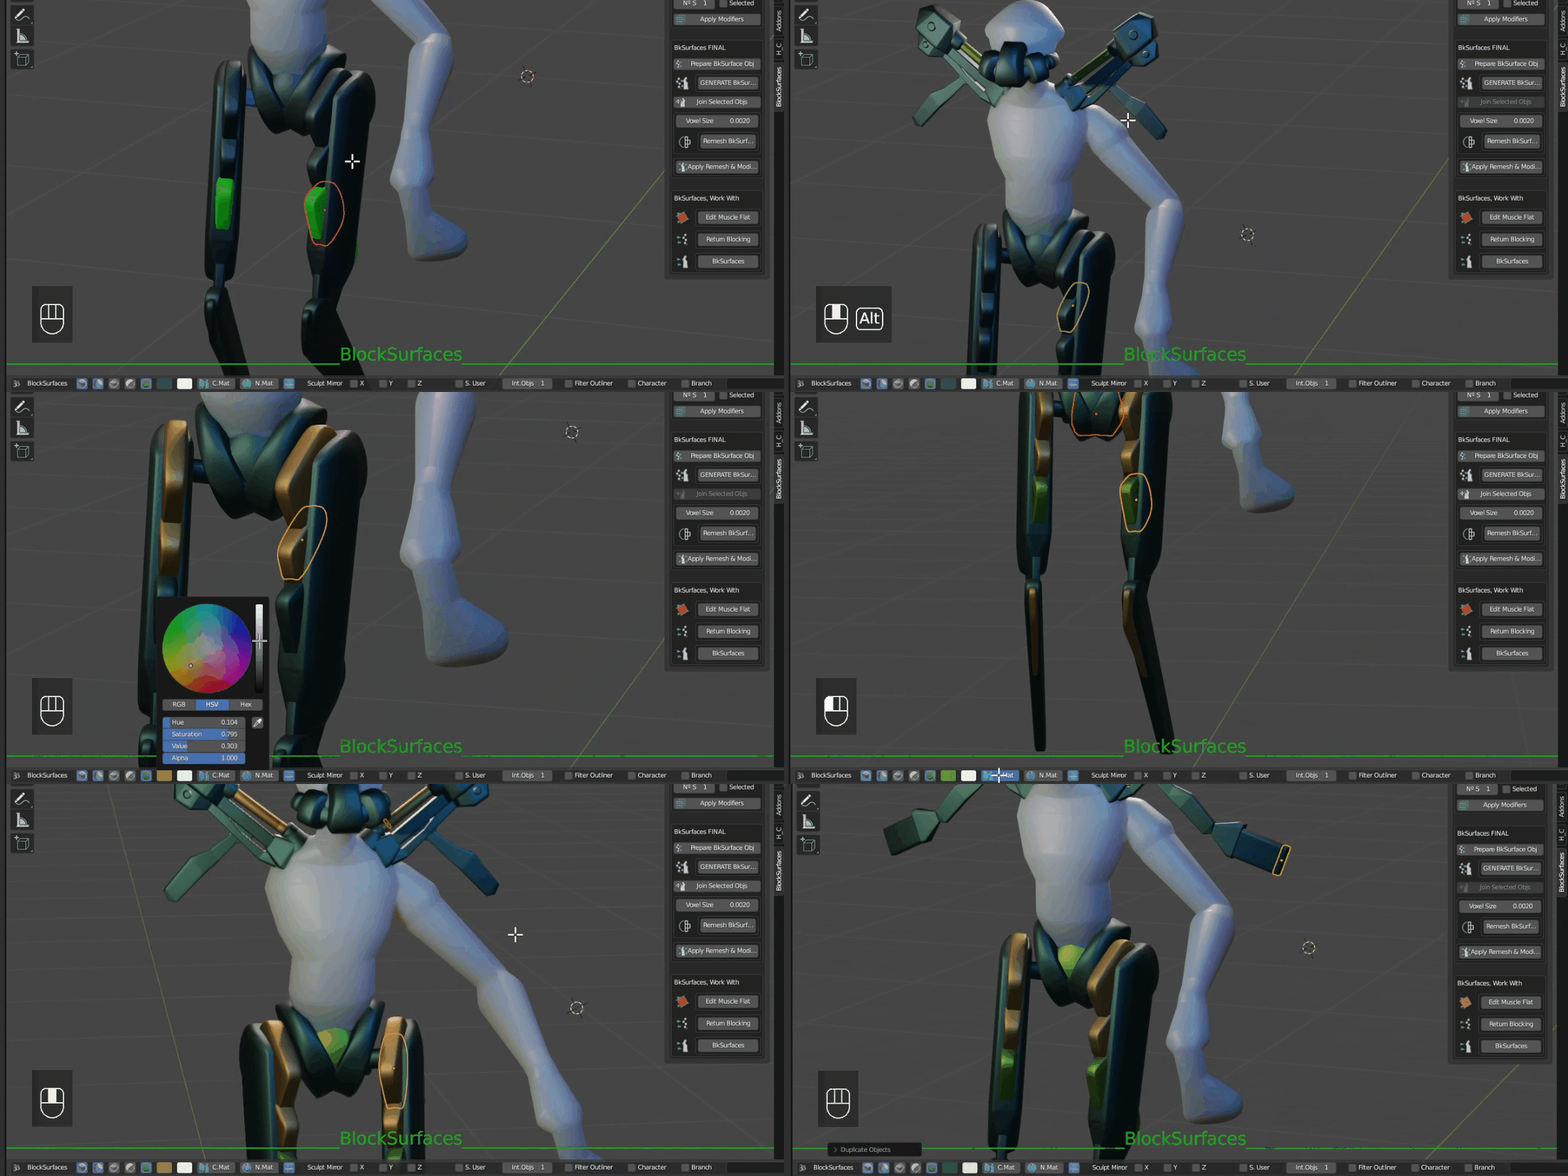
- New pie menu to switch between blocking modes, Select Muscleflat …
-You can quickly switch between the usual blocking mode or work with muscleflat or switch to the generated BkSurfaces meshes quickly.
- New pie menu to switch between blocking modes, Select Muscleflat …
-You can quickly switch between the usual blocking mode or work with muscleflat or switch to the generated BkSurfaces meshes quickly.
- New in version 1.0.025:
- New Size Insert Tool
- More organized and intuitive way to define object and branch sizes when duplicating in position.
- Target to Active Tool
- Orient branches towards an active helper object for quick adjustment of multiple branches simultaneously.
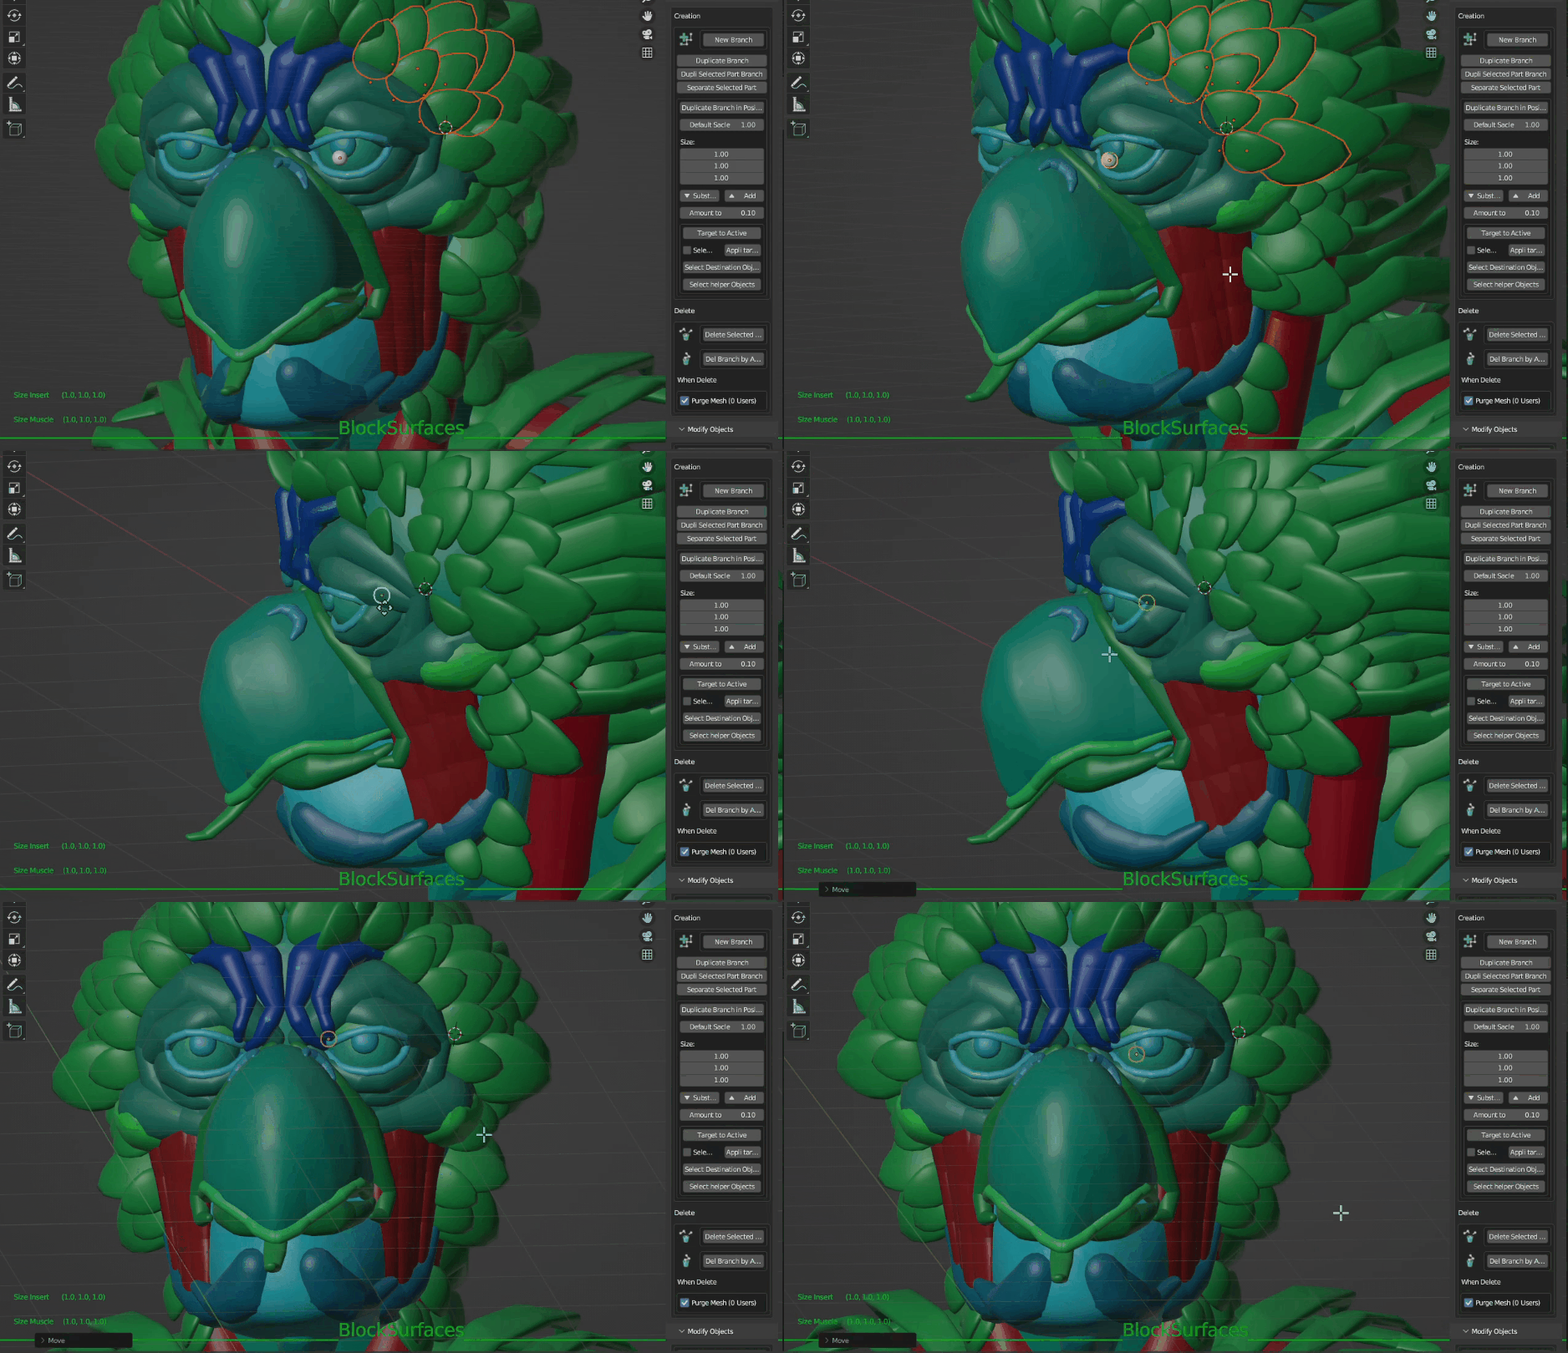
- Reset Scale Tool
- Quickly block objects by averaging their scale across axes.
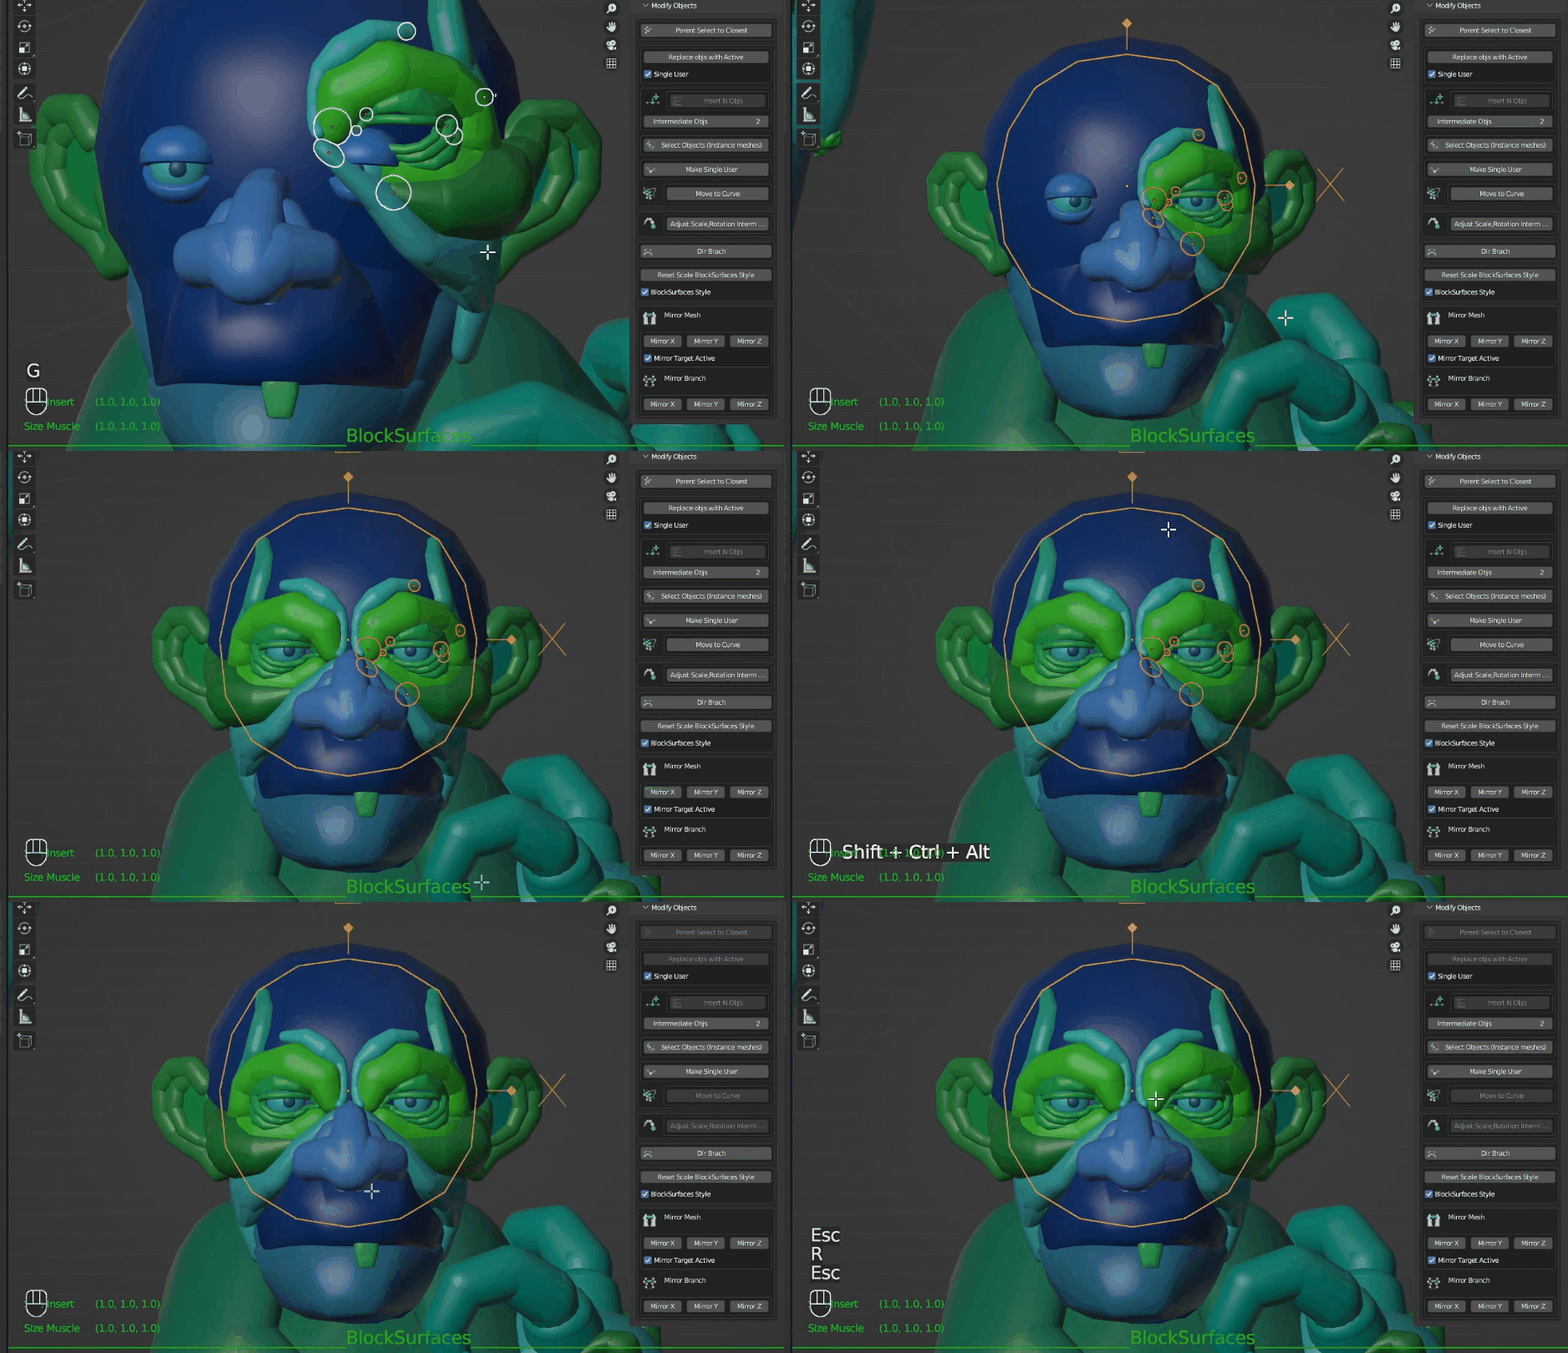
- Mirror Target to Active
- Rapidly mirror multiple branches by setting the active object as the mirror target, avoiding object-by-object target changes.
- New Branch Sizing Tool
- Faster, more intuitive way to define BlockMuscle branch objects.
- Readjust Muscle Size Tool
- Adjust intermediate muscle objects.
- Bevel Tool
- Small Tool to simulate bevels on hard surface branches.
- Delete Animation Keys Tool
- Remove animation keys from selected objects.
- Bs to Objs & Objs to Bs Tool
- Generate final mesh from branch objects.
- Duplicate & Mirror Branches with Hierarchy
- Accelerated branching duplication and mirroring.
- Show Active Axes
- Improved active object axis visibility.
- And many more improvements.
- New video manual covering the full Addon
- This new video manual thoroughly reviews each panel and option within the addon.It also includes an almost hour-long tutorial that provides an overview of the addon's capabilities while step-by-step creating a character from start to finish.
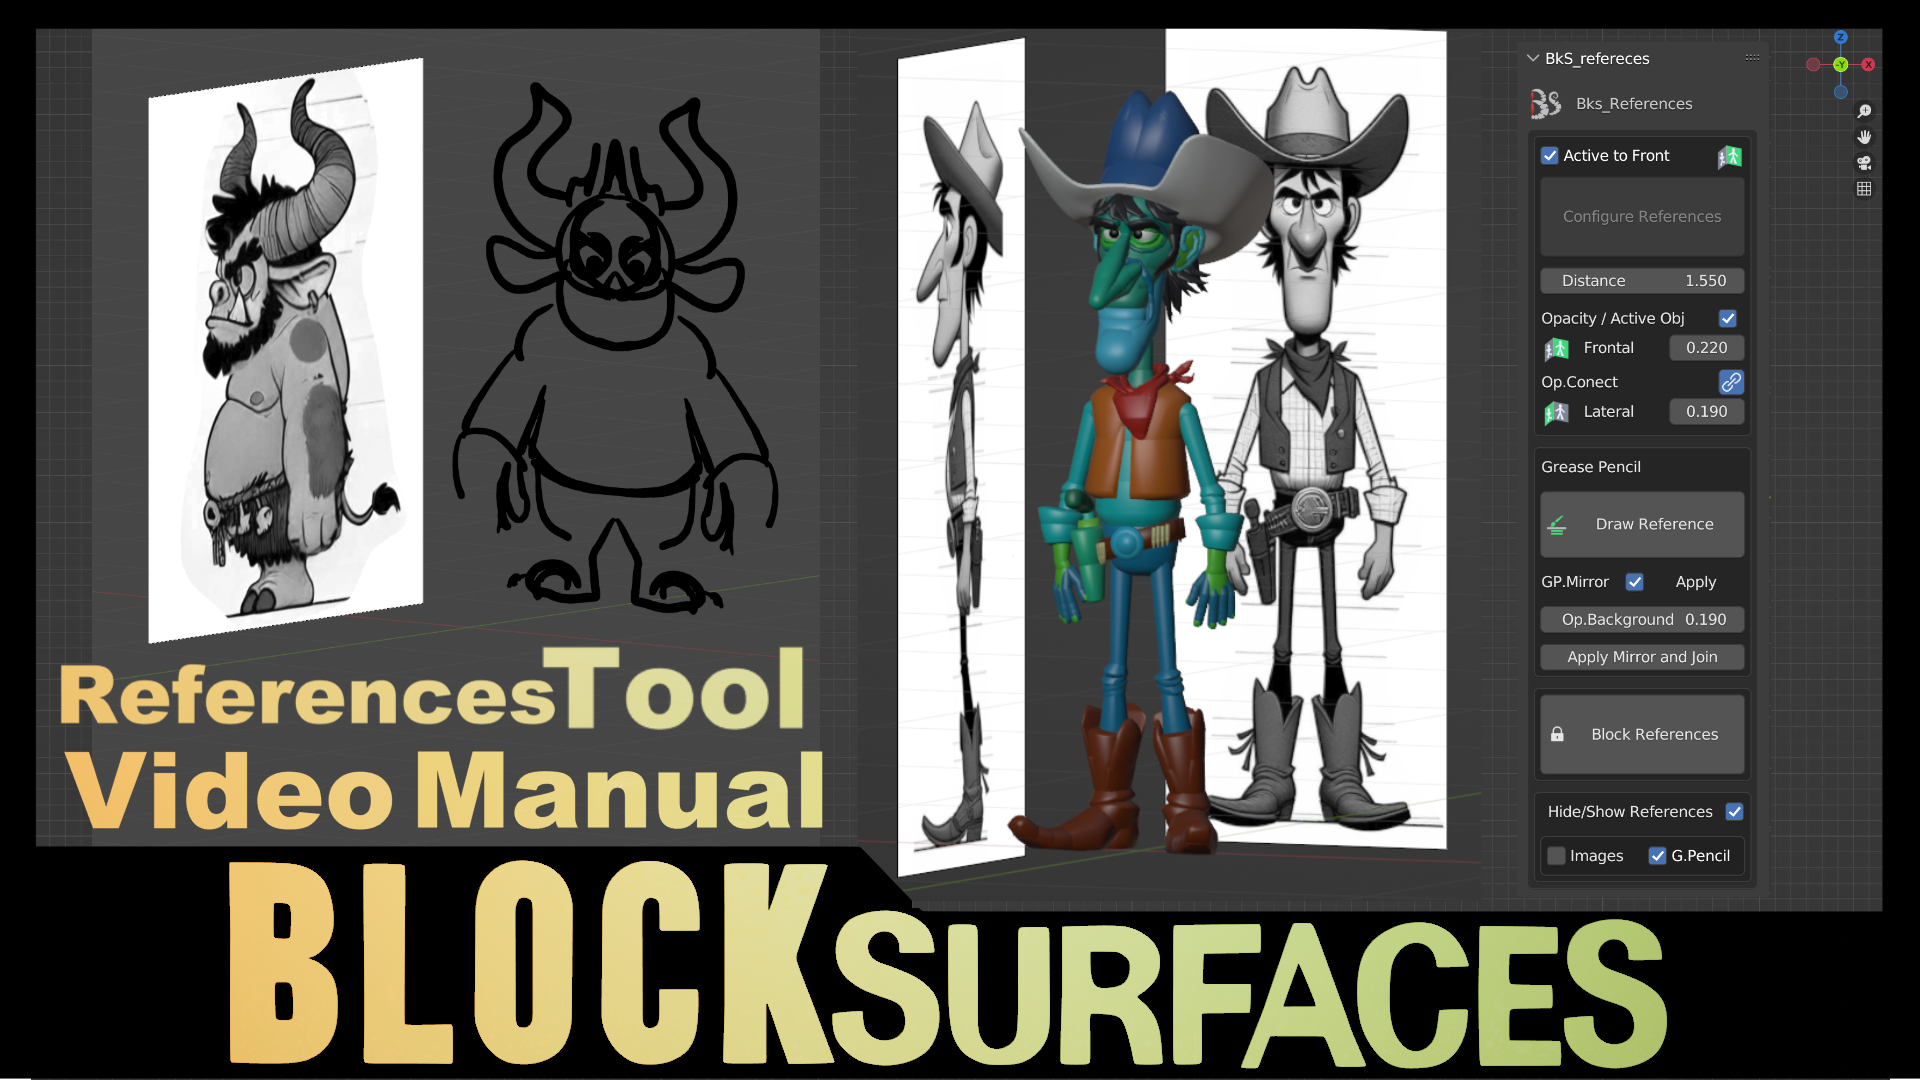
Blocksurfaces Video Manual V 1.0.25
Blocksurfaces 1.0.191 (new features)
Parent Branch indicator: Shows the parent of the active branch
Automatic Hierarchy in branch: Automatically creates hierarchy within the active branch
Smart Parenting: Will make the parent of the branch the child of the active object, accelerating the process of creating hierarchies between branches
Added Parent to Active option in mirror mesh: Faster mirroring of branches and already parented to the active object
Facesets for objects that join in remesh. Creates facesets for each branch when joining them and be able to handle the facesets after remesh in sculpting
Join By Material: In final mesh generation joins the branches based on the material they have .
New Character Selection: Quick selection of all branches of the character
New Work modes:
Rest Zone: Resting place for branches that are not being used temporarily and a more comfortable and clean way to work
Simulate Rig:You will be able to add or remove the objects that will be used for posing, making it cleaner and faster to pose characters without interference from the rest of the objects in each branch
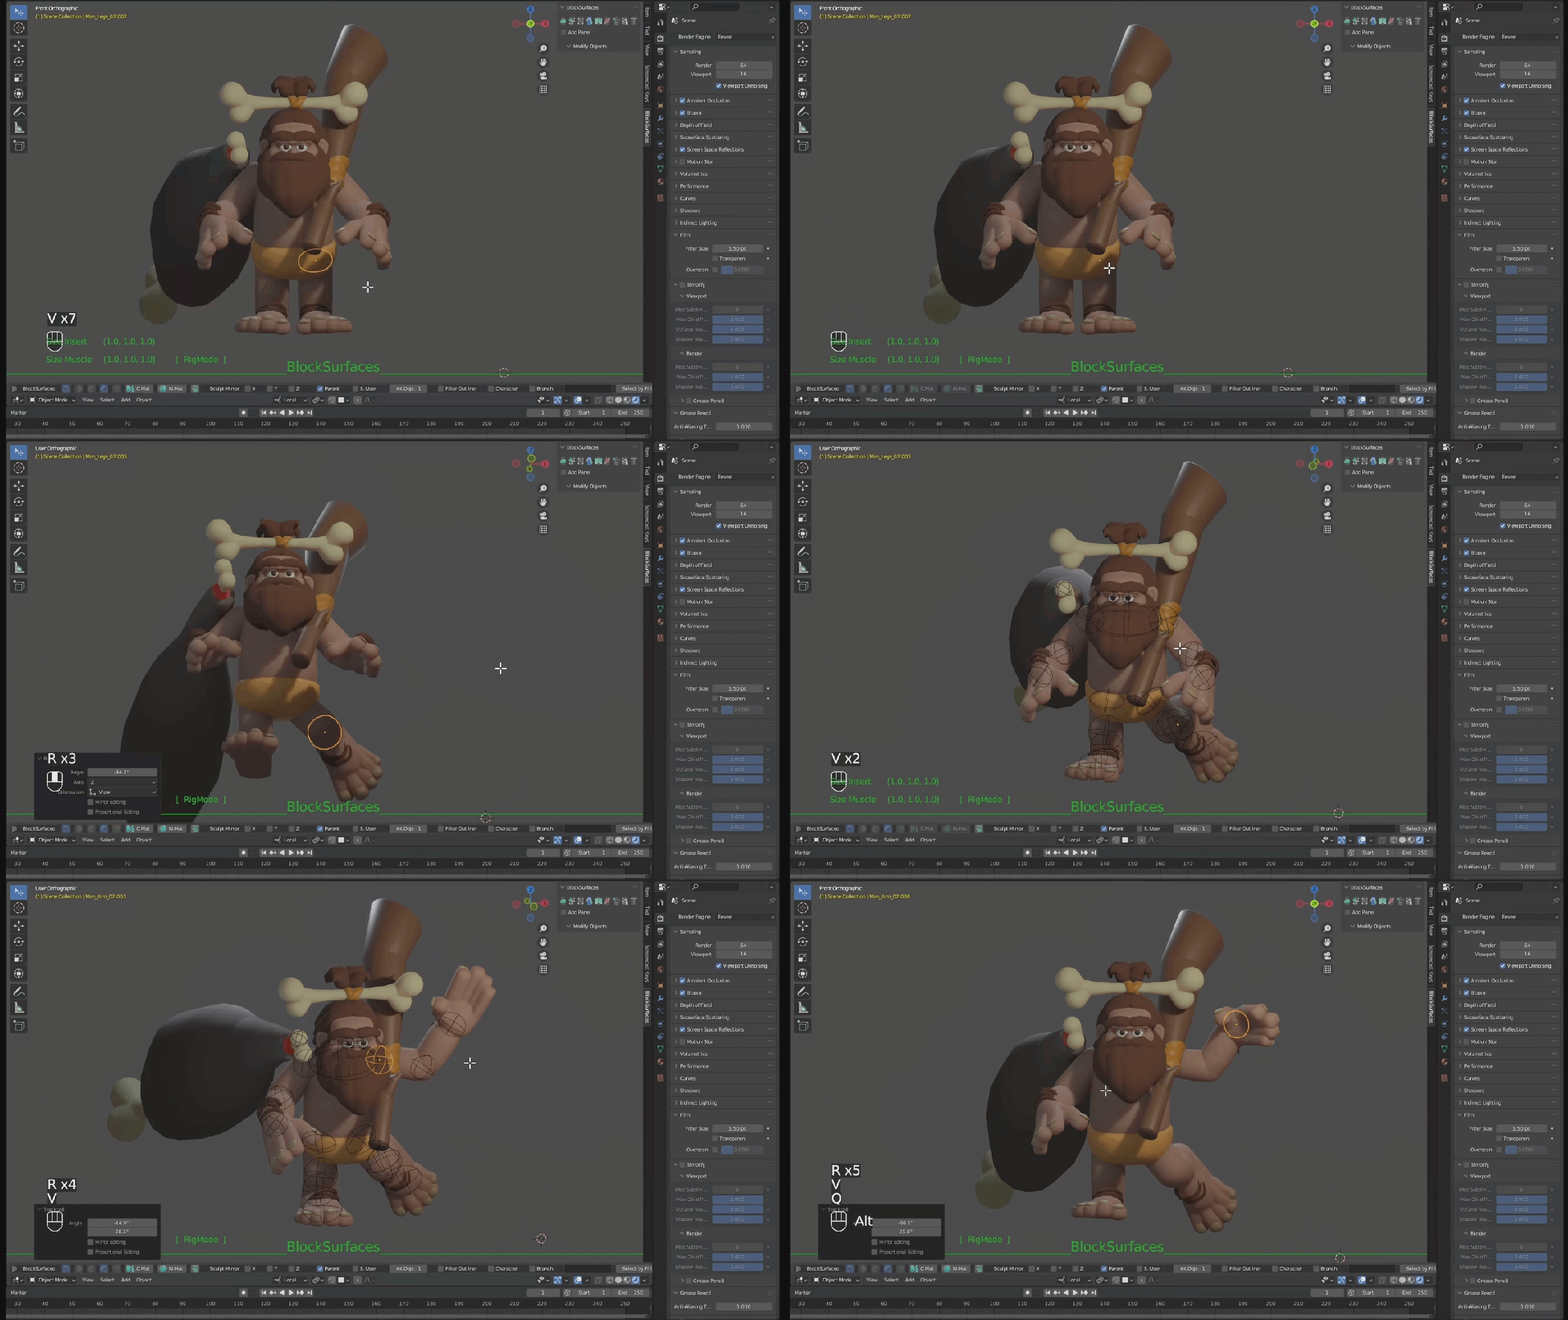
Custom Zone:We will be able to create as many final models as we want and use them along with the branches in blocking mode
Collection colors:Colors to better distinguish the purpose of each collection
Useful links:
Time lapse testing V 1.0.191 Santa and Elf
General overview V 1.0.025 : Blocksurfaces General Overview
Last updates V 1.0.020 : Video with the most important updates 1.0.20
Youtube Channel: https://www.youtube.com/@AitToolsB/playlists
Manual English: https://aittoolsb.wixsite.com/blocksurfacesen
Manual Español: https://aittoolsb.wixsite.com/blocksurfaceses
Support: [email protected]
I would like to express my gratitude to the creators of the Serpens addon, https://blendermarket.com/products/serpens
without whom it would have been impossible to create this addon, and also to their amazing community,
who have been so patient and helped me so much.
Thank you, guys!
Discover more products like this
muscular anatomy sculpting in Blender Sculpt character sculpting sculpting tools 3dgame low-poly modeling 3d modeling blender animation hard surface modeling winter24 modeling workflow zbrush game-art ZBrush modeling Game Blender sculpting high-poly modeling spring24 creature anatomy organic modeling sculpting techniques character anatomy creature posing digital art workflow. sculpting workflow character posing 3dsculpt character modeling techniques blender modeling digital sculpting


