Inverse Lock Bone
What is Inverse Lock Bone:
Inverse Lock Bone is a blender addon to lock a bone (e.g. toe bone) by recalculating something (e.g. the location of the master/root bone). In other words, given a location for the bone that needs to be locked, it can recalculate the location of the master/root bone to keep the Lock Bone locked. It is very helpful for MoCap which needs to lock the foot and recalculate the location of the master/root bone. If the character always has only one foot (left or right) on the ground during the animation, you can use this addon to complete the character's movement throughout the animation. You just need to switch the locked bone and make some adjustments where the character switches his/her supporting foot. If the non-supporting foot sinks into the floor, you also have to do some adjustments to it. For the situations where both feet of the character are off the ground during the animation, you can move the character however you like. If you want to lock both feet, in addition to this tool, you also need Rigify, or Auto-Rig Pro, or something like that. The specific steps are mentioned later.
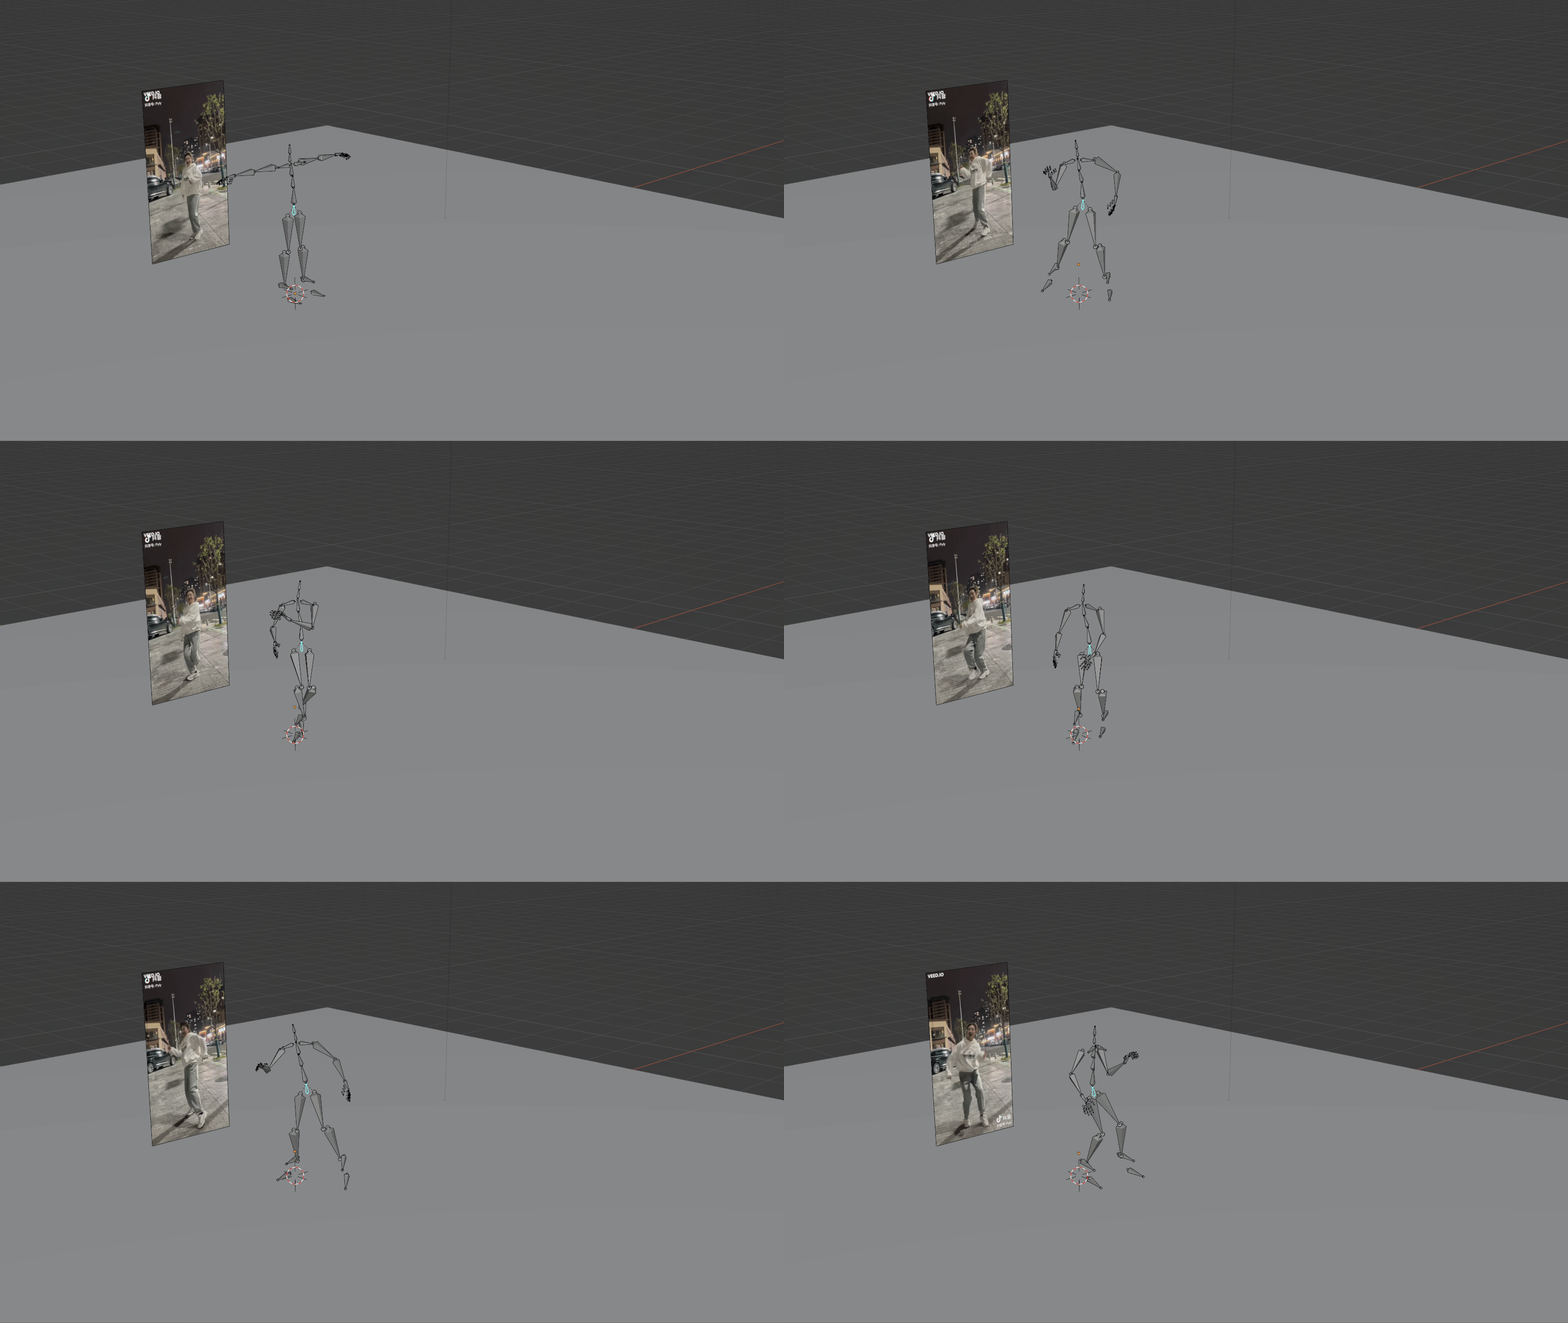
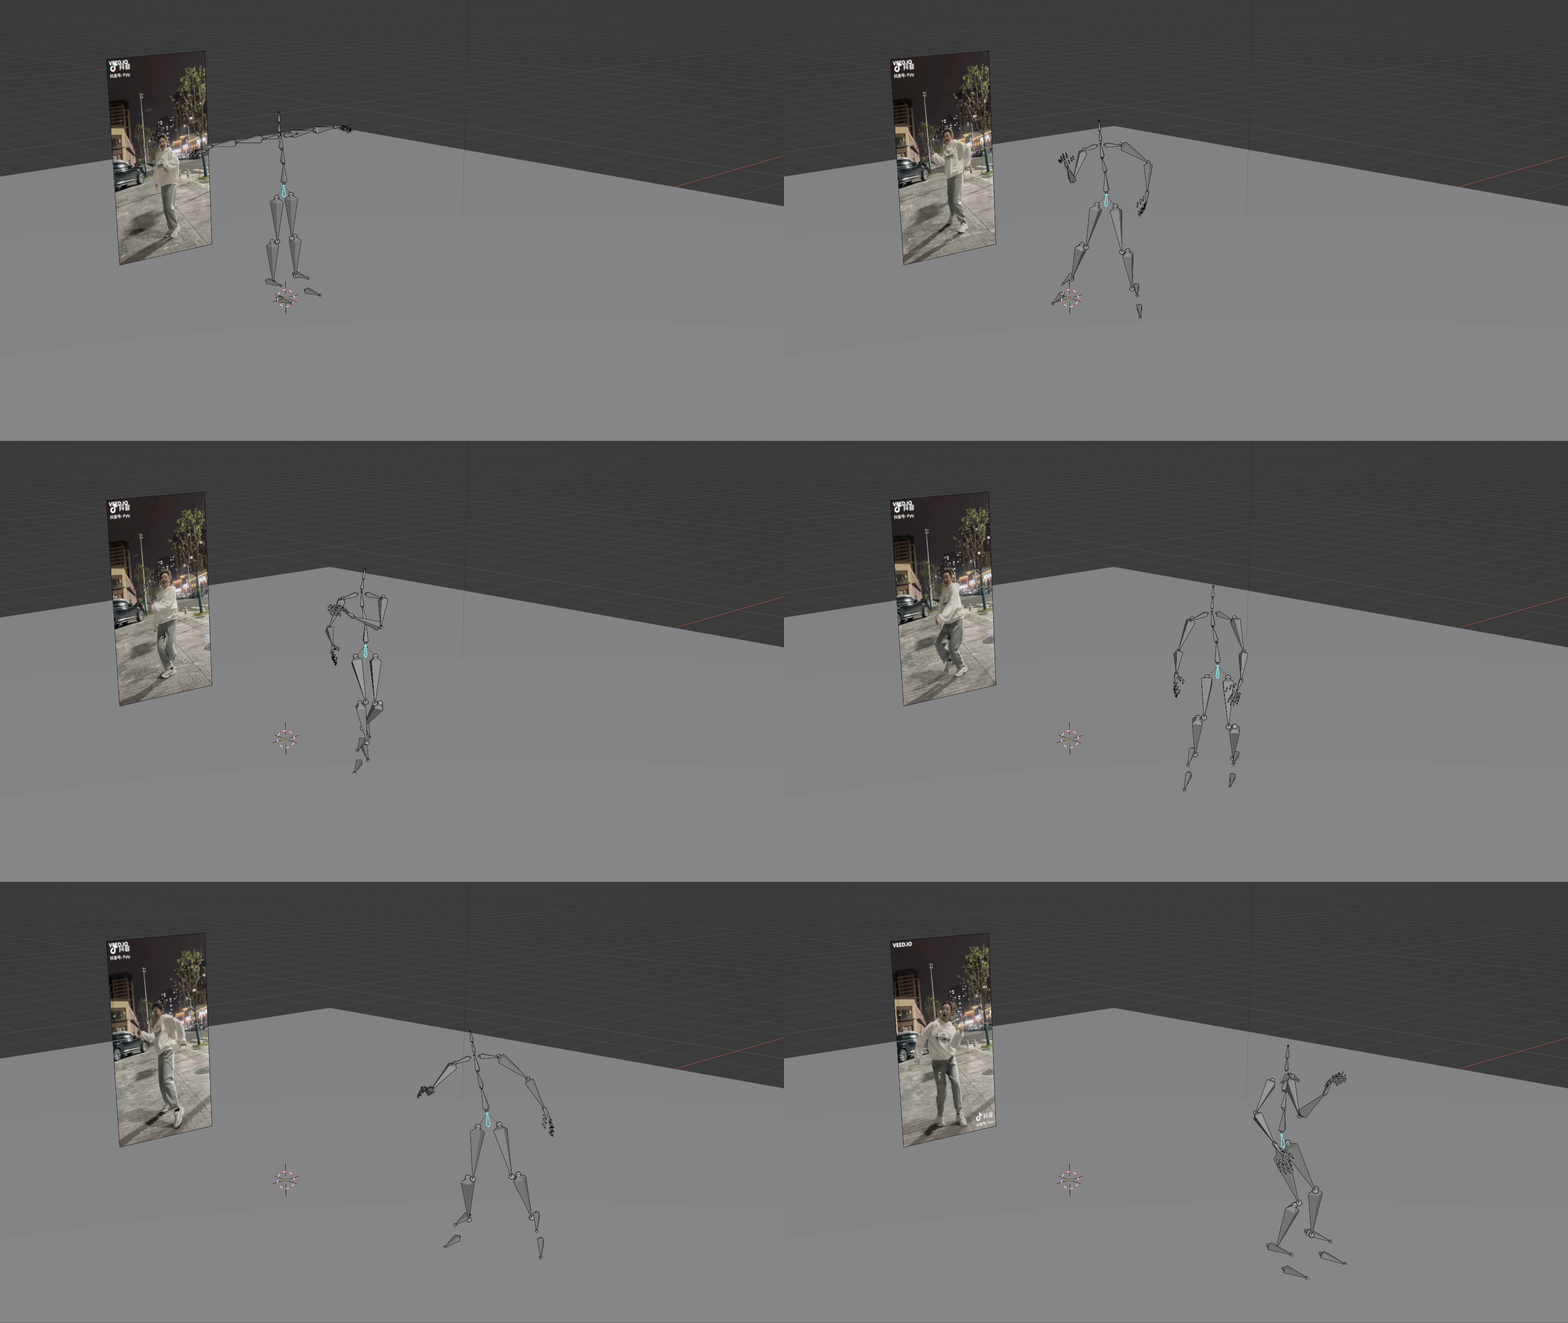
Here is a clip from AI MoCap (plask.ai), the following two gifs show the difference between before and after processing.
Before: The master/root bone did not move as we expected, and the foot is gliding/sliding.
After: The tail of the toe bone is locked in each step, the location of the master/root bone is recalculated.
Addon UI (In pose mode, bone properties):
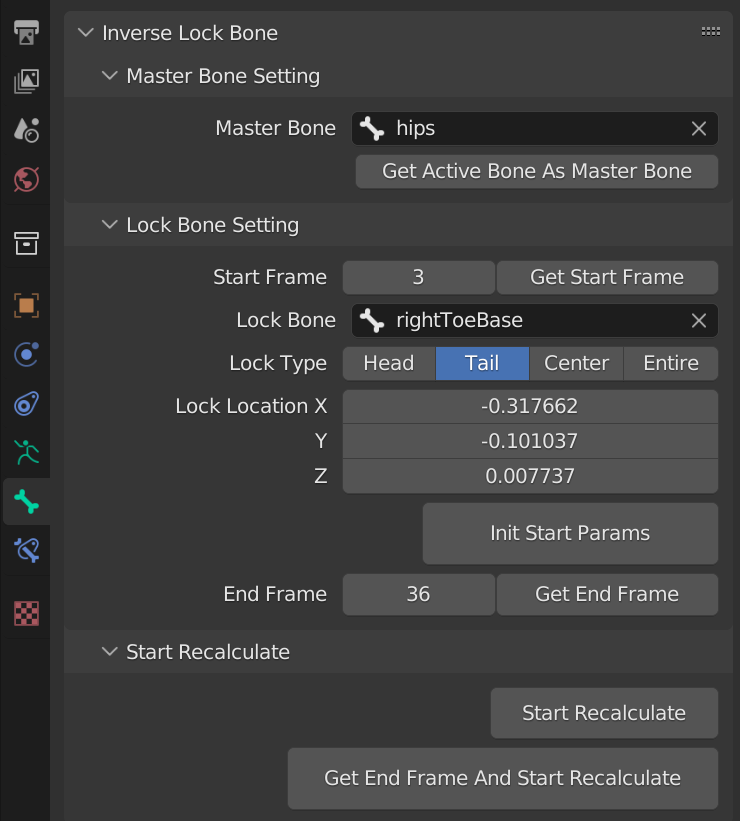
There are four Lock Types: the Head point of the bone, the Tail point of the bone, the Center point of the bone, and the Entire bone. The first three Lock Types will only recalculate the location of the master/root bone. The last one, namely Entire, will also recalculate the rotation of the Lock Bone except recalculating the location of the master/root bone. After recalculating, each frame of the location of the master/root bone will be a keyframe. You can decimate them in the Graph Editor if you want. The same to the rotation of the Lock Bone if the lock type is Entire.
Example:
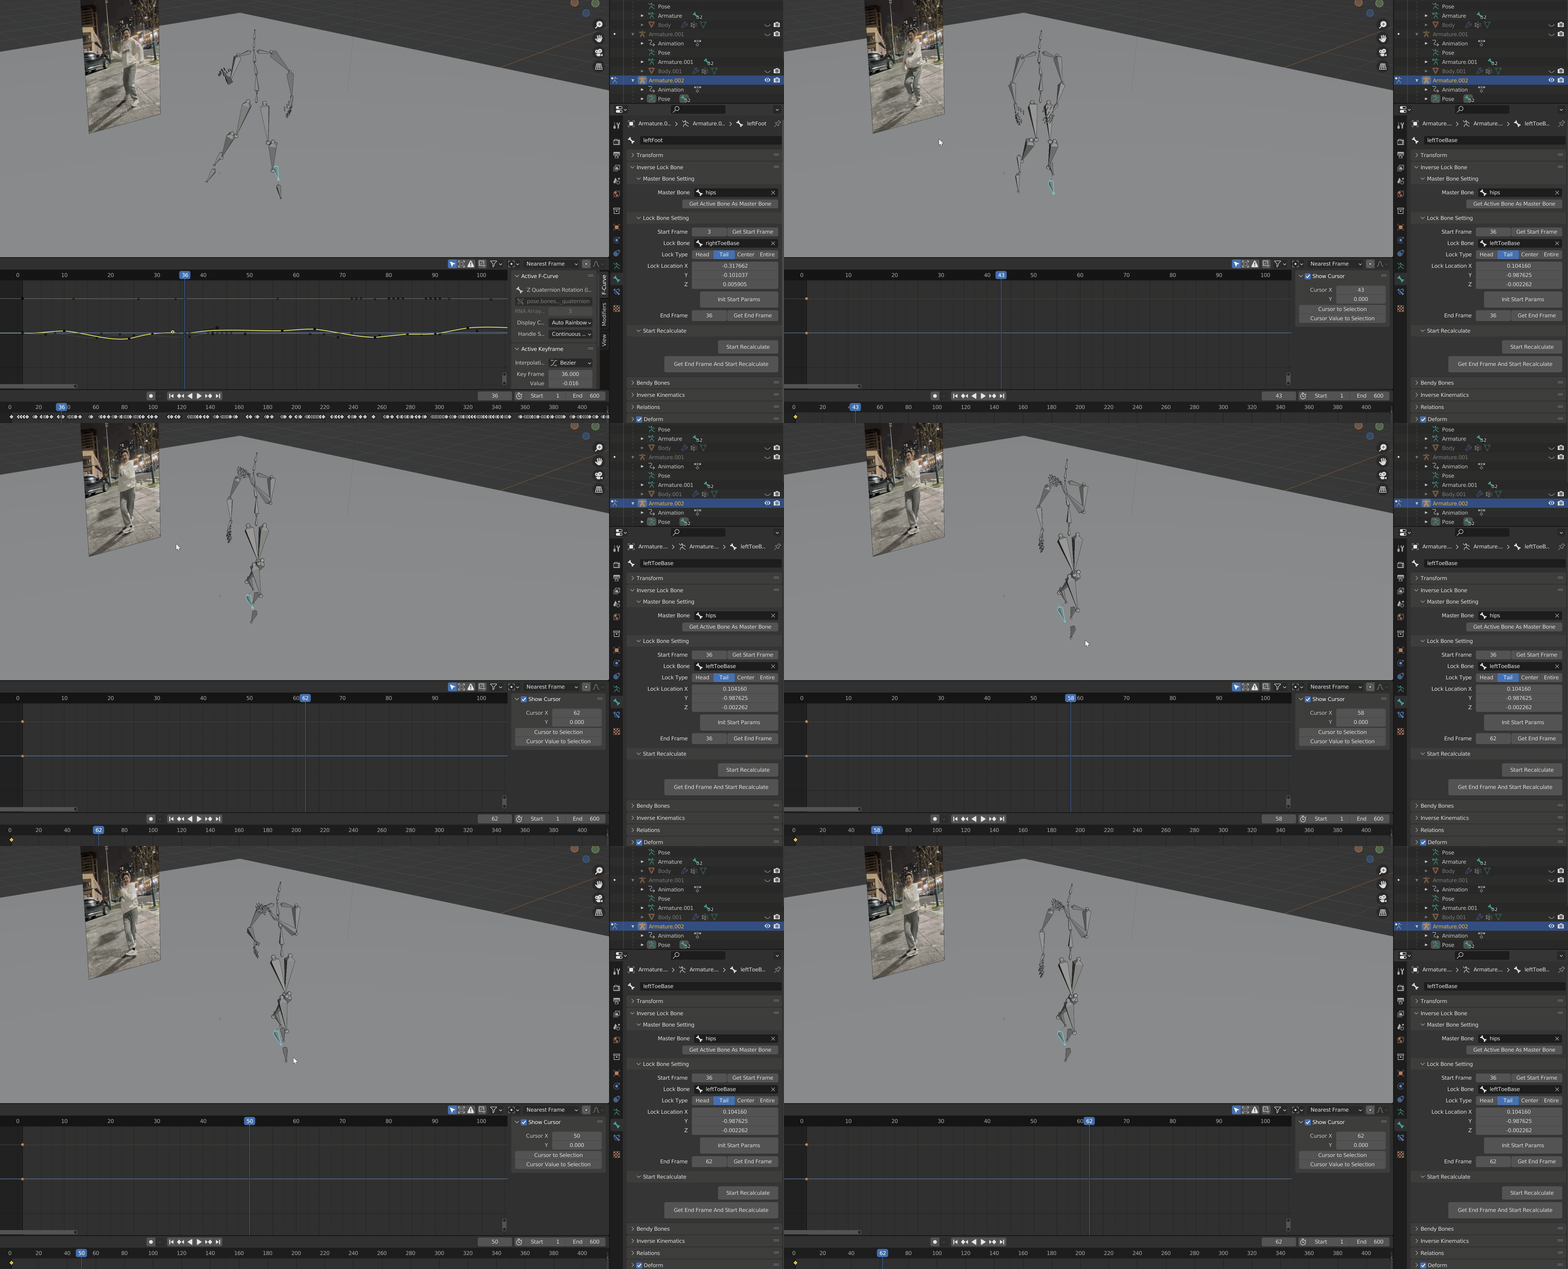
This is a clip from AI MoCap (plask.ai). Take Locking the tail point of the toe bone to a plane as an example. And this is just an example in which the armature has no IK controllers. If your armature has IK controllers, it will be easier to switch the character's locked foot smoothly. So in practice, it would be better to first retarget your motion to an armature that has IK controllers, and then do the clean-up jobs. It will be more convenient, and you don't need to do the following tedious adjustment operations. See details in FQA/Tips. This example just provides a better understanding of how it works.
precondition:
If your animation is from MoCap, you may need to smooth the keyframes first. If you want to have smooth control over the adjustment of the legs, but you have your animation frame by frame, you may also need to decimate the keyframes of legs (maybe also the keyframes of the other parts) in the Graph Editor. If you want to recalculate your master/root bone location from scratch, I would suggest deleting all the location keyframes of the master/root bone.
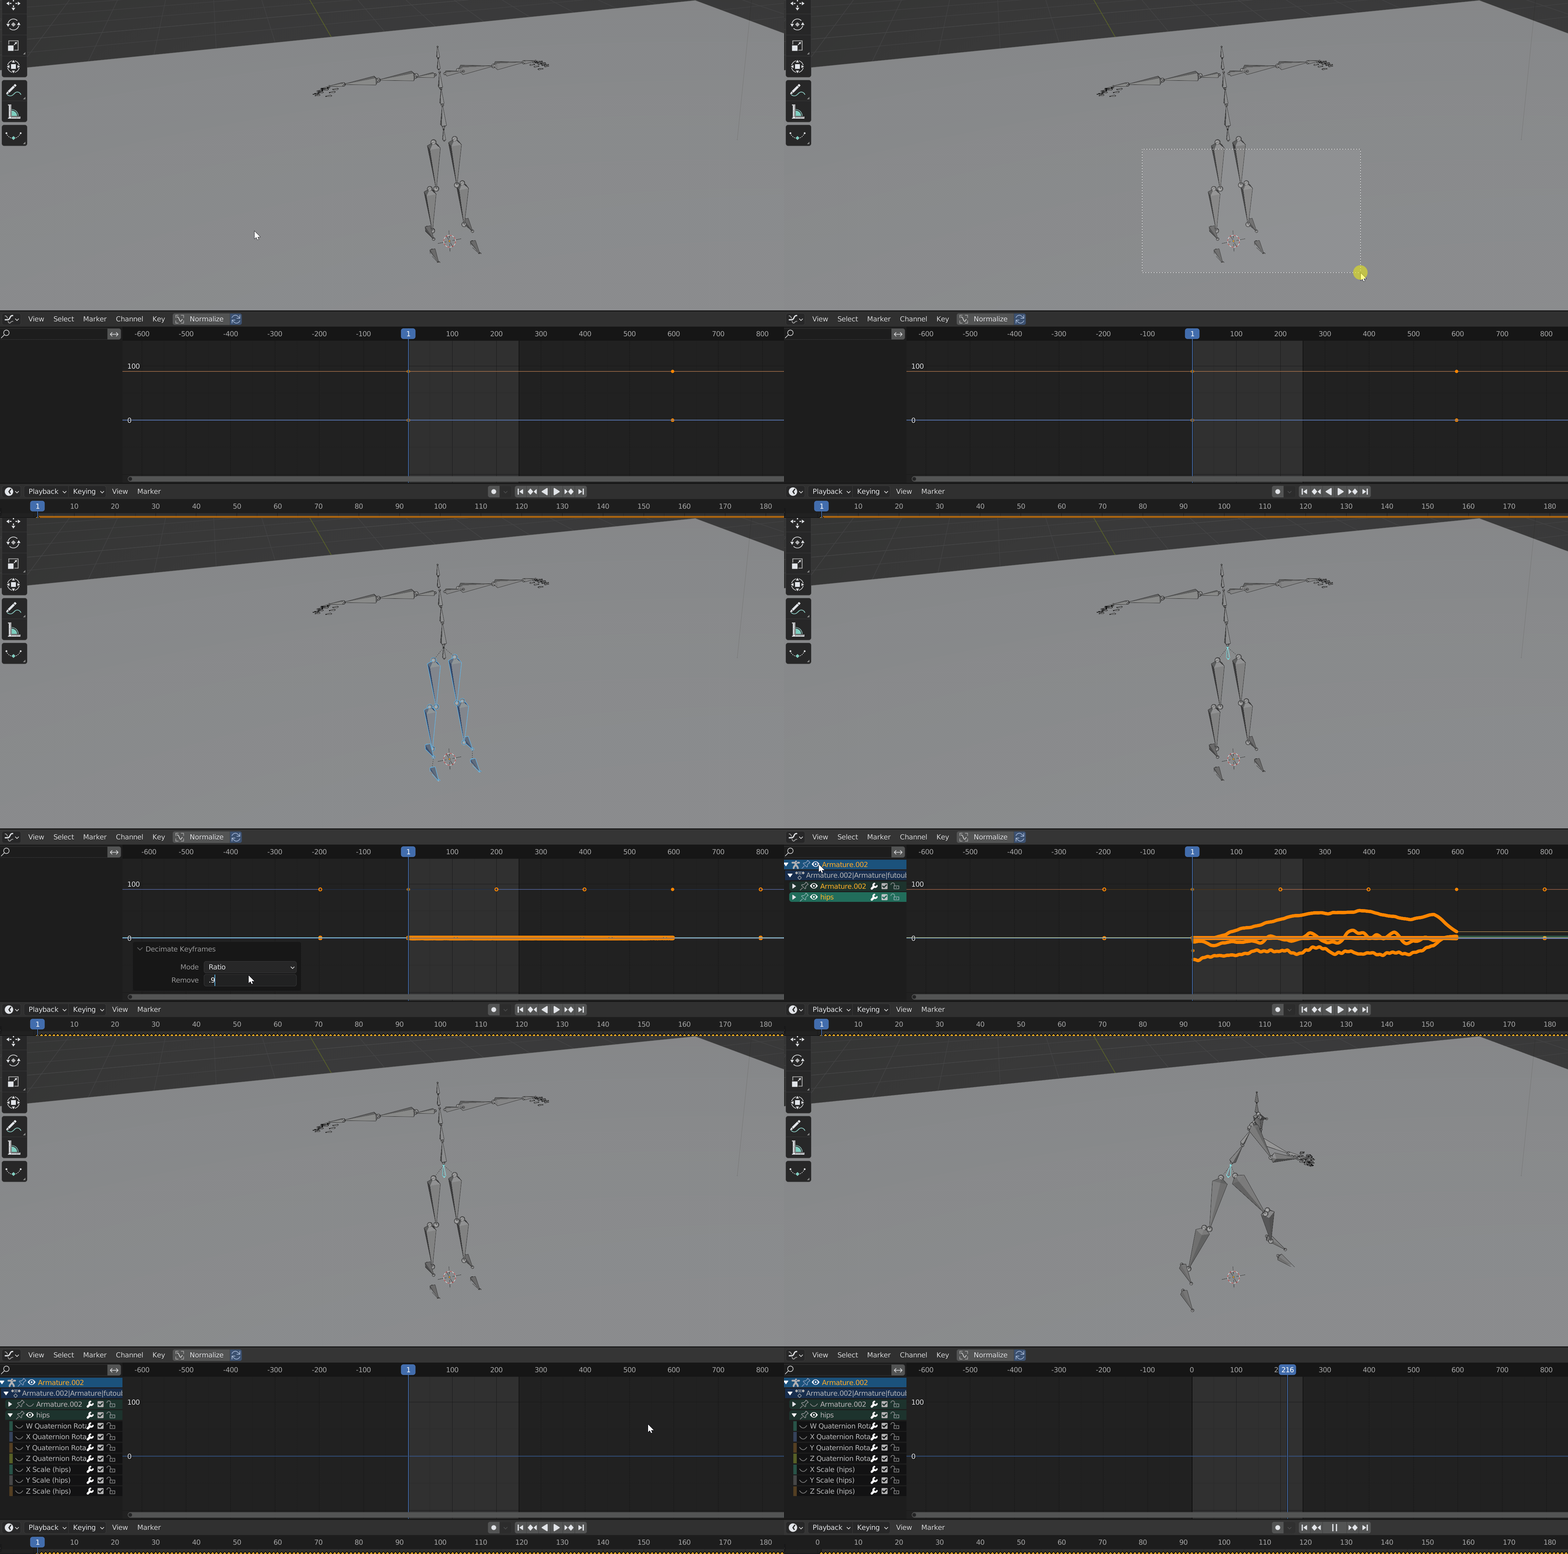
step one:
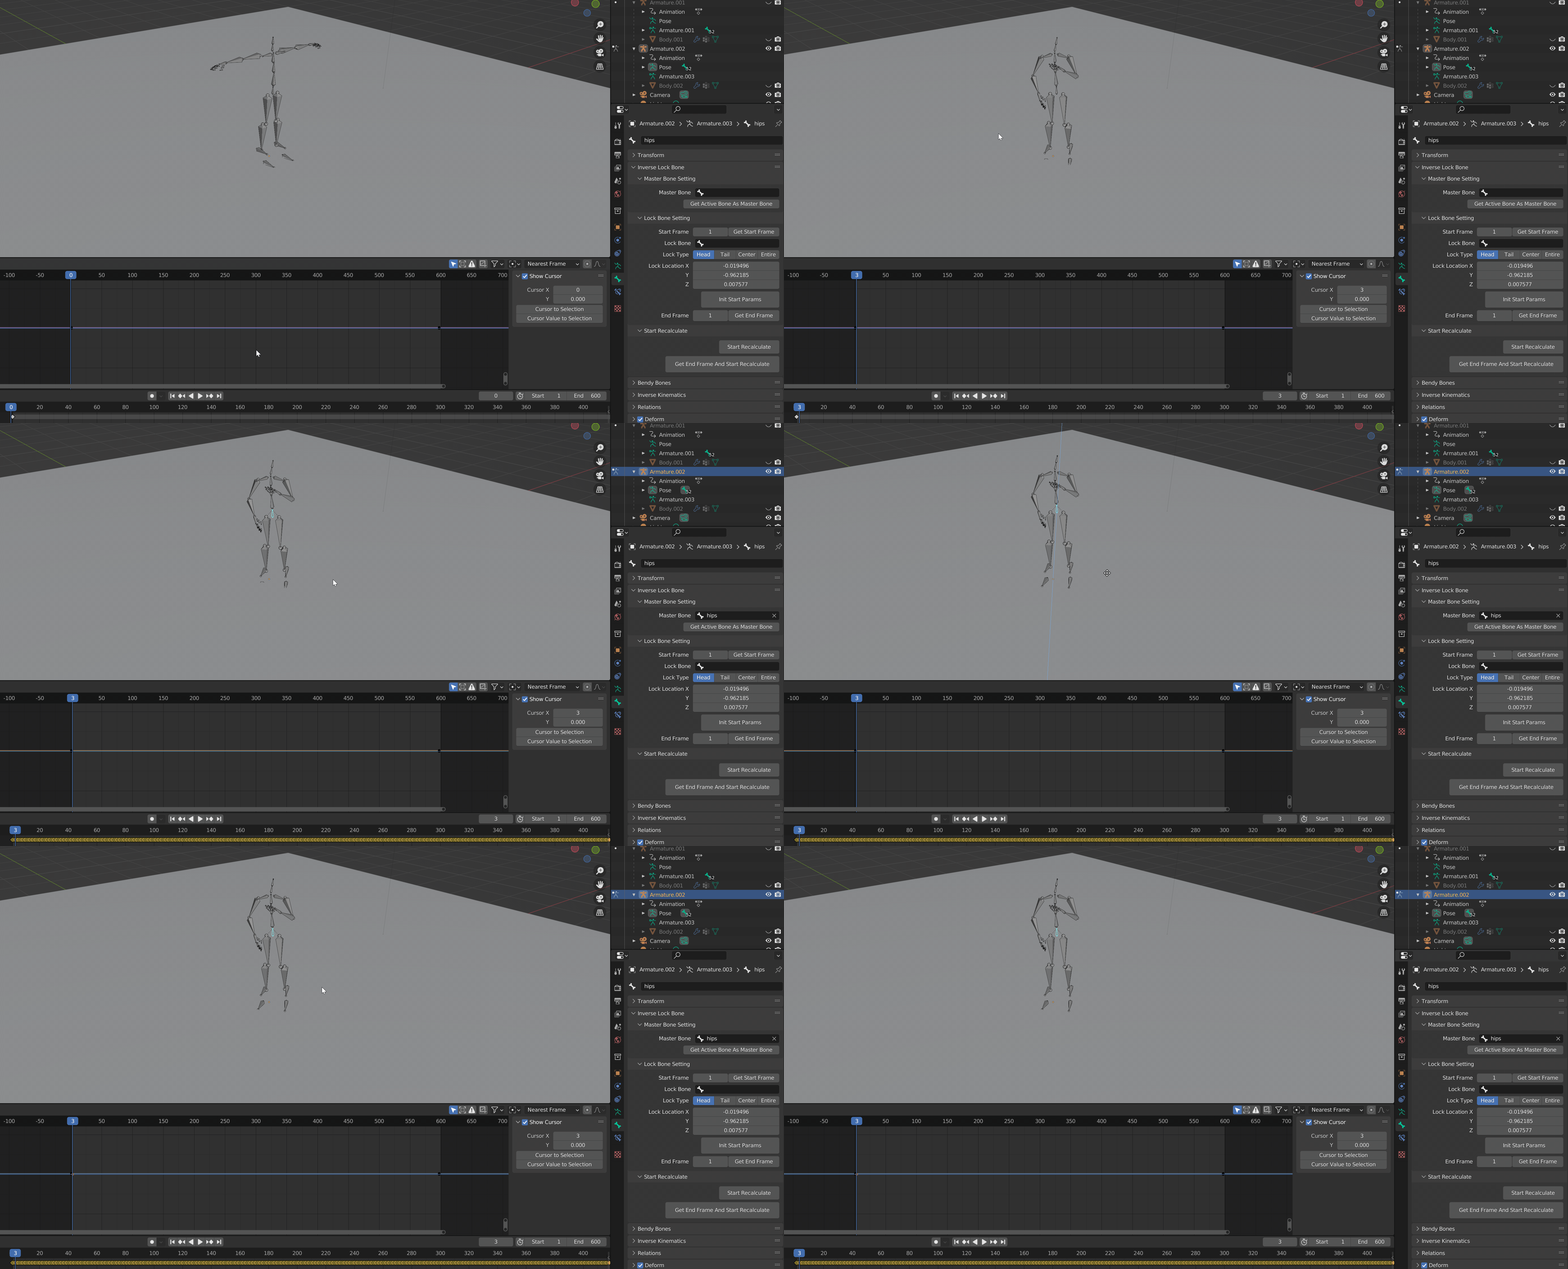
Move the current frame to the frame that you to start from. Choose the master bone, and fill the master bone setting, and move the master bone until the Lock Bone to the location where you want to start the locking, and insert a location keyframe for the master bone.
step two:
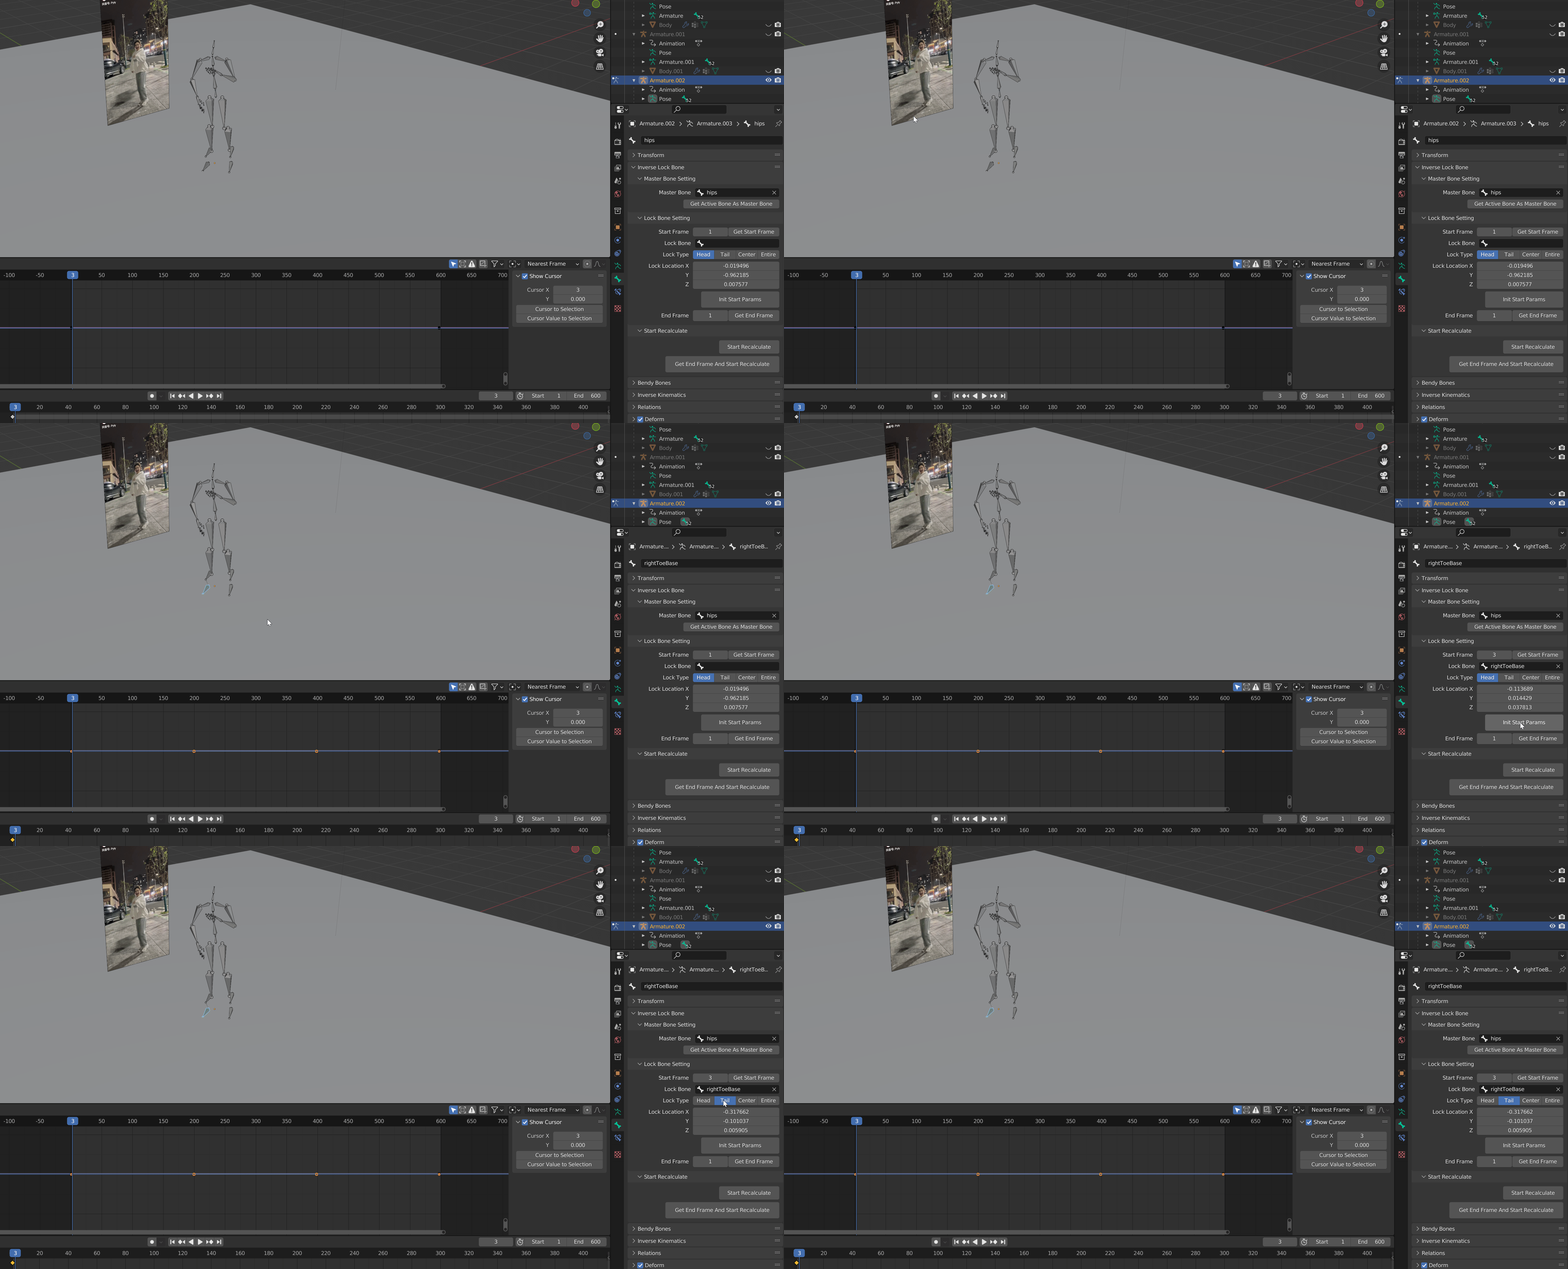
Choose the Lock Bone, fill in the start parameters by pressing the "Init Start Params" button, and choose the Lock Type if the default one is not what you want.
step three:
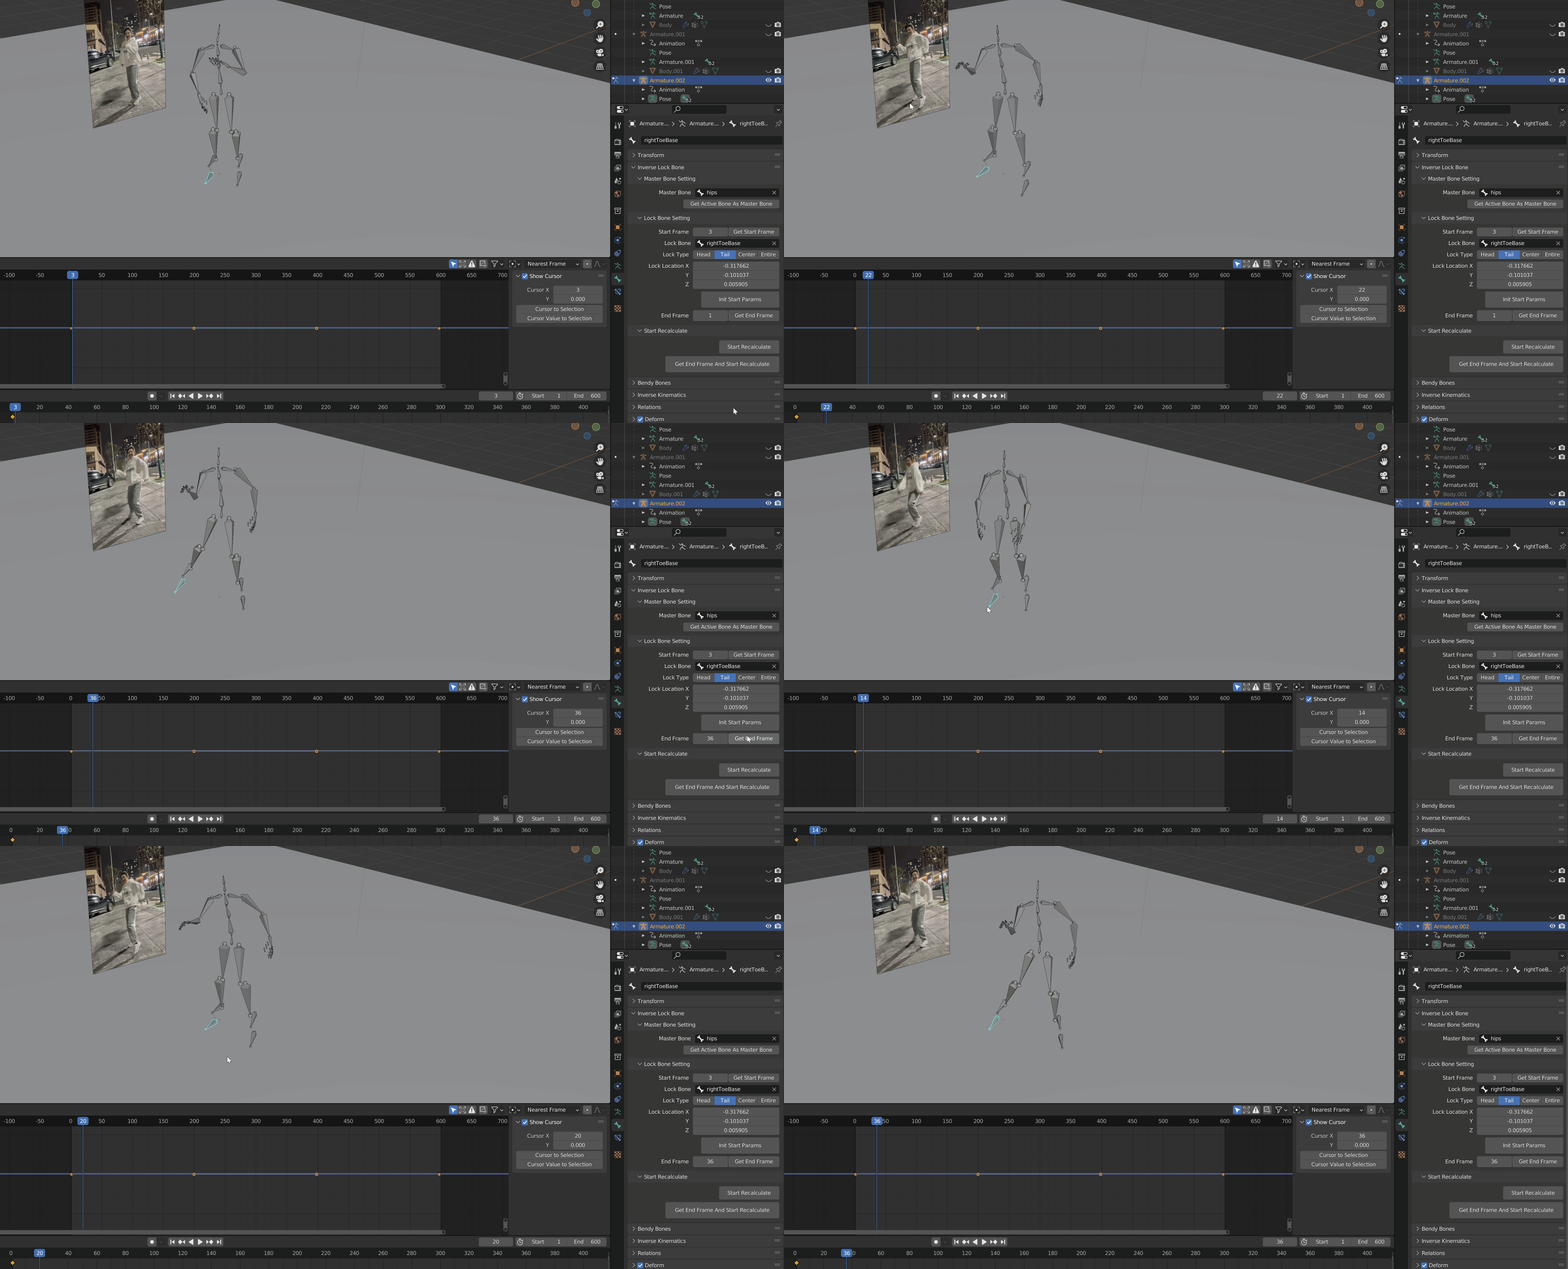
Move the current frame to the frame that you want to end the locking (If you have the original video, it's better to use it as a reference to decide which frame to end the locking), and press the "Get End Frame" button and then press the "Start Recalculate" button. Then, the master bone location will be recalculated.
step four:
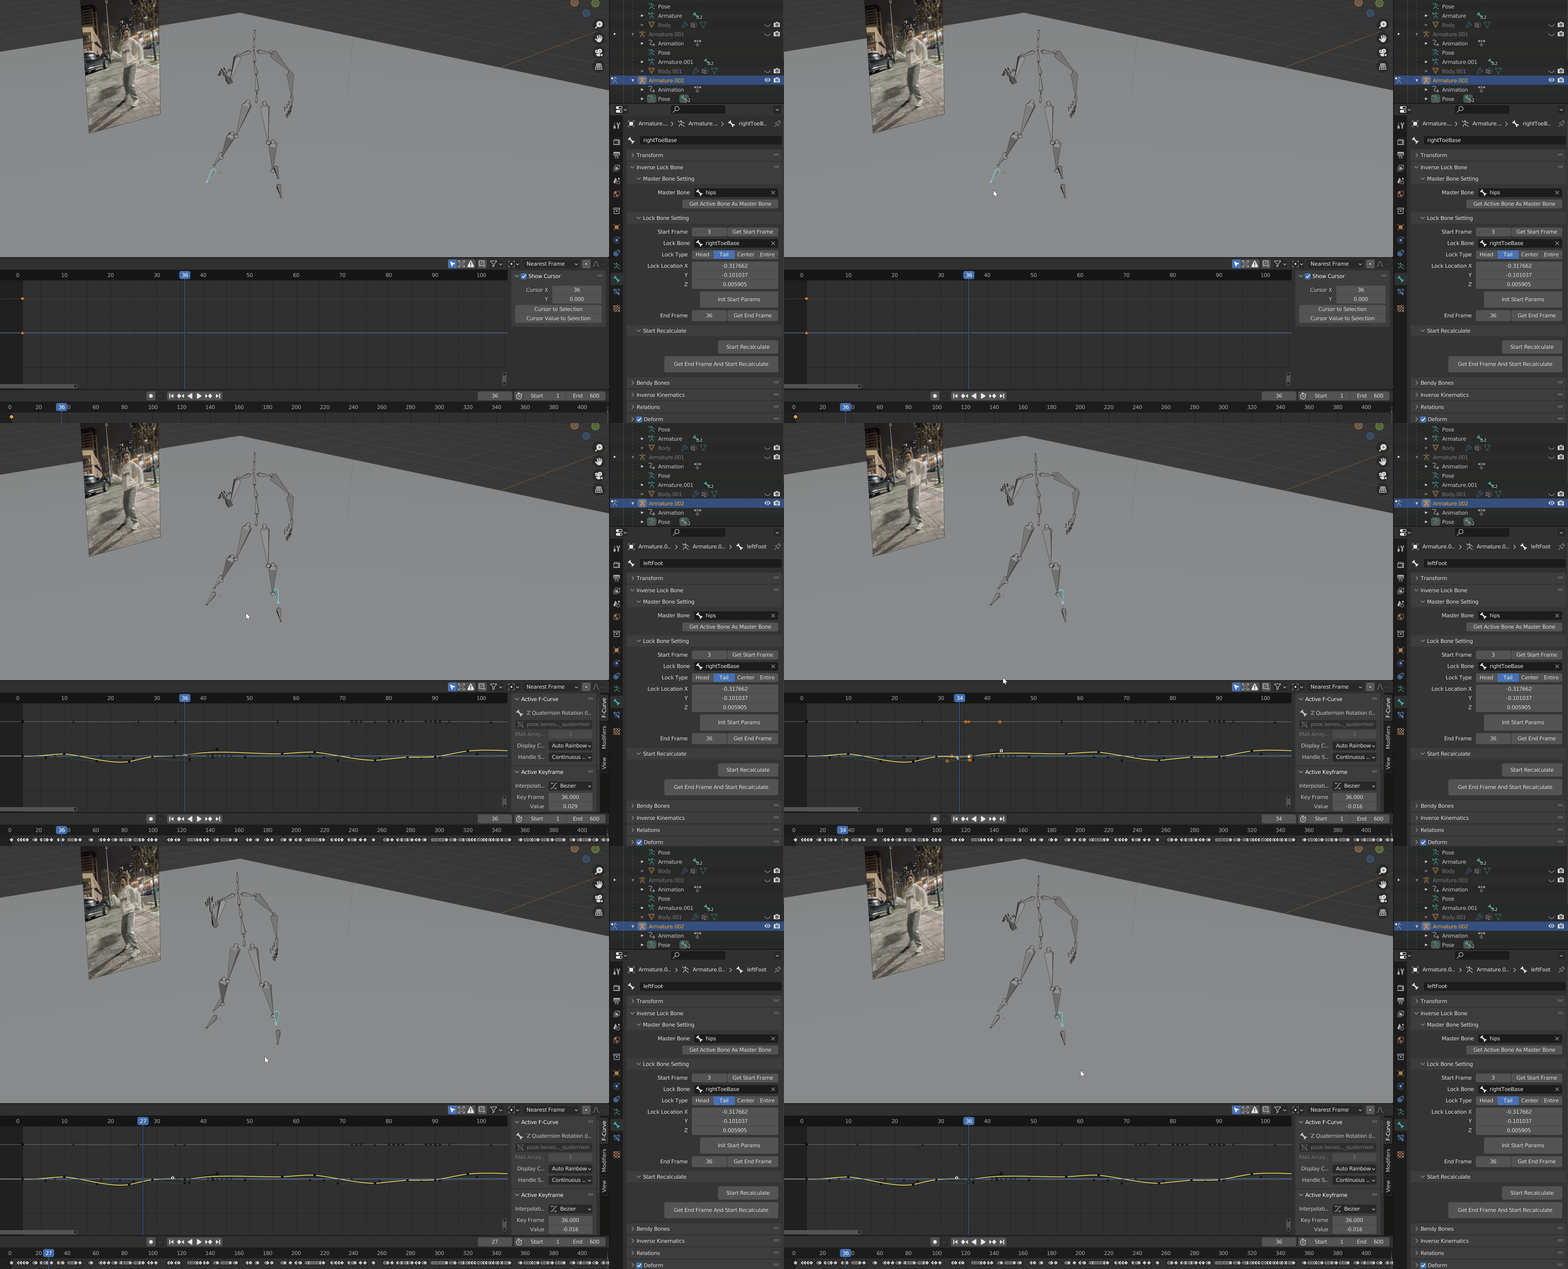
The locking is done, but there is still some adjustments job to do if your armature has no IK controllers, and this is the key step to switching the locked foot smoothly. If your armature has IK controllers and functions of baking IK/FK motion, you can skip this tedious step, otherwise, keep going. Go back to the Start Frame frame by frame to check if the non-supporting foot sinks into the floor, if yes, do some adjustments to it (by adjusting the rotation of the thigh or the shin or the foot, etc). Then go back to the End Frame, and check if the non-supporting foot is on the ground. If not, then adjust the rotation of the leg (thigh, shin, foot, toe, etc.) until it is. If these adjustments can't let the foot reach the ground or this is not what you want, then you can adjust the rotation of the supporting leg and recalculate it again using the last parameters. The specific method is: create a new auxiliary plane (if it exists, unhide it), move the auxiliary plane to the location of the non-supporting foot, adjust the supporting foot until it is also on the same auxiliary plane, and then recalculate again using the last parameters. Once all that is done, it's time to switch the locking feet.
step five:
Switch the Lock Bone. Repeat step two, step three, step four until the animation is done.
Tips:
- For the situation that none of the feet is locked, you can duplicate some previous keyframes, and manually do your custom movement.
- In the case of locking toe bones, each Lock Type has its pros and cons. Locking the tail of the bone is the simplest one and has fewer adjustments, but not that realistic. Locking the Head point of the bone or Locking the Entire bone, is more realistic, but sometimes there's more adjustments job to do. Each Lock Type has its use case and doesn't need to be the same.
- If your animation is from MoCap, you may need your original video to decide in which frame your character switches his/her locked foot and during which frame range both of the feet are off the ground. And you also need it to do your adjustment job.
- For efficient adjustment to the foot when the character switches his/her supporting foot, you may need IK control on your character's rig. If you need to lock both feet, you need IK control too. So it may be better to retarget your mocap motion to a rig with IK first and then do the clean-up job.
- In practice, it may not be a good choice to directly use the armature without IK controllers and functions of baking IK/FK to do the cleaning-up jobs. If your animation has very few steps, that's fine, but if there are many steps, it will be very inefficient. On the other hand, if you need to lock both feet, you won't be able to do that only with this addon. You also need an armature with IK control and the function of IK/FK conversion. A more practical approach would be to use this addon to lock one FK foot and recalculate the location of the hips bone, then bake FK to IK, and then use the IK controllers to lock the foot/feet finally. The specific steps are: First, retarget the motion to an armature that has IK and FK controllers and functions of baking IK/FK motion. For example, Rigify rig, Auto-Rig Pro rig, or something like that; Second, use this addon to lock the FK foot and recalculate the location of the Hips (torso/c_root_master.x) bone, in this step, we don't care about any sinking to the floor or not touching the floor or how to lock both feet. The main purpose of this step is to recalculate the location of the hips bone; Third, bake the FK motion to IK motion, and then use the IK controllers and/or other constraints to lock the foot/feet.
Limitation:
- This addon is just a simple auxiliary tool for cleaning Mocap data. Its main feature is to lock a foot by recalculating the location of the hips bone. If you need comprehensive foot locking feature, you also need Rigify, or Auto-Rig Pro, or something like that.
- Only with this addon, you can only lock one foot. If you want to lock both feet at the same time, you also need Rigify, or Auto-Rig Pro, or something like that. The workflow of locking both feet is in last one of the tips.
Installation:
1. Edit > Preferences > Add-Ons
2. Click “Install…” button in the top right of the window
3. Find the Add-On file to install
4. Click “Install Add-on”
5. Check the checkbox to enable the addon. Then in the pose mode, bone properties, you will find it.
Update:
version 1.1.1
- Added the blender_manifest.toml file.
- Made some adjustments to make it adapt to Blender Extension style.
version 1.1
- Made some adjustments along with the release of Blender 4.2
version 1.0
- First release

