Retopoflow - Retopology Toolkit For Blender
The comprehensive retopology toolkit for Blender
RetopoFlow is a full retopology mode for Blender that helps make quick work of creating custom, clean, mid or low poly meshes on top of high resolution sculpts.
The separate mode helps us not only get more information about the models than Blender can give by default (so our tools can work more effectively than anything else available today), but also to display the geometry in a more helpful manner. RetopoFlow mode’s custom mesh rendering is currently the only way in Blender to see low poly geometry cleanly overlaid on a high poly mesh without overlap, distortion, or depth sorting issues.
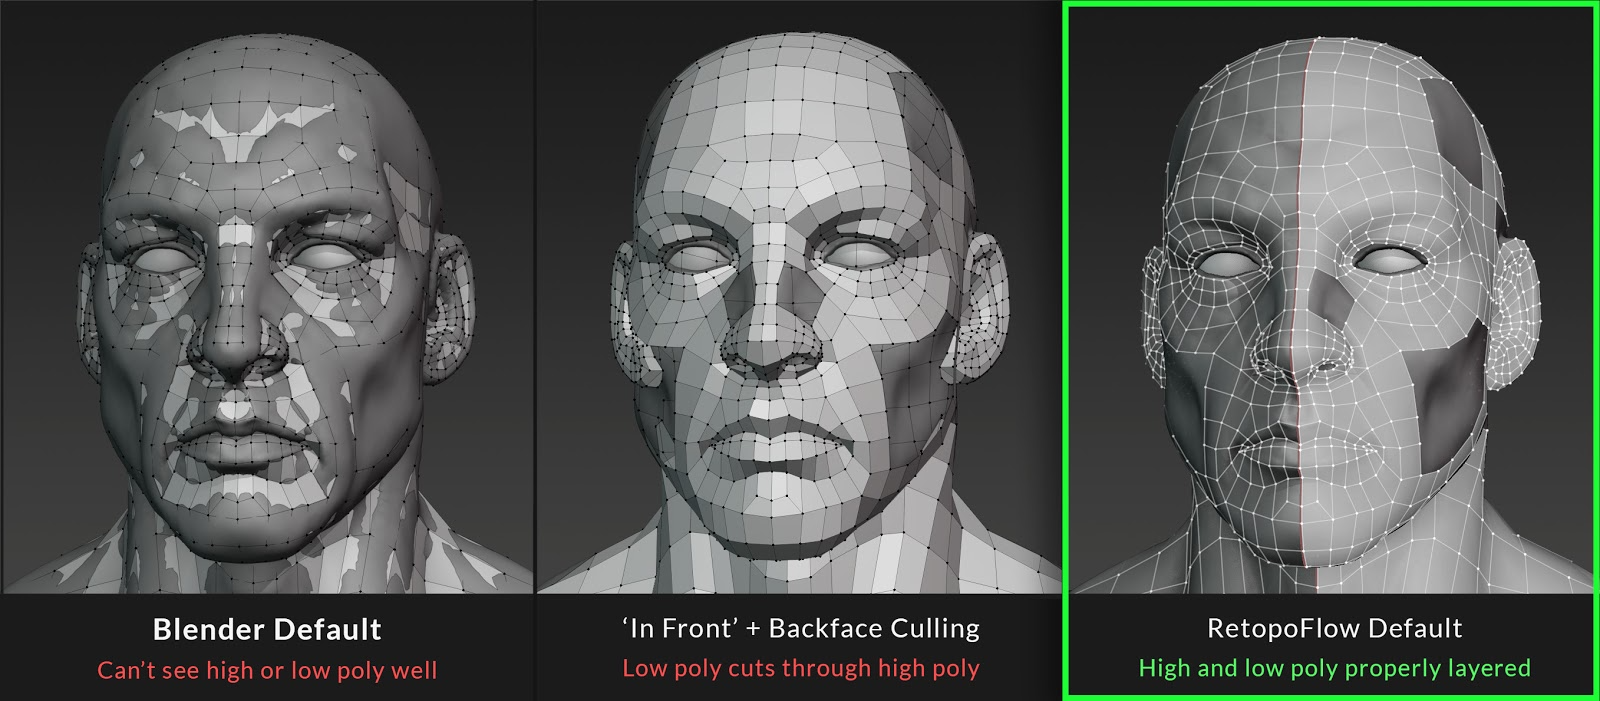
No more messing with shrinkwrap, object scale, snapping, mesh visibility, displacement, or mirror settings. Just jump into RetopoFlow mode and get started!
Built for artists, by artists
Quality retopology is essential for efficient rigging, animation, texturing, and even rendering, but we also know from years of experience that it can often be a tedious chore. That’s why we set out to do something that few thought was even possible - make retopology actually fun :D
RetopoFlow is my favorite tool for manual retopology among all the different software that I have tried. The developers are passionate and are always finding new ways to make the addon better. Thank you! ~ Daniel Bystedt, senior character artist
The tools in RetopoFlow mode are designed to be used by artists, and make the retopology process more like quick sketching and less like monotonous pointing and clicking. They make good topology practices like evenly spaced quads the default rather than the exception. Here’s a quick intro to the power of each new tool you’ll be getting:
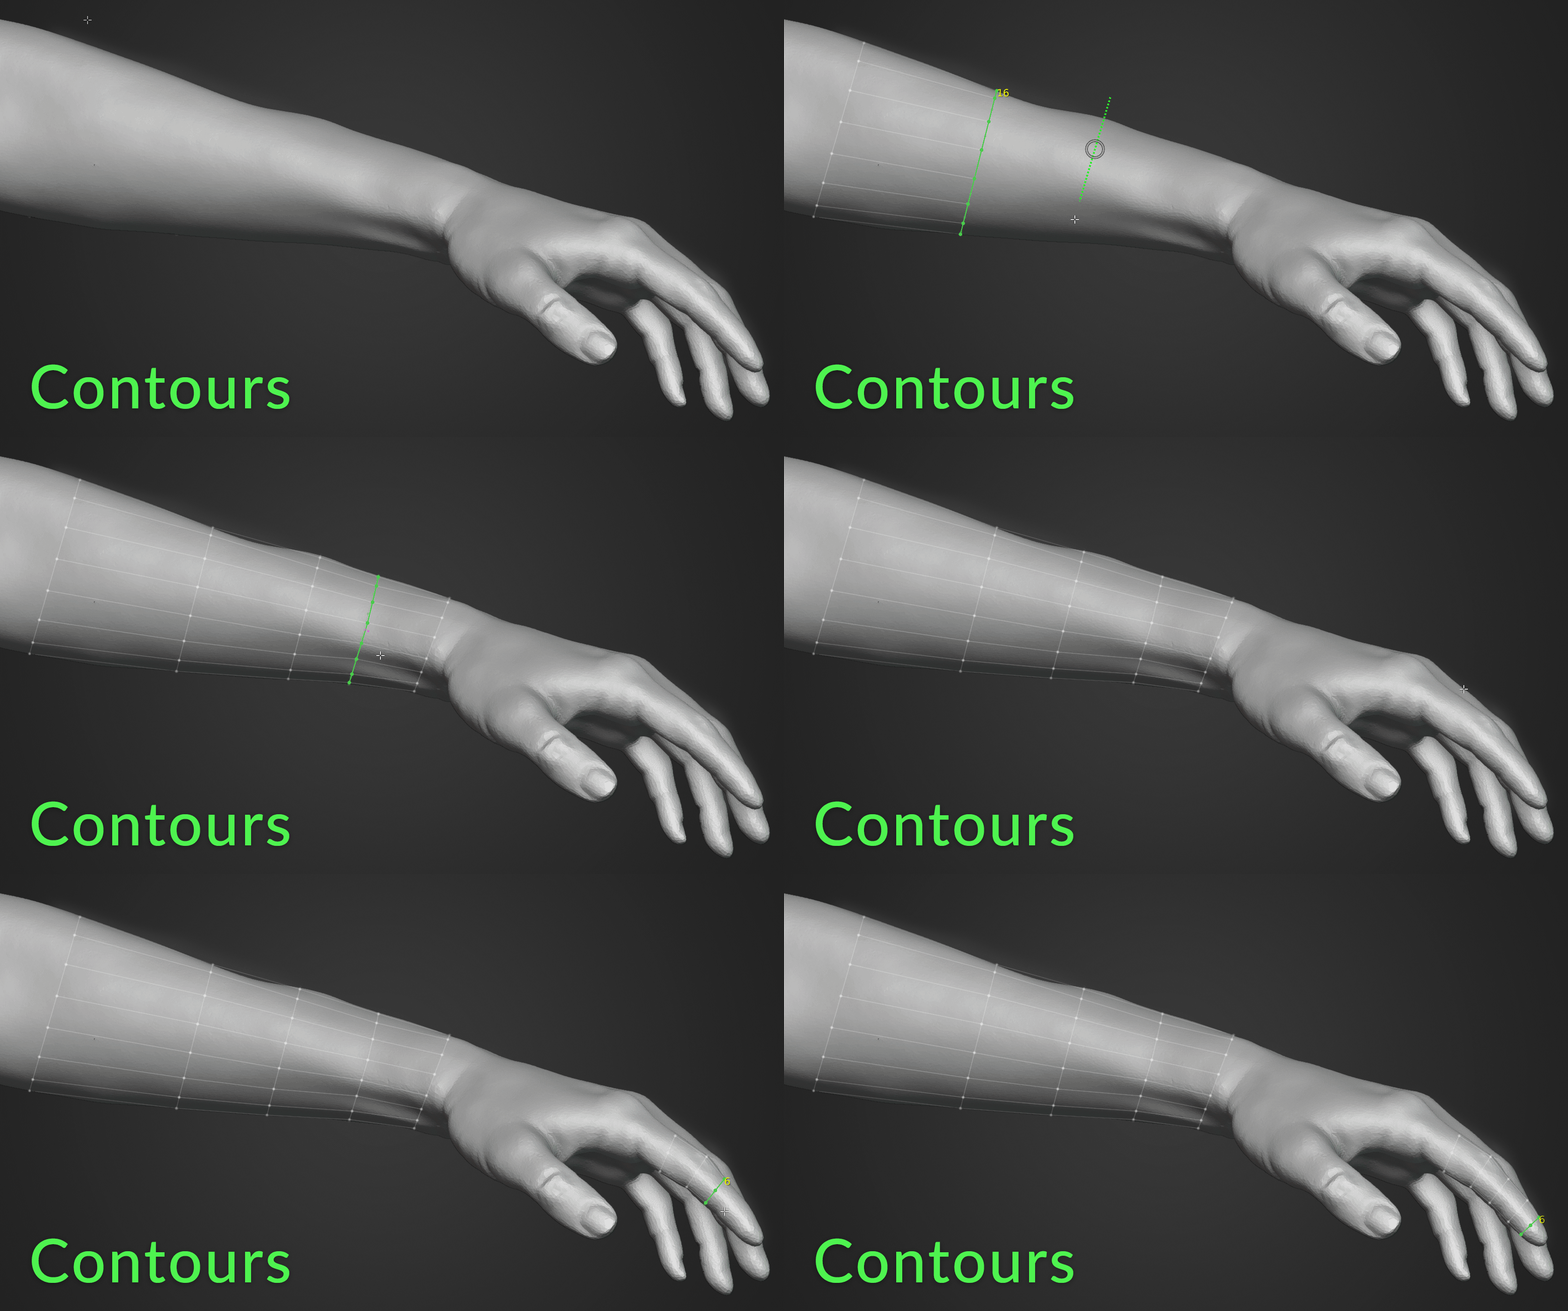
With Contours, you can quickly place and adjust loops around any cylindrical form. Just hold Ctrl and left click drag, and a loop will wrap around the high poly surface. You can easily adjust how many segments it has by holding shift and scrolling. In the example above, notice how it wraps perfectly around the finger, even though there are other fingers directly behind it. Contours gets it right where other tools routinely fail because our advanced algorithm walks the loops around the mesh instead of using Blender’s screen space snapping.
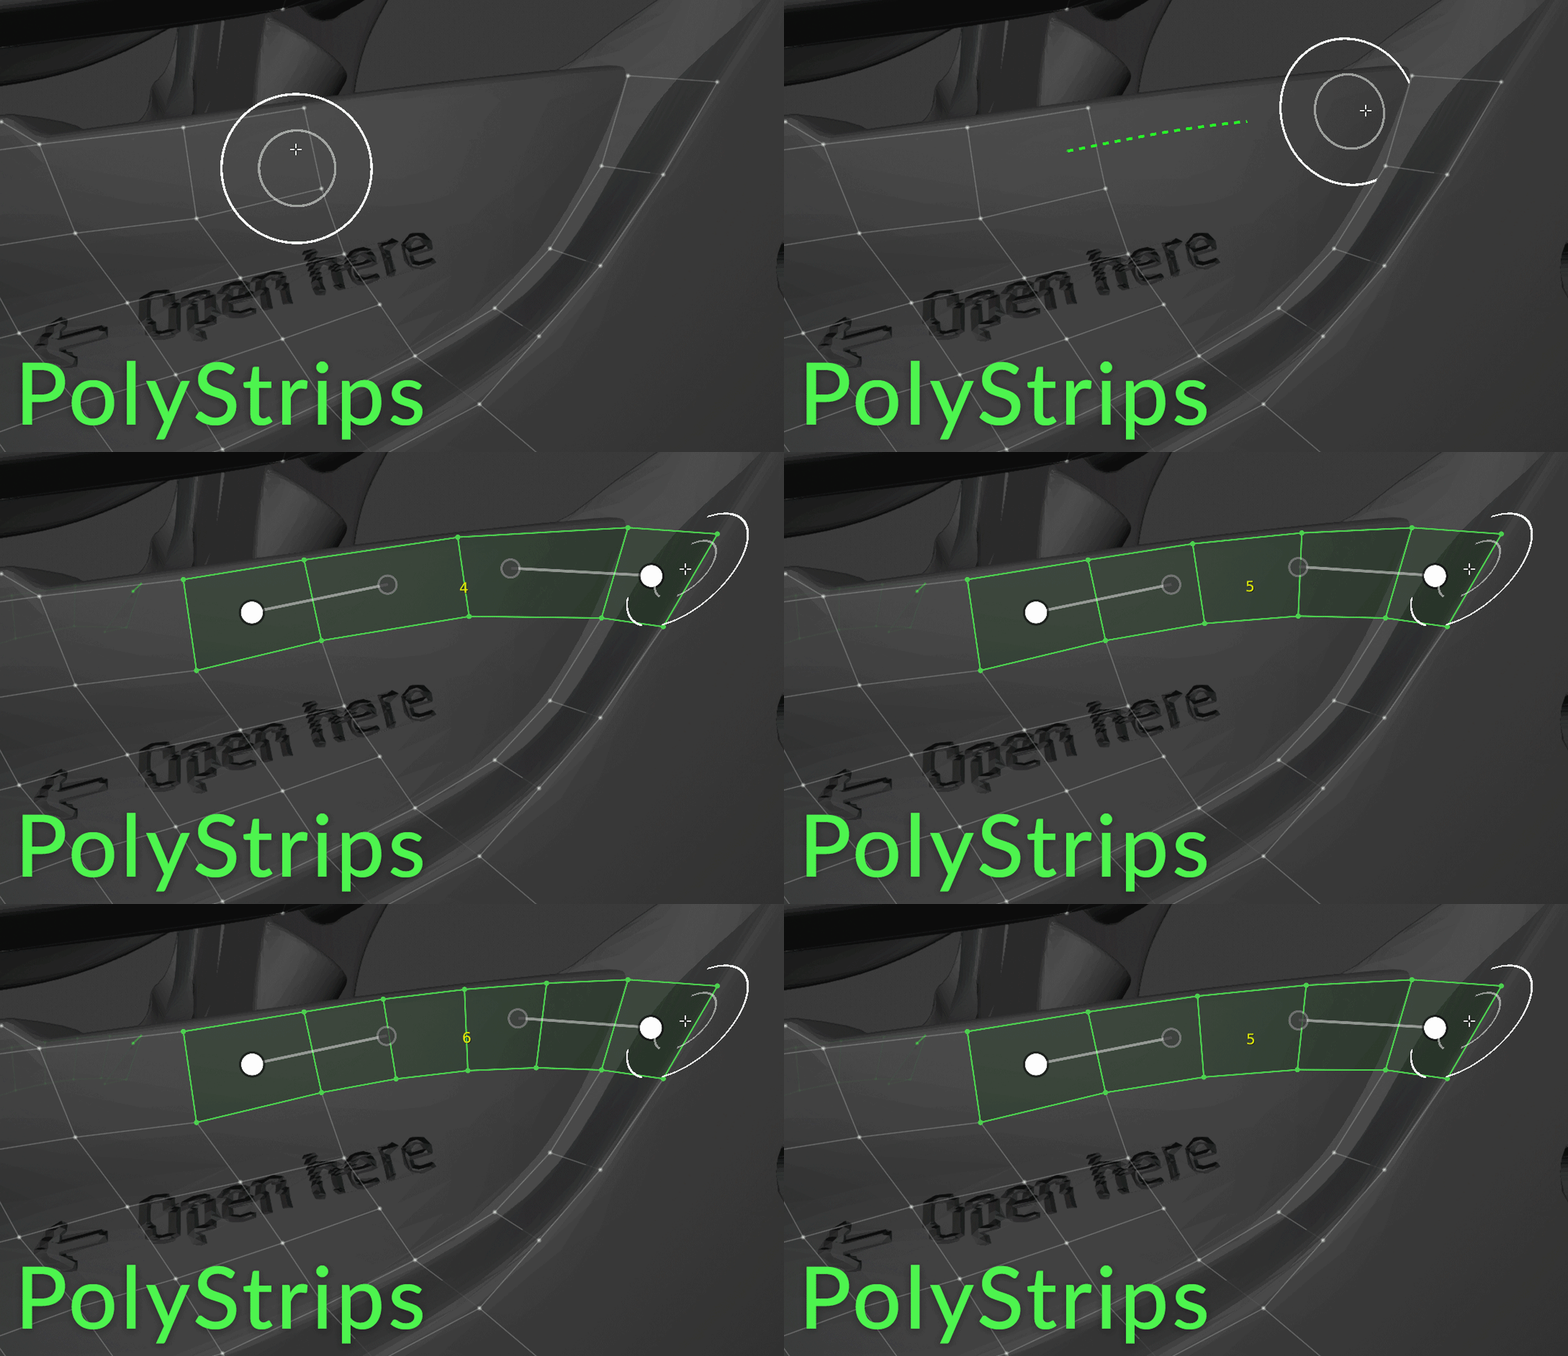
Quickly sketch to define your most important loops with PolyStrips. Just hold Ctrl and left click to draw out a strip. It can be an extension of or connection between existing topology or a brand new strip depending on where you start and stop your stroke. You can even draw over multiple sections of existing geometry to connect them all. The size of the polygons is determined by the brush size, and you can easily add or remove segments by holding shift and scrolling after a loop is placed.
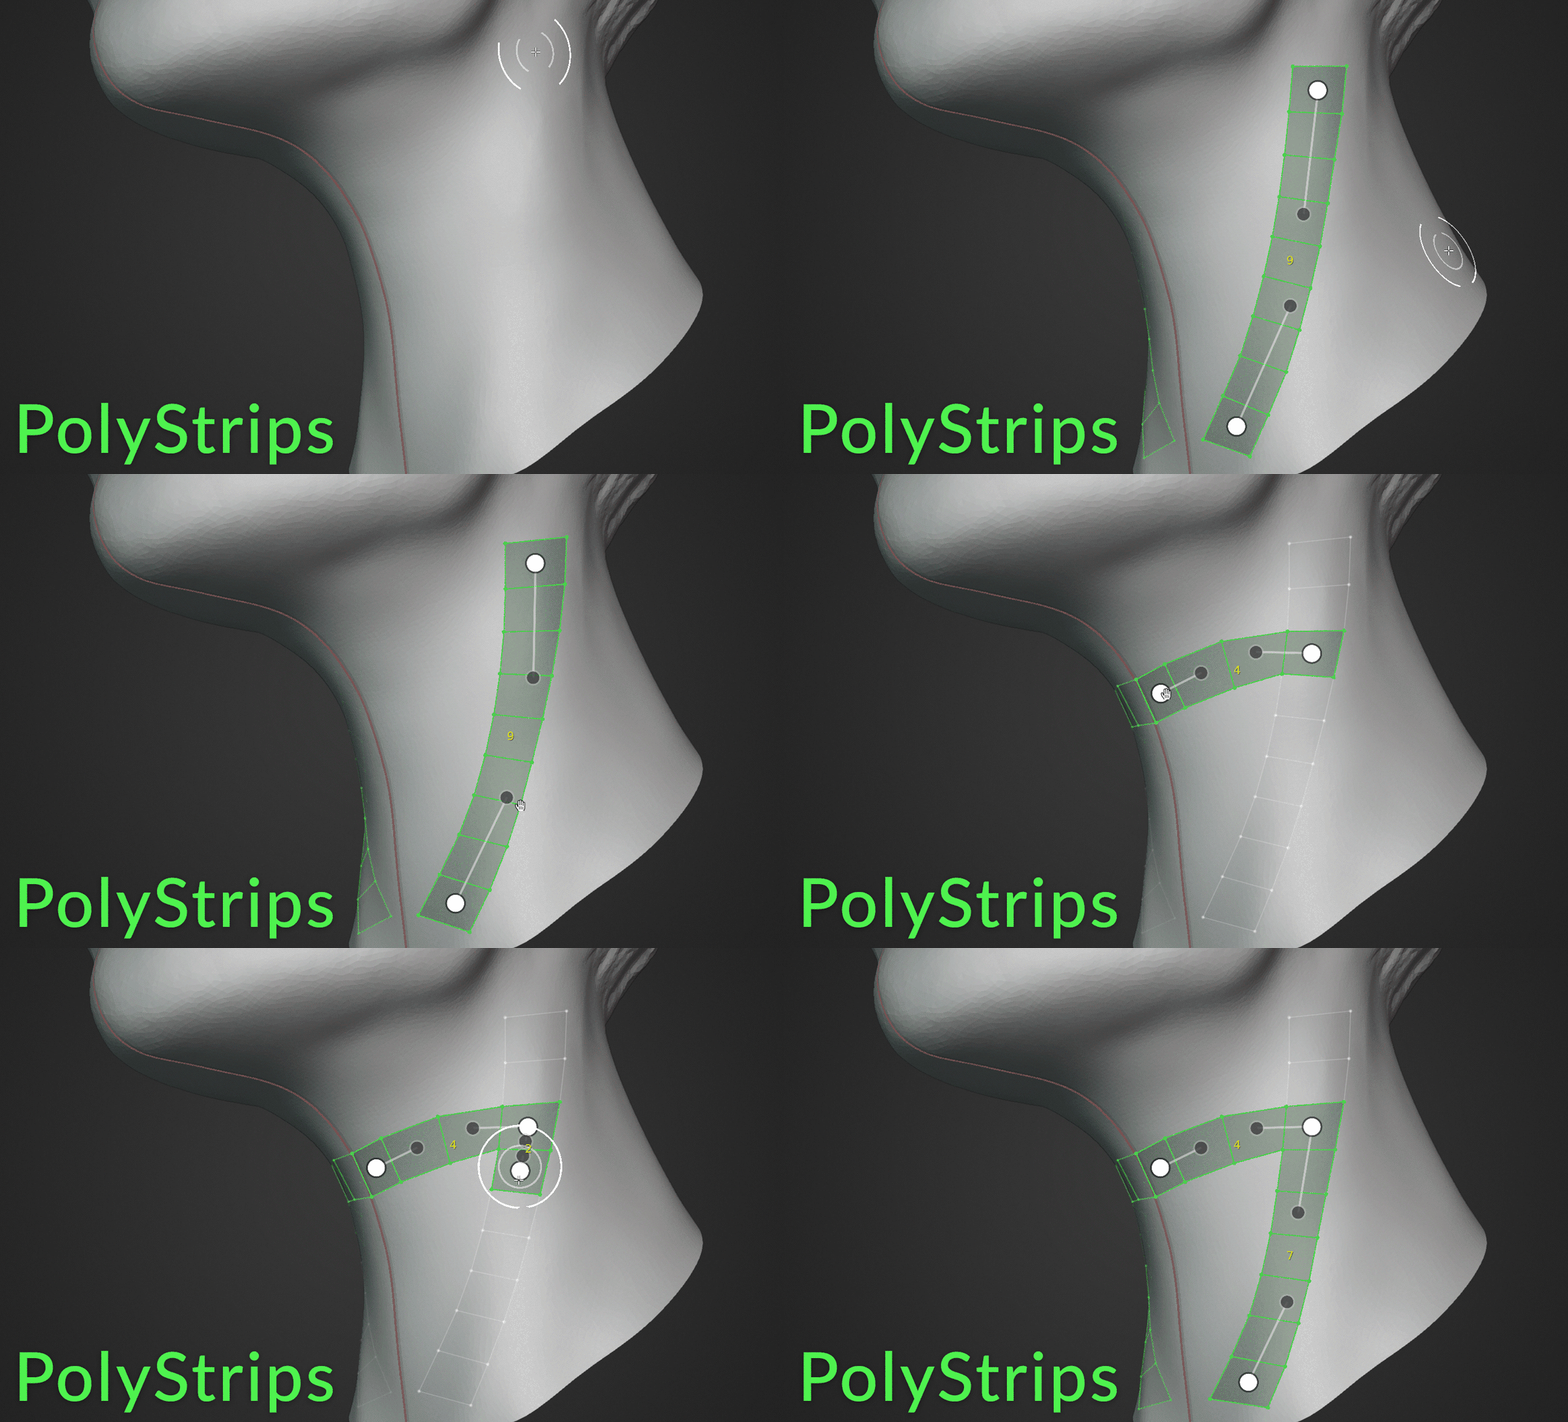
The best part? You can also use PolyStrips to manipulate any selection of quads like a Bezier curve. Everything is automatically snapped to the surface so you can focus on what’s important - the perfect placement of your key loops.
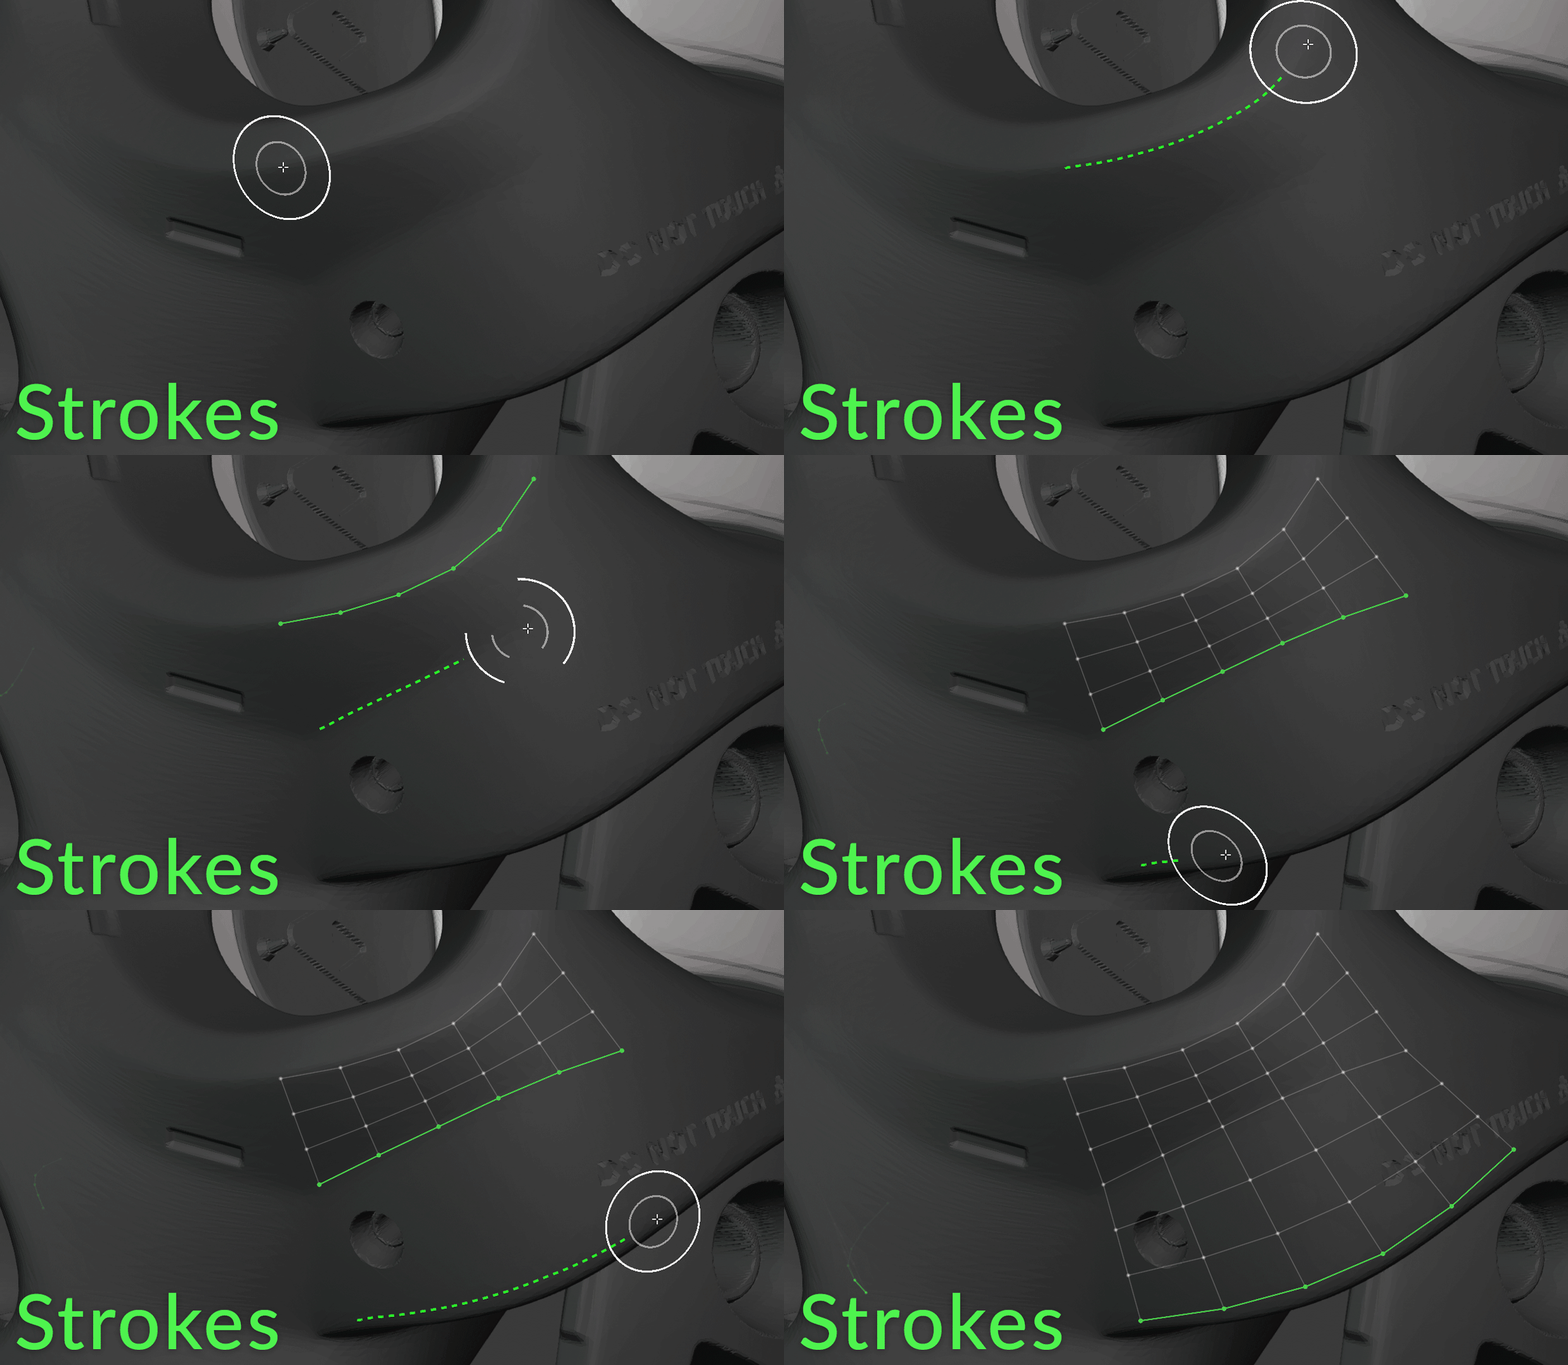
To quickly extend your main loops or define grids in larger areas, switch to the Strokes tool. Drawing out a single line will place a row of selected edges, and drawing another stroke roughly parallel to the first will connect the two with an even grid of interpolated quads.
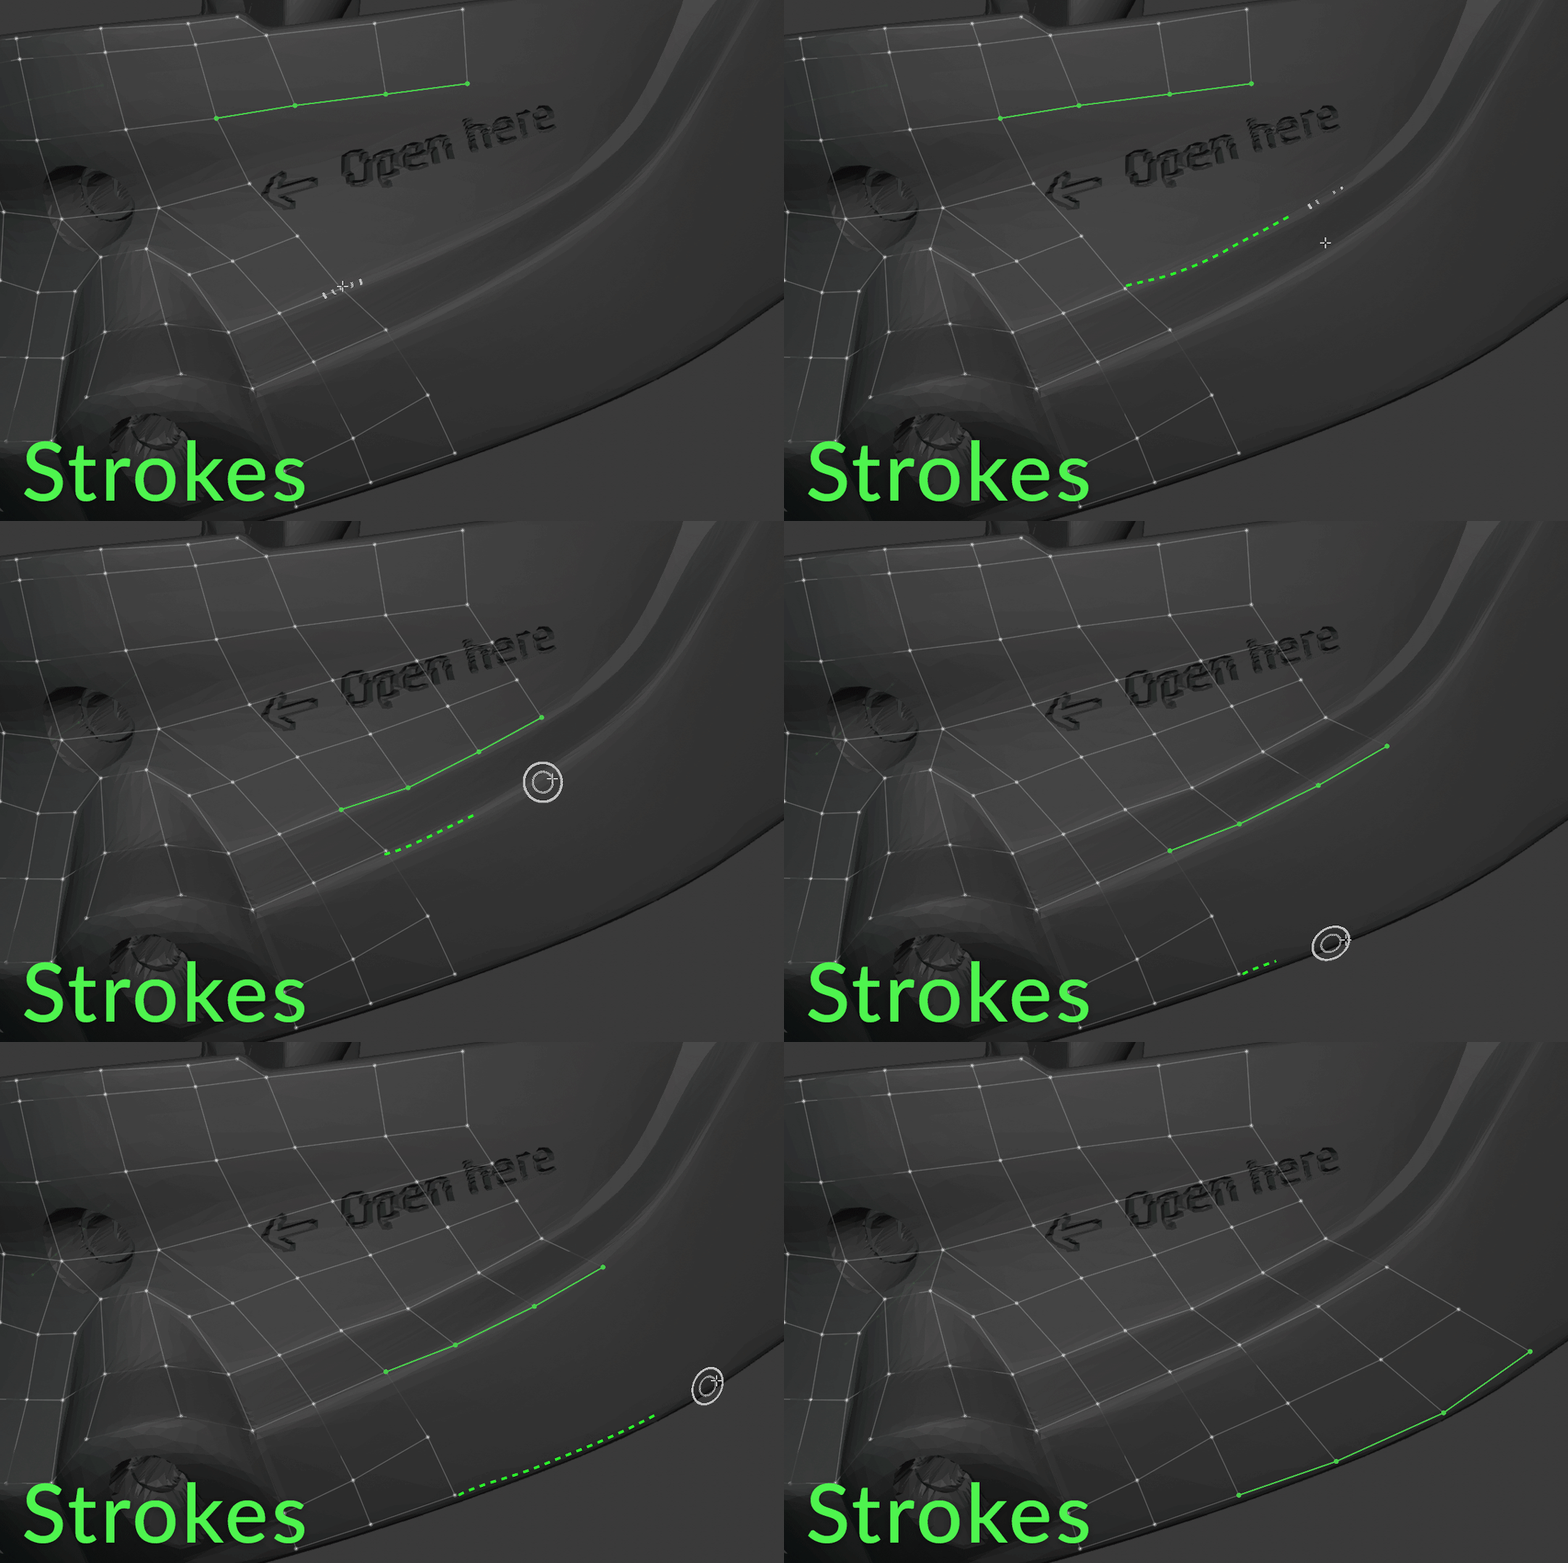
Or, you can draw out from a vertex to extend your selection to match the curve of the stroke. As always, every single vertex is snapped to the surface of the high poly mesh without you having to do the whole "move it and then immediately cancel so it actually snaps" rigmarole that comes with automatically placed geometry in regular Edit Mode.
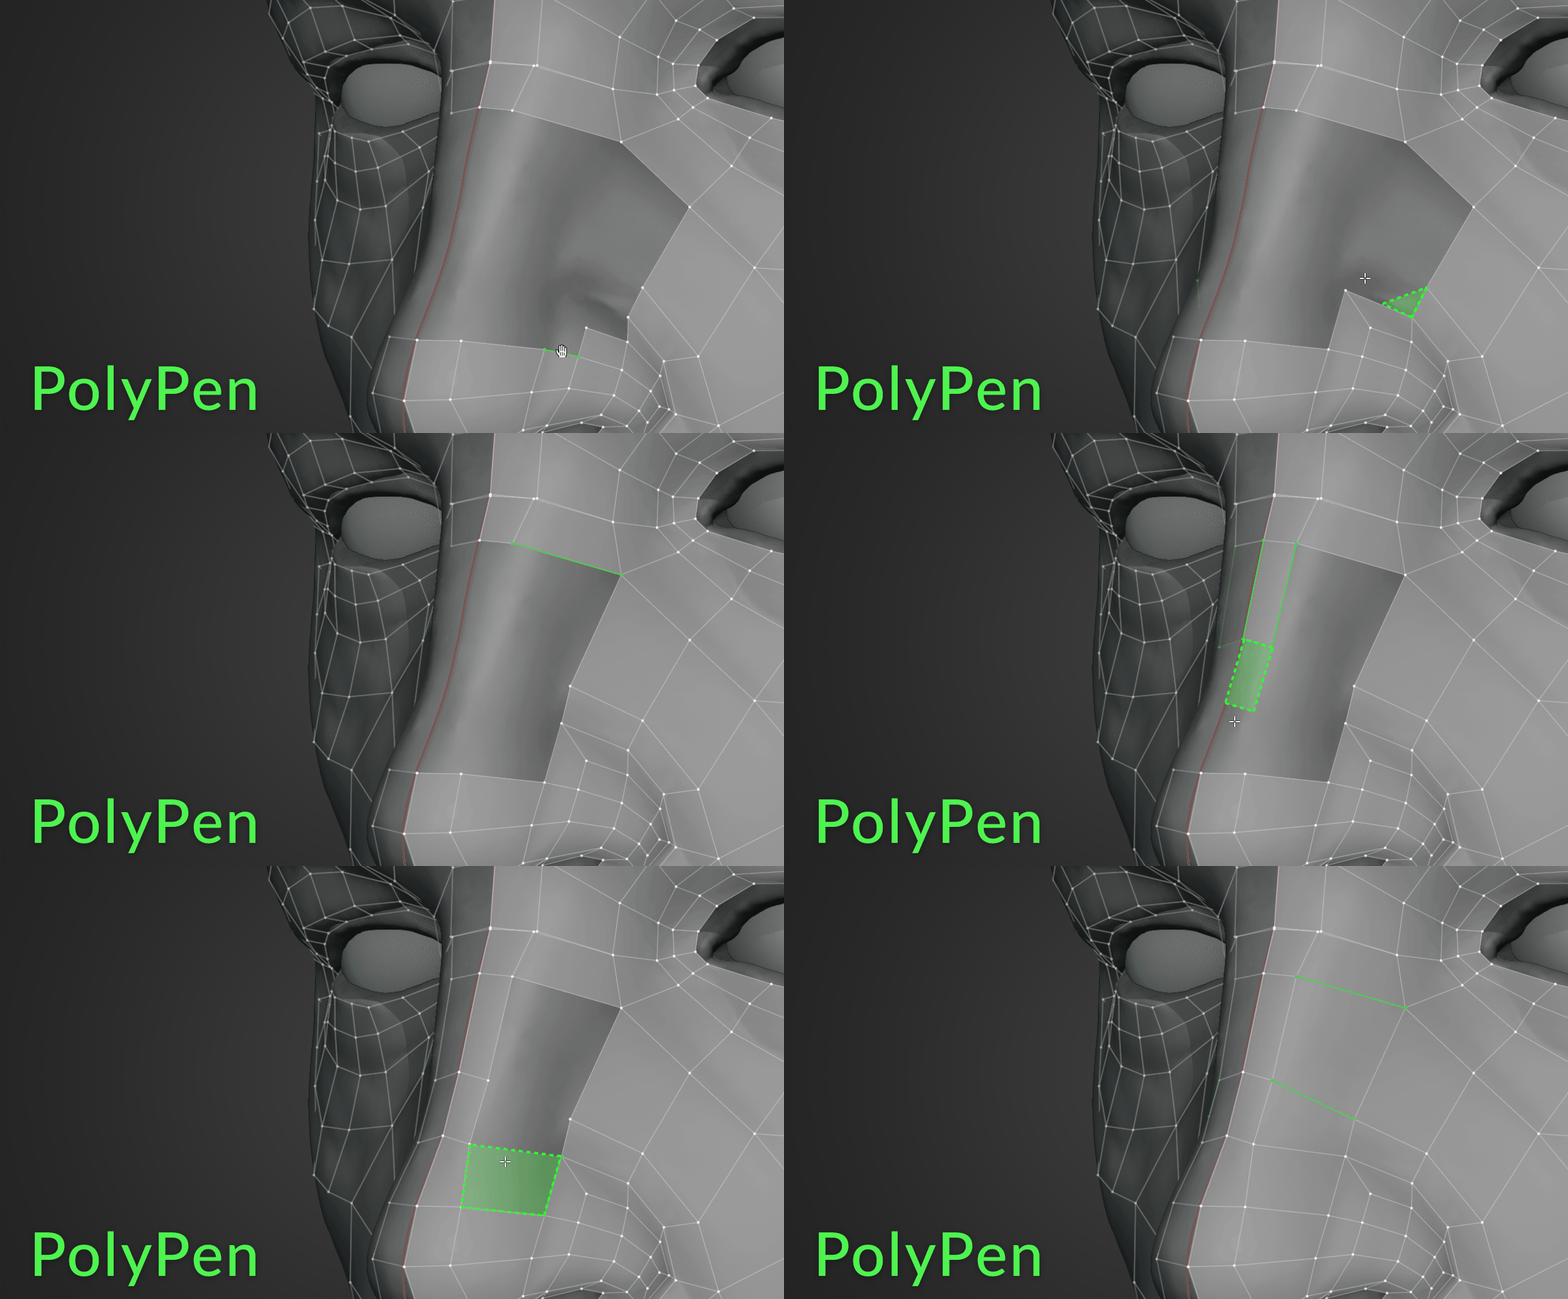
Sometimes you need to be more precise and deliberate, so PolyPen is built to give you maximum control over fine details. Select an edge, hold Ctrl, and click to extend the selection with triangles, quads, or both. PolyPen will automatically snap to other vertices and edges, and can even be used as a knife to make basic cuts.
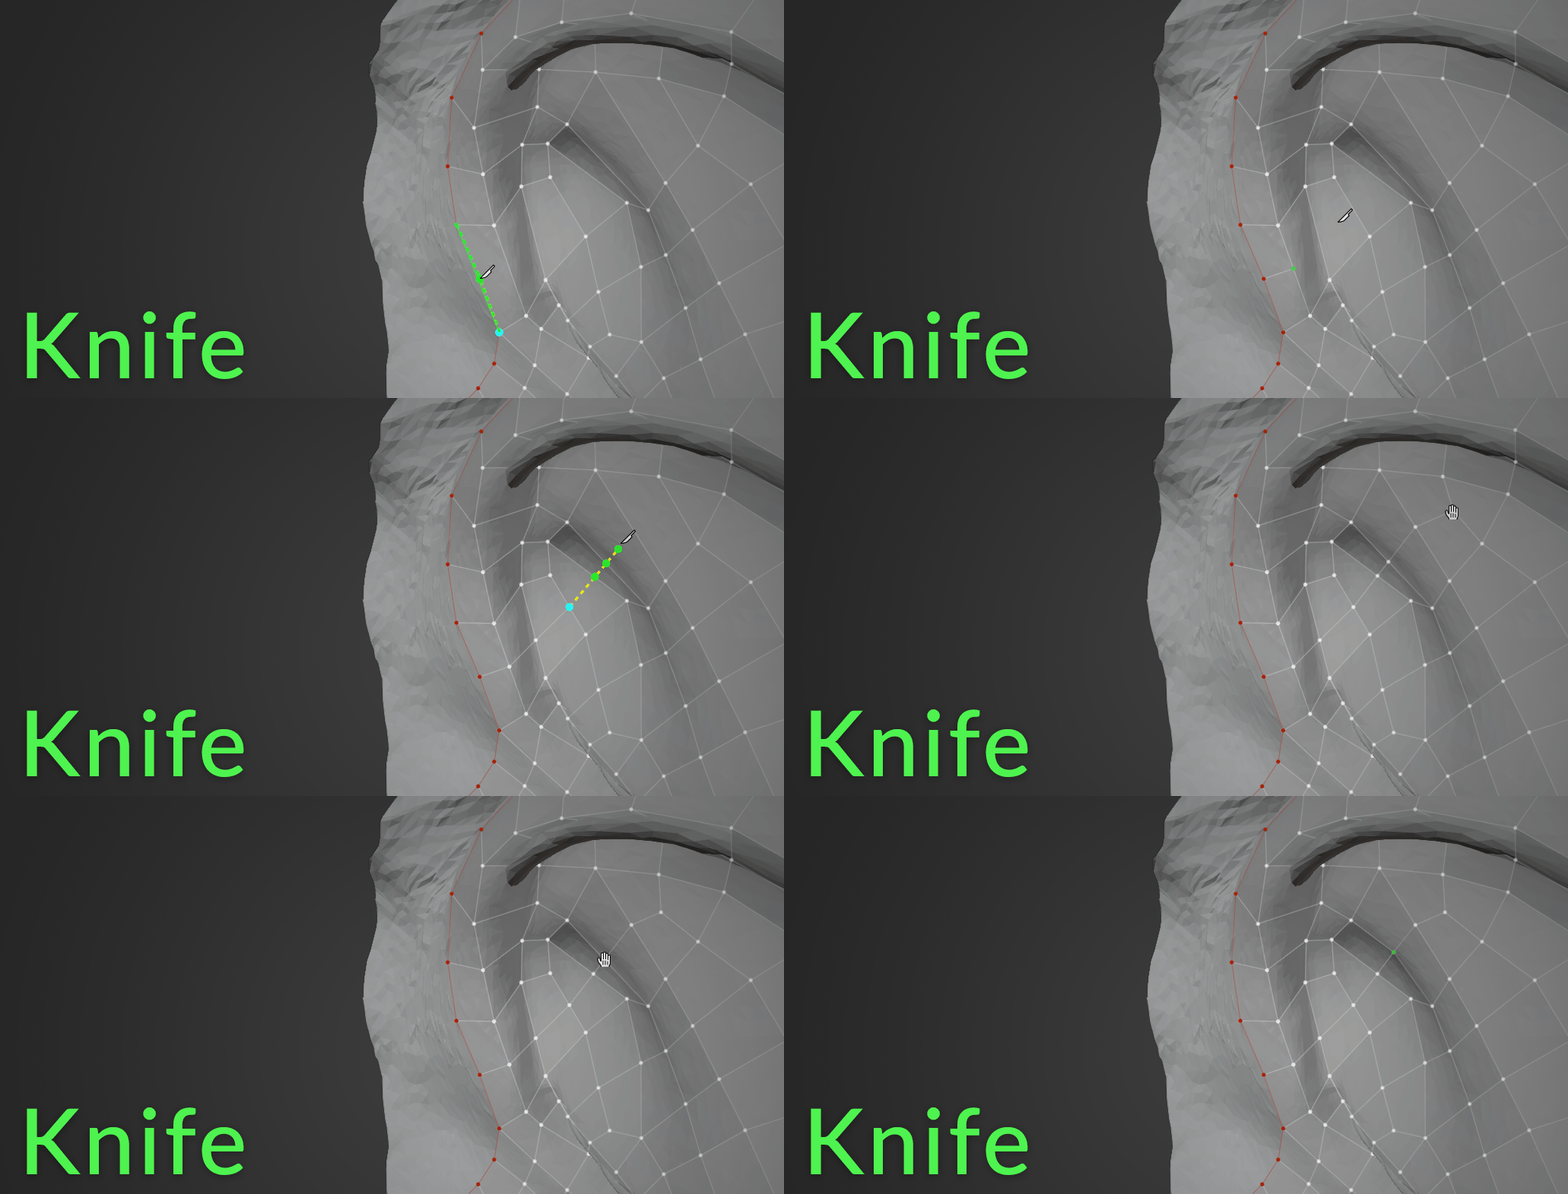
Quickly create more complex cuts into existing geometry using the Knife tool.
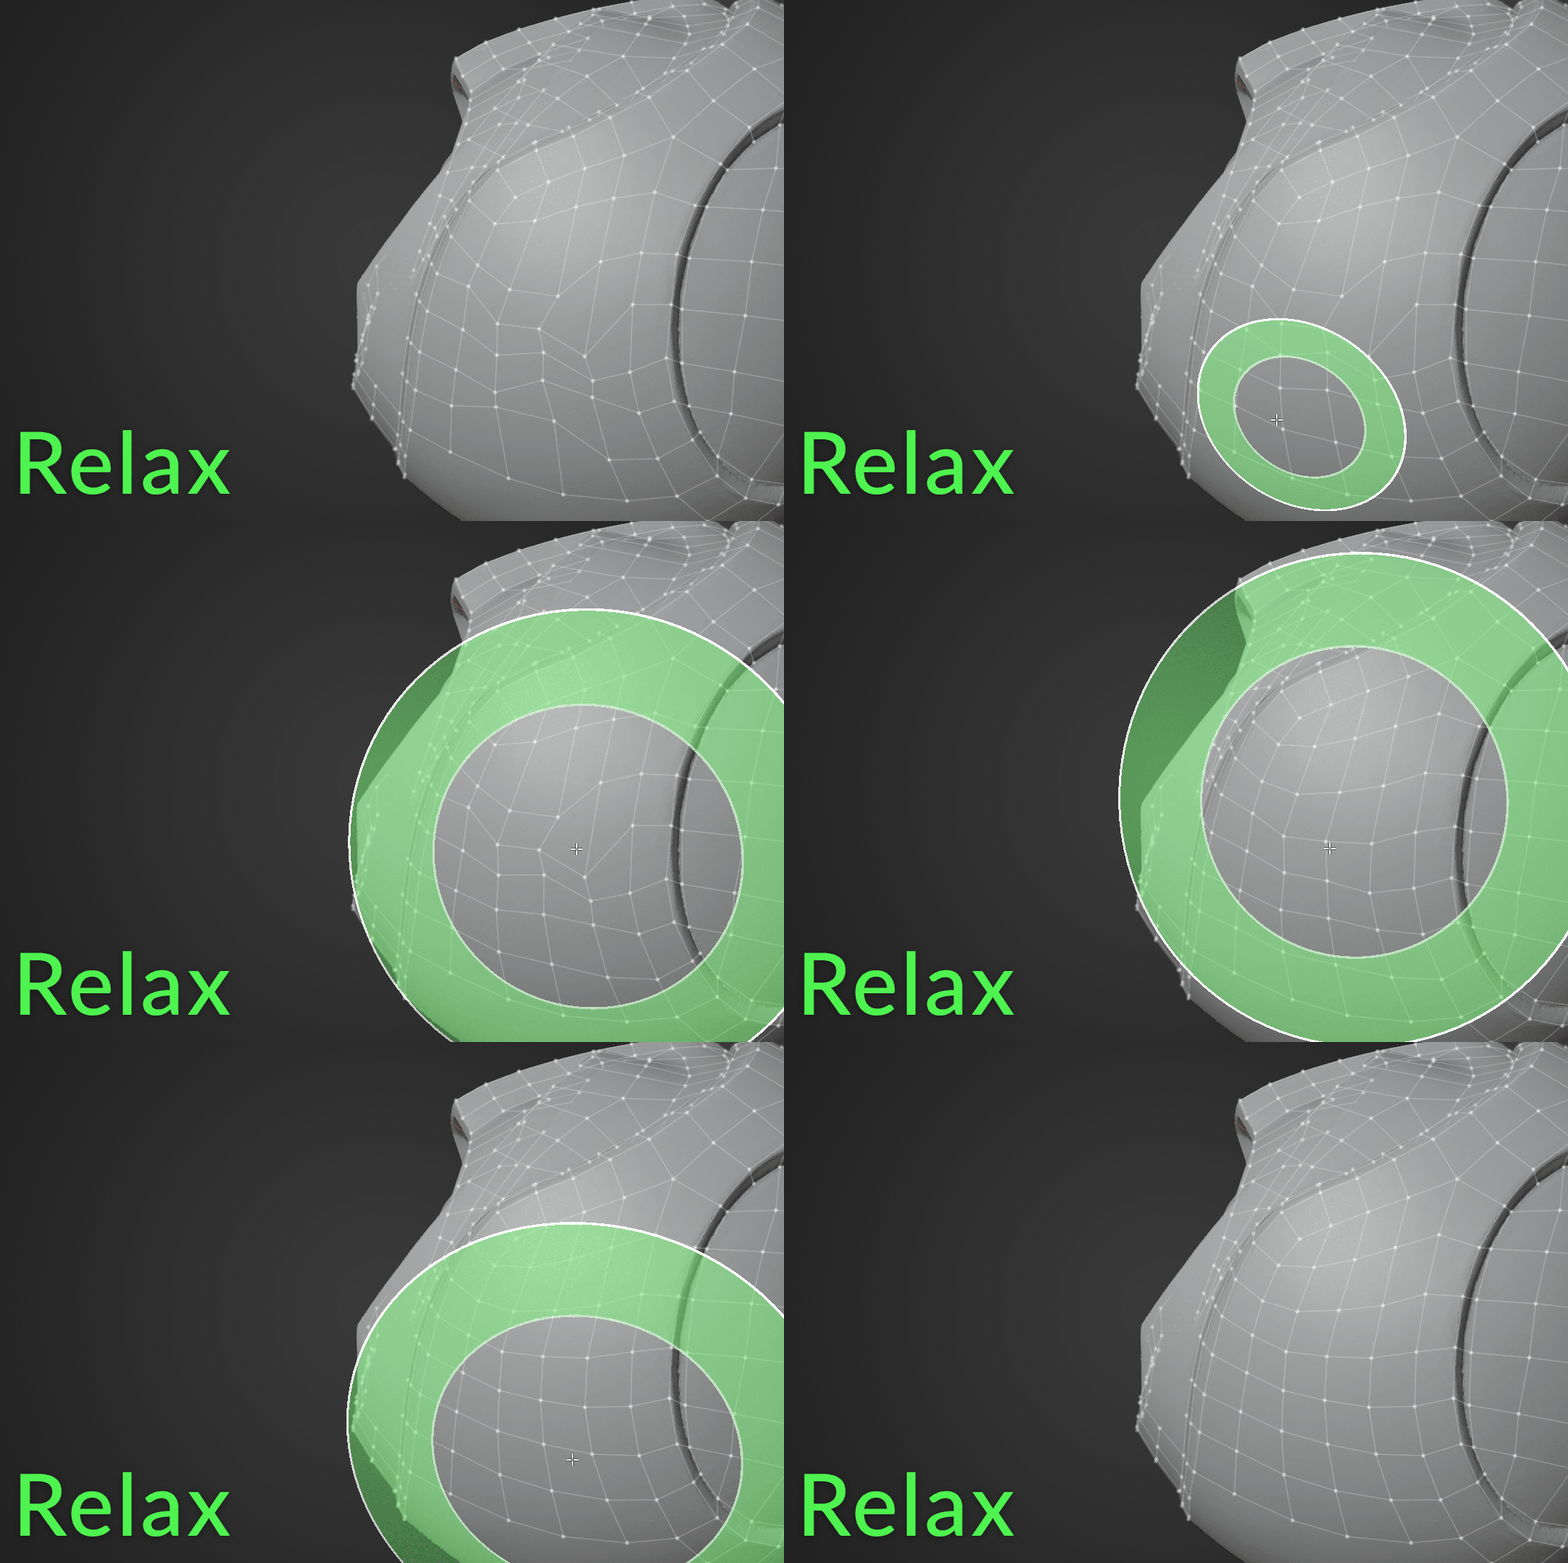
Gently massage your geometry into evenly-spaced-quad perfection with the Relax tool. It behaves just like a sculpting brush, except that it keeps all vertices snapped to the high poly geometry and shifts them towards a clean layout. Controls for what mesh features it tries to correct are adjustable so that you can use it in a wide variety of situations.
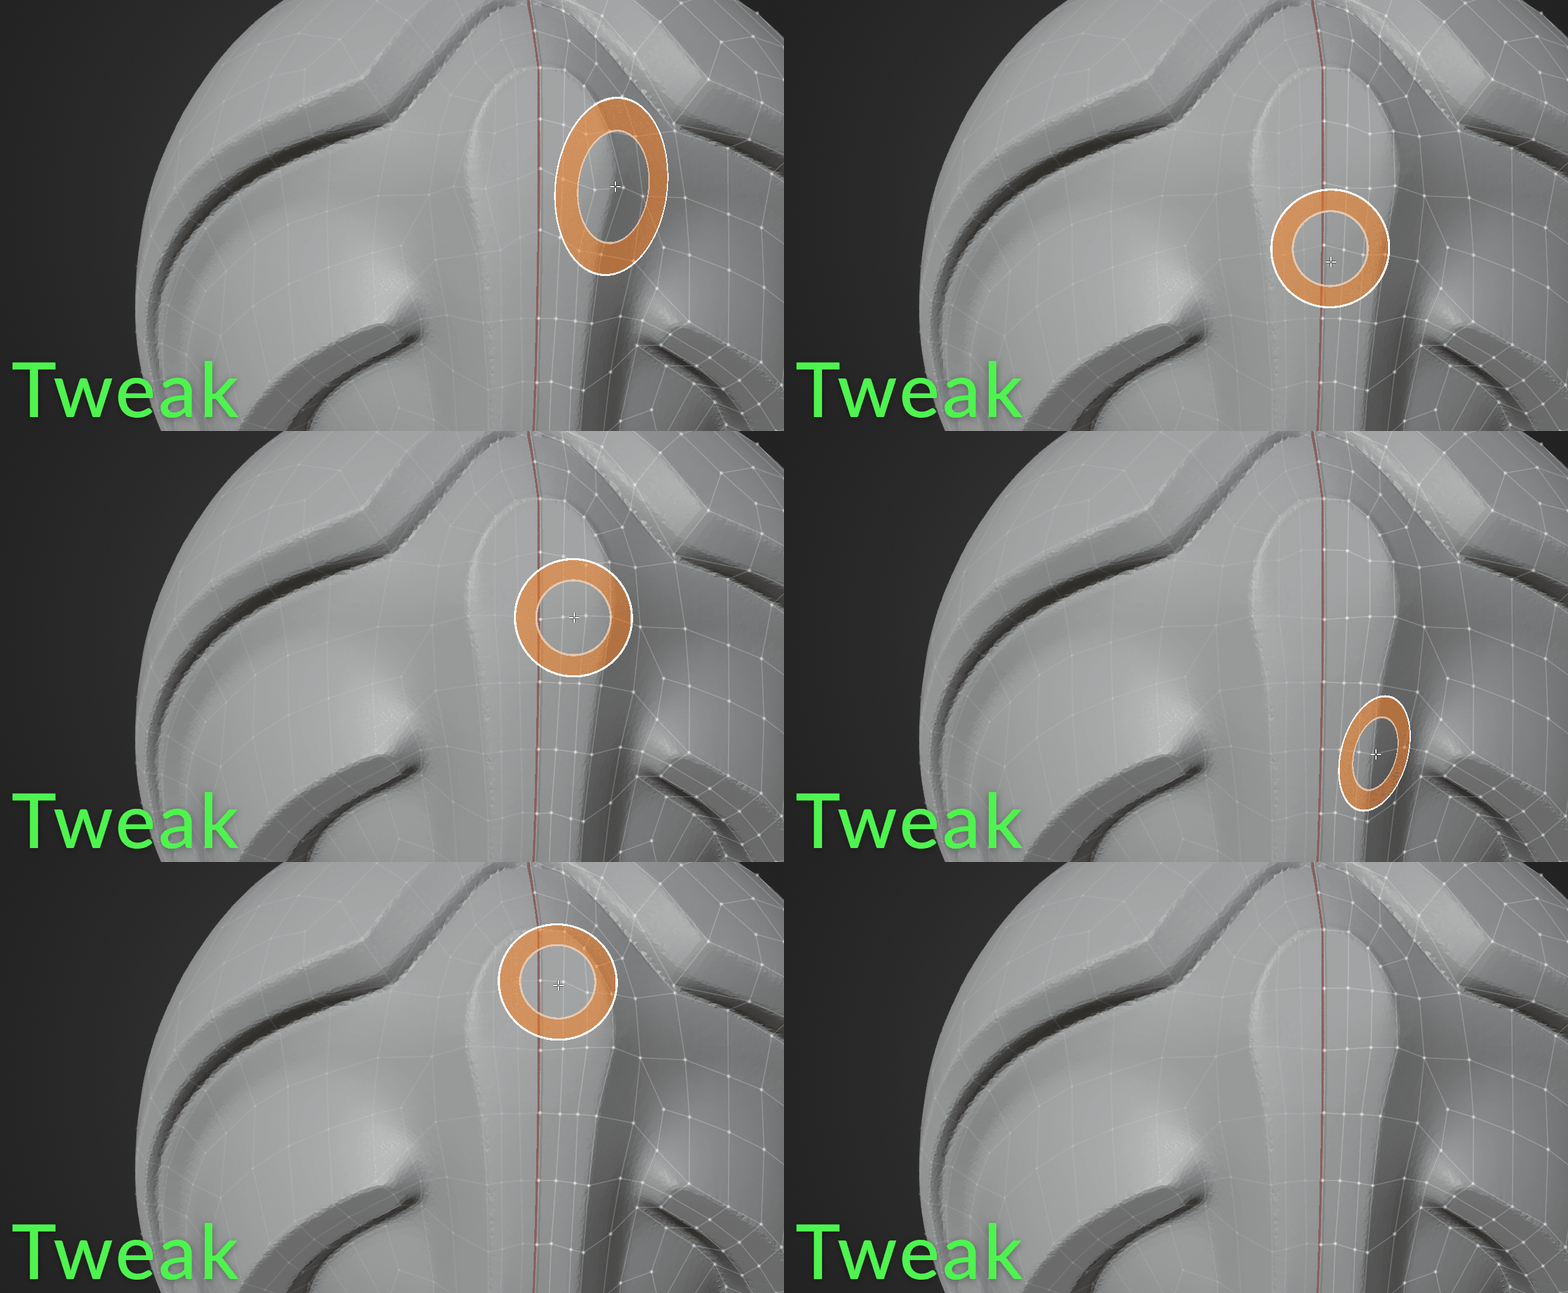
It’s not particularly fun to select and then move vertices around one by one, so if you need to do some adjusting then reach for the Tweak tool. It pushes and pulls the geometry like a sculpt brush in a way that’s fast, fluid, and intuitive.
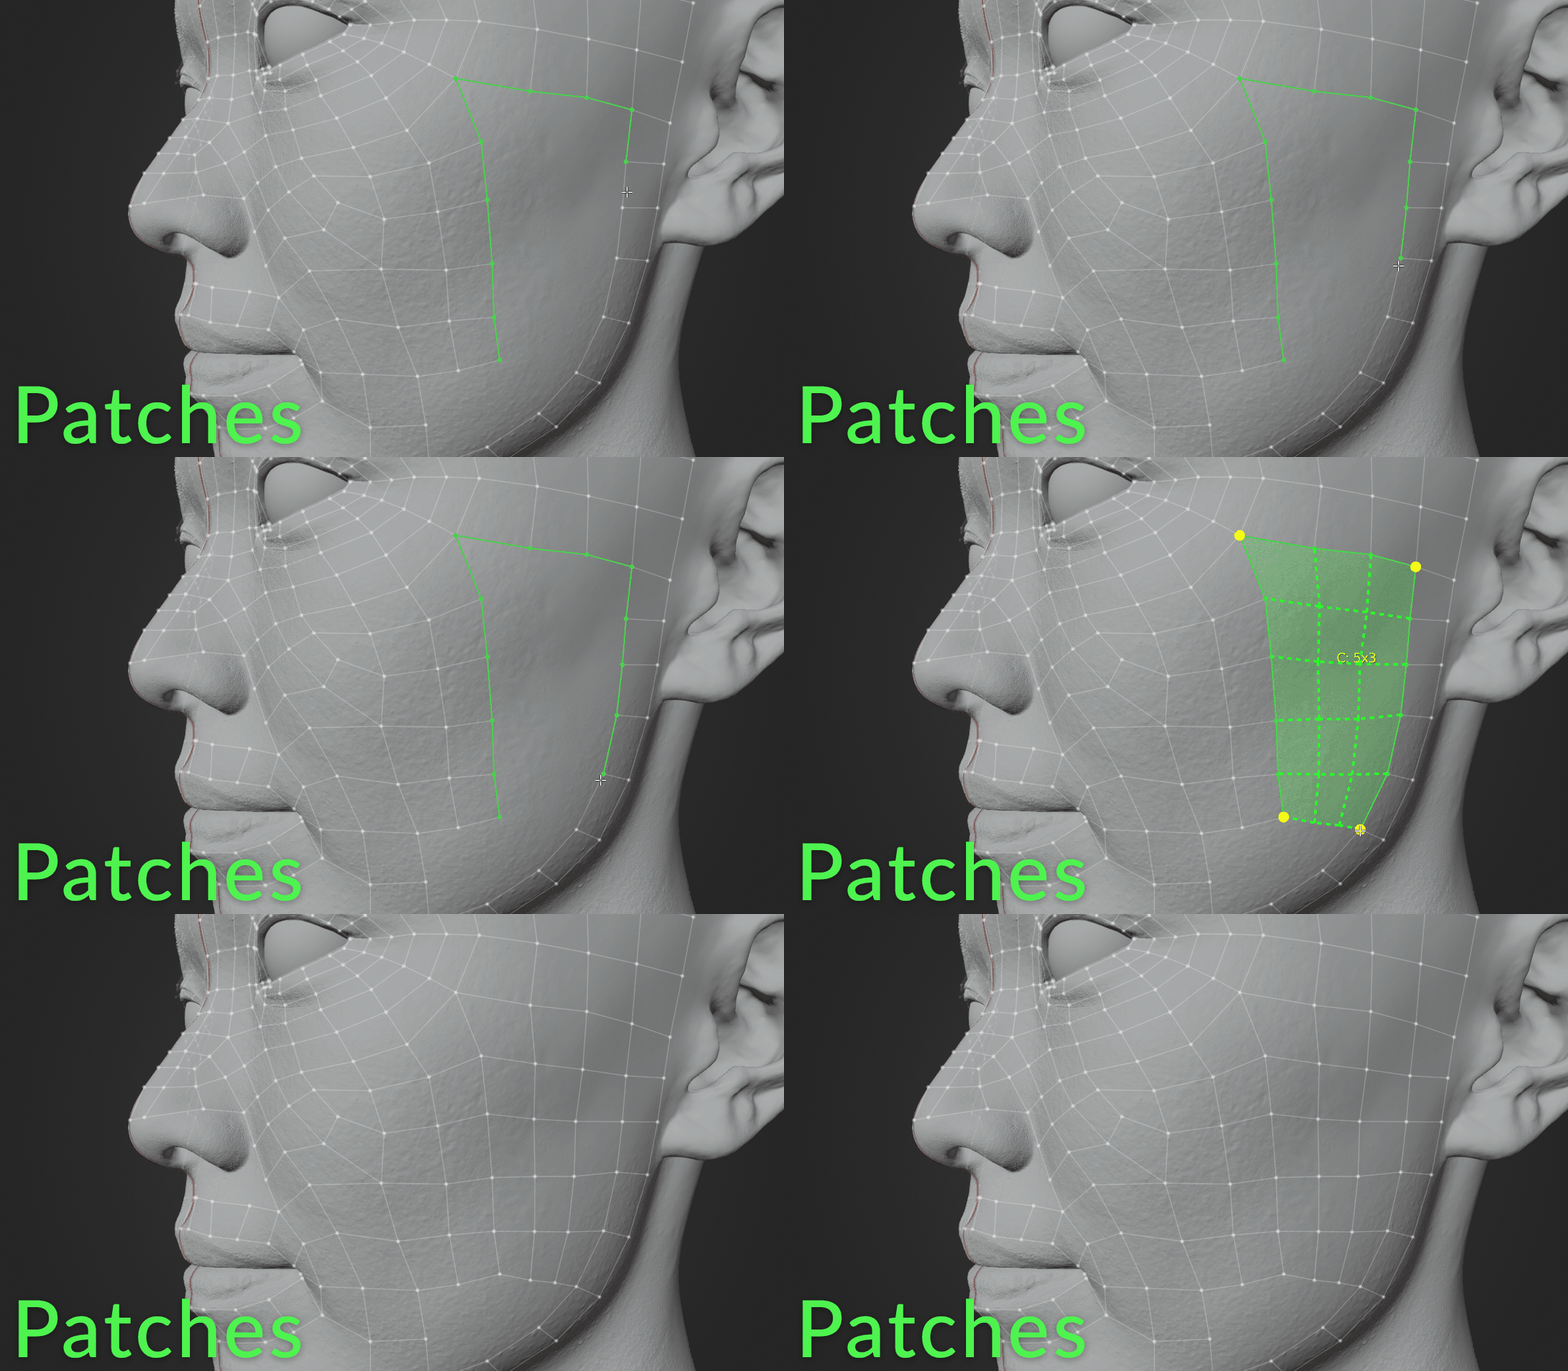
Large areas can be filled in all at once using the Patches too. Just select the boundary edge and click F to fill! You can shift select to toggle which vertices should be regarded as corners, so it’s flexible enough to work for a lot more than basic rectangular shapes.
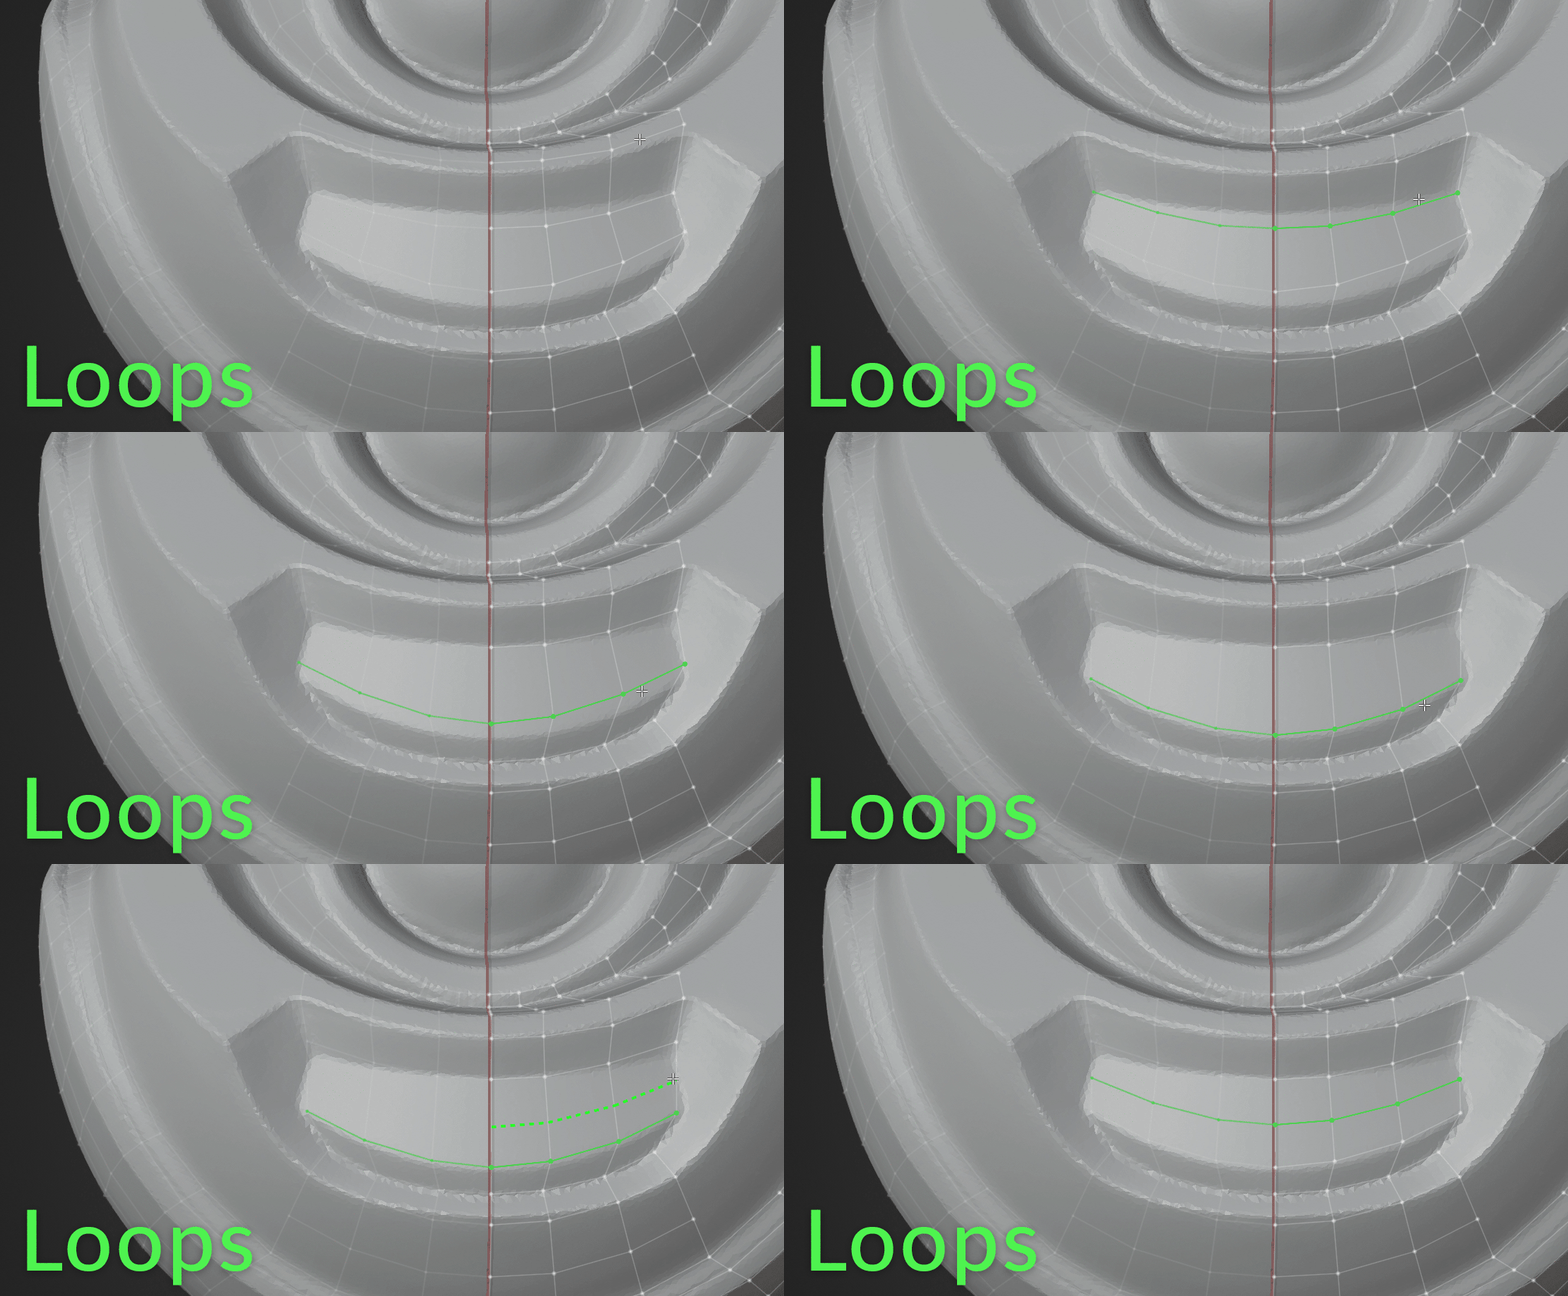
Last but not lease, the Loops tool does exactly what it advertises - insert and slide loops. Unlike normally inserting a loop in Edit Mode though, each vertex will remain snapped correctly in place.
See the tools in action
Watch the full RetopoFlow course for free on CG Cookie: Retopology with RetopoFlow 3
In-app tooltips and documentation to answer any question
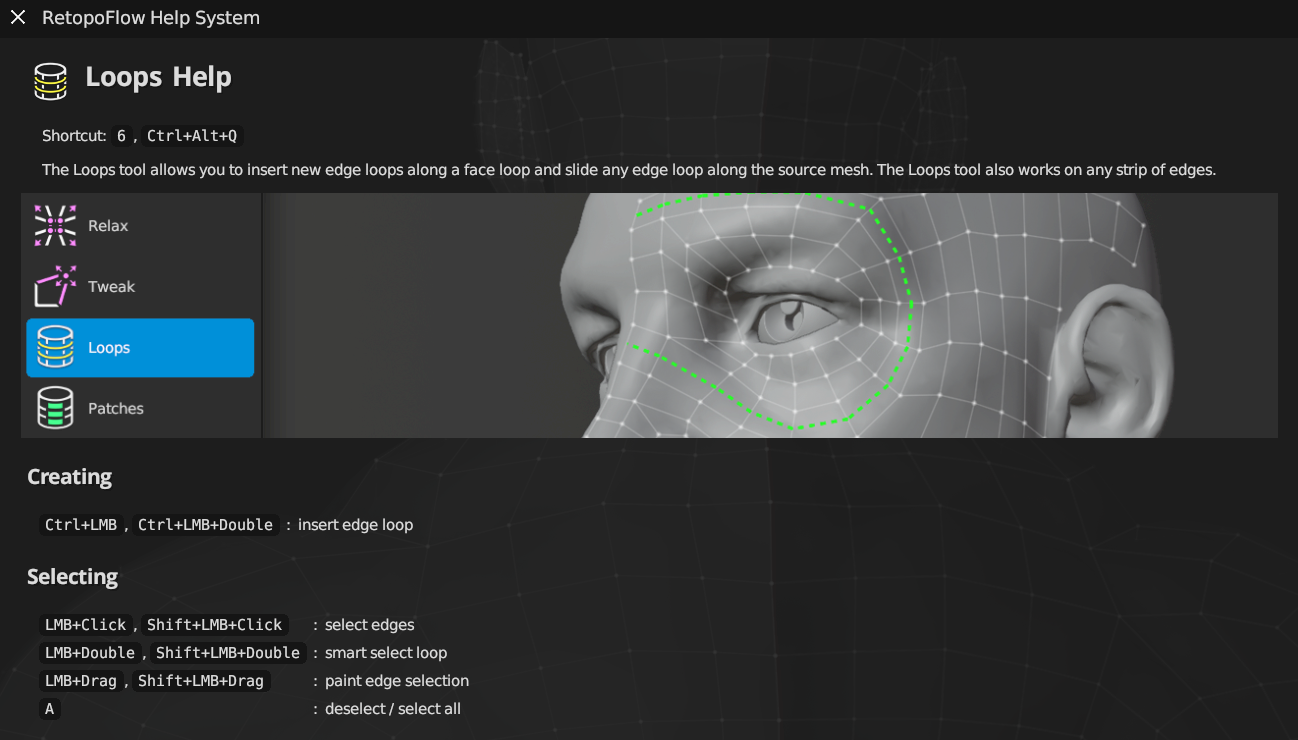
Our tooltips will remind you of shortcuts as you navigate the interface, but just in case you need a more detailed rundown of how the tools work, there is a full documentation system built into RetopoFlow that you can reference without interrupting your work.
Help is just a click away
If you run into any issues while using RetopoFlow, you can quickly report a bug using a button in the toolbar. It’ll offer to take a screenshot and automatically paste console details into the report for you so that you can leave the technical work up to us. You can also always reach us at [email protected].
RetopoFlow is continually updated so that you should never experience an issue, but we also built a custom auto-save and backup feature in addition to Blender’s so that you won’t lose work even if, in the worst case scenario, you experience a crash.
RetopoFlow works in Blender 2.7 to 3.0+ and is regularly updated
- To use with Blender 3.0+, install the latest version of RetopoFlow
- To use with Blender 2.8x or 2.9x, install RetopoFlow 3.2.4
- For use with Blender 2.7 or before, install RetopoFlow 2.0.3
All three versions are included in your purchase. Please note that further development of RetopoFlow for past Blender versions is not planned.
View the full change list to see what's new.
Known Limitations
RetopoFlow can only handle polygon information as fast as Blender can provide it, so retopology with source sculpts above 1m polygons or target meshes above 20k polygons is not recommended. Please note that you can work with a decimated copy of a high poly mesh, and as long as the decimation doesn’t visibly change the silhouette, the resulting retopologized mesh will be exactly identical.
Since RetopoFlow is its own custom mode that needs to draw on top of Blender, the Blender interface will be covered over and unavailable. Not all Edit Mode tools and no other addons will be available while RF is active.
RetopoFlow is free for students and teachers
If you'd like to use RetopoFlow for educational or non-commercial use, you can download it for free from our GitHub.
Created with love from the folks at CG Cookie
I am an indie game developer (with some 10+ years of AAA experience). I use Blender for nearly all my 3D work (modelling, animation). I love sculpting, but retopology was always a daunting task. Sometimes I even preferred to create low poly models right away and just add some details in Substance Painter to save some time. RetopoFlow 2.0 changed that. I can create a full character outfit (model it with Marvelous Designer and Blender) and retopo it in just a few days. And the retopology process is a smooth and pleasant experience :). I actually started to like it a lot - it's a lot more like sculpting now. - Maciej Szcześnik, Indie game developer
This is a very important tool in my workflow, it turns the retopology process into a very pleasant and relaxing process. A big thanks to you guys, for making this awesome tool available! - Lucas Falcao
Credits:
Robot skull model example created by and property of Ivan Santic


